RESTful web services with Java (Jersey / JAX-RS). This tutorial explains how to develop RESTful web services in Java. It uses the JAX-RS reference implementation Jersey. In this tutorial Java 21 and JAX-RS with Jersey is used. We demonstrate the usage of Maven and Gradle for dependencies management.
1. REST - Representational State Transfer
1.1. What is REST?
REST is an architectural style which is based on web-standards and the HTTP protocol. This style was initially described by Roy Fielding in 2000. In a REST based architecture everything is a resource. A resource is accessed via a common interface based on the HTTP standard methods. In a REST based architecture you have a REST server that provides access to the resources. A REST client can access and modify the REST resources.
Every resource should support the HTTP common operations. Resources are identified by global IDs (that are typically URIs).
REST allows that resources have different representations, e.g., text, XML, JSON etc. The REST client can ask for a specific representation via the HTTP protocol (content negotiation).
1.2. HTTP methods
The PUT, GET, POST and DELETE methods are typical used in REST based architectures. The following table gives an explanation of these operations.
-
GET defines a reading access of the resource without side-effects. The resource is never changed via a GET request, e.g., the request has no side effects (idempotent).
-
PUT creates a new resource. It must also be idempotent.
-
DELETE removes the resources. The operations are idempotent. They can get repeated without leading to different results.
-
POST updates an existing resource or creates a new resource.
1.3. RESTful web services
A RESTful web services are based on HTTP methods and the concept of REST. A RESTful web service defines the base URI for the services, the supported MIME-types (XML, text, JSON, user-defined, …). It also defines the set of operations (POST, GET, PUT, DELETE) that are supported.
1.4. Serving the data
To create and start a server to serve the Jersey RESTful web service, you can use several options like deploying it on an external servlet container (Tomcat, Jetty) or creating an embedded server using Grizzly. Using Grizzly is simple and quick for development purposes.
2. Installation of Jersey
2.1. Using Maven
The following pom can be used as example for setting up the JAX-RS dependencies and also for a Grizzly demo server.
<project xmlns="http://maven.apache.org/POM/4.0.0"
    xmlns:xsi="http://www.w3.org/2001/XMLSchema-instance"
    xsi:schemaLocation="http://maven.apache.org/POM/4.0.0 https://maven.apache.org/xsd/maven-4.0.0.xsd">
    <modelVersion>4.0.0</modelVersion>

    <groupId>com.vogella.jersey.first</groupId>
    <artifactId>jersey-grizzly-example</artifactId>
    <version>1.0-SNAPSHOT</version>

    <properties>
        <maven.compiler.source>21</maven.compiler.source>
        <maven.compiler.target>21</maven.compiler.target>
    </properties>

    <dependencies>
        <!-- Jakarta RESTful Web Services API -->
        <dependency>
            <groupId>jakarta.ws.rs</groupId>
            <artifactId>jakarta.ws.rs-api</artifactId>
            <version>3.1.0</version>
        </dependency>

        <!-- Jersey Core for Jakarta RESTful Web Services -->
        <dependency>
            <groupId>org.glassfish.jersey.core</groupId>
            <artifactId>jersey-server</artifactId>
            <version>3.1.8</version>
        </dependency>

        <dependency>
            <groupId>org.glassfish.jersey.inject</groupId>
            <artifactId>jersey-hk2</artifactId>
            <version>3.1.8</version>
        </dependency>


        <dependency>
            <groupId>jakarta.json</groupId>
            <artifactId>jakarta.json-api</artifactId>
            <version>2.0.0</version>
        </dependency>
        <!--
        https://mvnrepository.com/artifact/org.eclipse.persistence/org.eclipse.persistence.json -->
        <dependency>
            <groupId>org.eclipse.persistence</groupId>
            <artifactId>org.eclipse.persistence.json</artifactId>
            <version>4.0.4</version>
        </dependency>


        <!-- Grizzly HTTP server for embedded use -->
        <dependency>
            <groupId>org.glassfish.jersey.containers</groupId>
            <artifactId>jersey-container-grizzly2-http</artifactId>
            <version>3.1.8</version>
        </dependency>

        <!-- Jersey Client for calling external REST APIs -->
        <dependency>
            <groupId>org.glassfish.jersey.core</groupId>
            <artifactId>jersey-client</artifactId>
            <version>3.1.8</version>
        </dependency>

        <!-- Jersey JSON Binding for JSON support with Jakarta -->
        <dependency>
            <groupId>org.glassfish.jersey.media</groupId>
            <artifactId>jersey-media-json-binding</artifactId>
            <version>3.1.8</version>
        </dependency>
    </dependencies>
</project>
2.2. Using Gradle
We are going to use primary Maven in our examples but with the following build.gradle file you can follow the example and use Gradle.
plugins {
    id 'java'
}

group = 'com.vogella.jersey.first'
version = '1.0-SNAPSHOT'

sourceCompatibility = '21'
targetCompatibility = '21'

repositories {
    mavenCentral()
}

dependencies {
    // Jakarta RESTful Web Services API
    implementation 'jakarta.ws.rs:jakarta.ws.rs-api:3.1.0'

    // Jersey Core for Jakarta RESTful Web Services
    implementation 'org.glassfish.jersey.core:jersey-server:3.1.8'

    implementation 'org.glassfish.jersey.inject:jersey-hk2:3.1.8'

    // JSON Processing
    implementation 'jakarta.json:jakarta.json-api:2.0.0'

    implementation 'org.eclipse.persistence:org.eclipse.persistence.json:4.0.4'

    // Grizzly HTTP server for embedded use
    implementation 'org.glassfish.jersey.containers:jersey-container-grizzly2-http:3.1.8'

    // Jersey Client for calling external REST APIs
    implementation 'org.glassfish.jersey.core:jersey-client:3.1.8'

    // Jersey JSON Binding for JSON support with Jakarta
    implementation 'org.glassfish.jersey.media:jersey-media-json-binding:3.1.8'
}

test {
    useJUnitPlatform()
}
3. Create your first RESTful Webservice with Maven
3.1. Create a new Maven project
Create a new Maven project, for example with the Eclipse IDE Maven functionality.
3.2. Change pom file
Change the pom file to the following:
<project xmlns="http://maven.apache.org/POM/4.0.0"
    xmlns:xsi="http://www.w3.org/2001/XMLSchema-instance"
    xsi:schemaLocation="http://maven.apache.org/POM/4.0.0 https://maven.apache.org/xsd/maven-4.0.0.xsd">
    <modelVersion>4.0.0</modelVersion>

    <groupId>com.vogella.jersey.first</groupId>
    <artifactId>jersey-grizzly-example</artifactId>
    <version>1.0-SNAPSHOT</version>

    <properties>
        <maven.compiler.source>21</maven.compiler.source>
        <maven.compiler.target>21</maven.compiler.target>
    </properties>

    <dependencies>
        <!-- Jakarta RESTful Web Services API -->
        <dependency>
            <groupId>jakarta.ws.rs</groupId>
            <artifactId>jakarta.ws.rs-api</artifactId>
            <version>3.1.0</version>
        </dependency>

        <!-- Jersey Core for Jakarta RESTful Web Services -->
        <dependency>
            <groupId>org.glassfish.jersey.core</groupId>
            <artifactId>jersey-server</artifactId>
            <version>3.1.8</version>
        </dependency>

        <dependency>
            <groupId>org.glassfish.jersey.inject</groupId>
            <artifactId>jersey-hk2</artifactId>
            <version>3.1.8</version>
        </dependency>


        <dependency>
            <groupId>jakarta.json</groupId>
            <artifactId>jakarta.json-api</artifactId>
            <version>2.0.0</version>
        </dependency>
        <!--
        https://mvnrepository.com/artifact/org.eclipse.persistence/org.eclipse.persistence.json -->
        <dependency>
            <groupId>org.eclipse.persistence</groupId>
            <artifactId>org.eclipse.persistence.json</artifactId>
            <version>4.0.4</version>
        </dependency>


        <!-- Grizzly HTTP server for embedded use -->
        <dependency>
            <groupId>org.glassfish.jersey.containers</groupId>
            <artifactId>jersey-container-grizzly2-http</artifactId>
            <version>3.1.8</version>
        </dependency>

        <!-- Jersey Client for calling external REST APIs -->
        <dependency>
            <groupId>org.glassfish.jersey.core</groupId>
            <artifactId>jersey-client</artifactId>
            <version>3.1.8</version>
        </dependency>

        <!-- Jersey JSON Binding for JSON support with Jakarta -->
        <dependency>
            <groupId>org.glassfish.jersey.media</groupId>
            <artifactId>jersey-media-json-binding</artifactId>
            <version>3.1.8</version>
        </dependency>
    </dependencies>
</project>
3.3. Java Class
Create the following class.
package com.vogella.jersey.first;


// POJO class for JSON response
public class Message {
    private String greeting;

    private String framework;


  // Constructor
  public Message(String greeting, String framework) {
    this.greeting = greeting;
    this.framework = framework;
  }

  // Getters
  public String getGreeting() {
    return greeting;
  }

  public String getFramework() {
    return framework;
  }

  // Optionally add setters if necessary
}
Now create this class.
package com.vogella.jersey.first;

import jakarta.json.bind.annotation.JsonbProperty;
import jakarta.ws.rs.GET;
import jakarta.ws.rs.Path;
import jakarta.ws.rs.Produces;
import jakarta.ws.rs.core.MediaType;

//Sets the path to base URL + /hello
@Path("/message")
public class MessageExample {

  // This method is called if TEXT_PLAIN is requested
  @GET
  @Produces(MediaType.TEXT_PLAIN)
  public String sayPlainTextHello() {
    return "Hello Jersey";
  }

  // This method is called if XML is requested
  @GET
  @Produces(MediaType.TEXT_XML)
  public String sayXMLHello() {
    return "<?xml version=\"1.0\"?>" + "<hello> Hello Jersey" + "</hello>";
  }

  // This method is called if HTML is requested
  @GET
  @Produces(MediaType.TEXT_HTML)
  public String sayHtmlHello() {
    return "<html> " + "<title>" + "Hello Jersey" + "</title>"
        + "<body><h1>" + "Hello Jersey" + "</body></h1>" + "</html> ";
  }

  // This method is called if JSON is requested
  @GET
  @Produces(MediaType.APPLICATION_JSON)
  public Message sayJsonHello() {
    return new Message("Hello", "Jersey");
  }

}
This class registers itself as a GET resource using the @GET annotation.
The @Produces annotation specifies the MIME types that the class can deliver, including text/plain, text/xml, text/html, and application/json.
The @Path annotation indicates that the service is accessible under the /message URL.
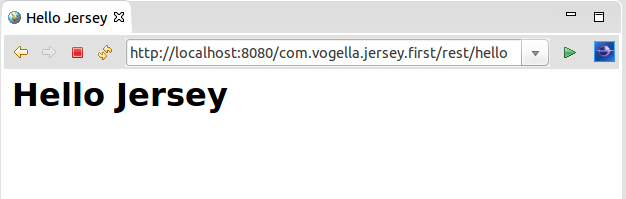
When accessed via a web browser, the service defaults to requesting the HTML MIME type, returning a structured HTML response.
To view the plain text version, you can use command-line tools such as curl. For example:
curl -H "Accept: text/plain" https://localhost:8080/message3.4. Define Grizzly server
Define the following class which will serve the RESTful API.
package com.vogella.jersey.first;

import org.glassfish.grizzly.http.server.HttpServer;
import org.glassfish.jersey.grizzly2.httpserver.GrizzlyHttpServerFactory;
import org.glassfish.jersey.server.ResourceConfig;

import java.io.IOException;
import java.net.URI;

public class ServerApp {

    // Base URI the Grizzly HTTP server will listen on
    public static final String BASE_URI = "https://localhost:8080/api/";

    /**
     * Starts Grizzly HTTP server exposing JAX-RS resources defined in this application.
     * @return Grizzly HTTP server.
     */
    public static HttpServer startServer() {
        // Create a resource config that scans for JAX-RS resources and providers in the package
        final ResourceConfig rc = new ResourceConfig().packages("com.vogella.jersey.first");

        // Create and start a new instance of the Grizzly HTTP server
        // Exposing the Jersey application at BASE_URI
        return GrizzlyHttpServerFactory.createHttpServer(URI.create(BASE_URI), rc);
    }

    public static void main(String[] args) throws IOException {
        // Start the server
        final HttpServer server = startServer();
        System.out.println(String.format("Jersey app started at %s%s", BASE_URI, "message"));
        System.out.println("Hit enter to stop it...");
        System.in.read();
        server.shutdownNow();
    }
}
The ServerApp class initializes and starts a Grizzly HTTP server that exposes JAX-RS resources defined within the application.
3.5. Run your rest service
Start you ServerApp application.
You should be able to access your resources under the following URL:
https://localhost:8080/api/message
4. Create a REST client
As of Java 11, you have a simple HttpClient API included in the Java runtime. In this example, you use it to access the XML and JSON representive of the message data.
package com.vogella.jersey.first;

import java.net.URI;
import java.net.http.HttpClient;
import java.net.http.HttpRequest;
import java.net.http.HttpResponse;

public class ApiClient {
    public static void main(String[] args) {
        String url = "https://localhost:8080/api/message";

        // Call JSON API
        HttpRequest jsonRequest = HttpRequest.newBuilder()
            .uri(URI.create(url))
            .header("Accept", "application/json")
            .build();

        HttpClient client = HttpClient.newHttpClient();
        client.sendAsync(jsonRequest, HttpResponse.BodyHandlers.ofString())
            .thenApply(HttpResponse::body)
            .thenAccept(response -> {
                System.out.println("JSON Response:");
                System.out.println(response);
            })
            .join();

        // Call XML API
        HttpRequest xmlRequest = HttpRequest.newBuilder()
            .uri(URI.create(url))
            .header("Accept", "text/xml")
            .build();

        client.sendAsync(xmlRequest, HttpResponse.BodyHandlers.ofString())
            .thenApply(HttpResponse::body)
            .thenAccept(response -> {
                System.out.println("XML Response:");
                System.out.println(response);
            })
            .join();
    }
}
Run this program (while your Grizzly server is using) to get the following output.
JSON Response:
{"framework":"Jersey","greeting":"Hello"}
XML Response:
<?xml version="1.0"?><hello> Hello Jersey</hello>
5. RESTful web services and JAXB
JAX-RS supports the automatic creation of XML and JSON via JAXB. For an introduction into XML please see Java and XML - Tutorial. For an introduction into JAXB please see JAXB. You can continue this tutorial without reading these tutorials, but they contain more background information.
5.1. Using JAXB
To use JAXB in your Maven project add the following dependencies to your pom file.
<dependency>
    <groupId>jakarta.xml.bind</groupId>
    <artifactId>jakarta.xml.bind-api</artifactId>
    <version>3.0.0</version>
</dependency>
<dependency>
    <groupId>org.glassfish.jaxb</groupId>
    <artifactId>jaxb-runtime</artifactId>
    <version>3.0.0</version>
</dependency>
To use JAXB in your Maven project add the following dependencies to your pom file.
implementation 'jakarta.xml.bind:jakarta.xml.bind-api:3.0.0'
implementation 'org.glassfish.jaxb:jaxb-runtime:3.0.0'5.3. Create Java classes
Create your domain class.
package com.vogella.jersey.jaxb;

import jakarta.xml.bind.annotation.XmlRootElement;

@XmlRootElement
// JAX-RS supports an automatic mapping from JAXB annotated class to XML and JSON
// Isn't that cool?
public class Todo {
    private String summary;
    private String description;
    public String getSummary() {
        return summary;
    }
    public void setSummary(String summary) {
        this.summary = summary;
    }
    public String getDescription() {
        return description;
    }
    public void setDescription(String description) {
        this.description = description;
    }


}
Create the following resource class.
This class simply returns an instance of the Todo class.
package com.vogella.jersey.jaxb;

import jakarta.ws.rs.GET;
import jakarta.ws.rs.Path;
import jakarta.ws.rs.Produces;
import jakarta.ws.rs.core.MediaType;

@Path("/task")
public class TodoResource {

    // This method is called if XML is requested
    @GET
    @Produces({MediaType.APPLICATION_XML})
    public Todo getXML() {
        Todo todo = new Todo();
        todo.setSummary("Application XML Todo Summary");
        todo.setDescription("Application XML Todo Description");
        return todo;
    }

    // This method is called if JSON is requested
    @GET
    @Produces({MediaType.APPLICATION_JSON})
    public Todo getJSON() {
        Todo todo = new Todo();
        todo.setSummary("Application JSON Todo Summary");
        todo.setDescription("Application JSON Todo Description");
        return todo;
    }

    // This can be used to test the integration with the browser
    @GET
    @Produces({ MediaType.TEXT_XML })
    public Todo getHTML() {
        Todo todo = new Todo();
        todo.setSummary("XML Todo Summary");
        todo.setDescription("XML Todo Description");
        return todo;
    }

}
Change your server app to serve both packages.
package com.vogella.jersey.first;

import org.glassfish.grizzly.http.server.HttpServer;
import org.glassfish.jersey.grizzly2.httpserver.GrizzlyHttpServerFactory;
import org.glassfish.jersey.server.ResourceConfig;

import java.io.IOException;
import java.net.URI;

public class ServerApp {

    // Base URI the Grizzly HTTP server will listen on
    public static final String BASE_URI = "https://localhost:8080/api/";

    /**
     * Starts Grizzly HTTP server exposing JAX-RS resources defined in this application.
     * @return Grizzly HTTP server.
     */
    public static HttpServer startServer() {
        // Create a resource config that scans for JAX-RS resources and providers in both packages
        final ResourceConfig rc = new ResourceConfig()
                .packages("com.vogella.jersey.first", "com.vogella.jersey.jaxb"); // Include both packages

        // Create and start a new instance of the Grizzly HTTP server
        // Exposing the Jersey application at BASE_URI
        return GrizzlyHttpServerFactory.createHttpServer(URI.create(BASE_URI), rc);
    }

    public static void main(String[] args) throws IOException {
        // Start the server
        final HttpServer server = startServer();
        System.out.println(String.format("Jersey app started at %s%s and at %s%s", BASE_URI, "message",  BASE_URI, "task"));
        System.out.println("Hit enter to stop it...");
        System.in.read();
        server.shutdownNow();
    }
}
Start your server application again and access your new API. Your application should be available under the following URL.
https://localhost:8080/api/task5.4. Create a client
To access the JSON for the task, you can use the following Java 11 HttpClient code.
package com.vogella.jersey.clients;

import java.net.URI;
import java.net.http.HttpClient;
import java.net.http.HttpRequest;
import java.net.http.HttpResponse;

public class TaskApiClient {

    // Base URI for the API
    private static final String BASE_URL = "https://localhost:8080/api/task";

    public static void main(String[] args) {
        TaskApiClient client = new TaskApiClient();
        client.getTaskAsJson(); // Call to fetch the task as JSON
    }

    // Method to get task in JSON format
    public void getTaskAsJson() {
        try {
            HttpClient httpClient = HttpClient.newHttpClient();
            HttpRequest jsonRequest = HttpRequest.newBuilder()
                    .uri(URI.create(BASE_URL))
                    .header("Accept", "application/json")
                    .build();

            HttpResponse<String> response = httpClient.send(jsonRequest, HttpResponse.BodyHandlers.ofString());

            if (response.statusCode() == 200) {
                System.out.println("JSON Response:");
                System.out.println(response.body());
            } else {
                System.out.println("Error: " + response.statusCode());
            }

        } catch (Exception e) {
            e.printStackTrace();
        }
    }
}
Run this class to see the JSON output.
6. Rest Resources
6.1. vogella Java example code
If you need more assistance we offer Online Training and Onsite training as well as consulting