This tutorial contains some information about handling a Linux system.
1. Ubuntu
1.1. Introduction
Ubuntu Linux is a full fledged Linux system trailed for the desktop. Ubuntu builds a unique user interface and offers the users a solid choice of tools.
Unity is the default windows manager on Ubuntu. It introduced the launcher on the left side of Ubuntu and the Dash to start programs.
Press the Windows key to start the Dash. Here you can type in commands to open programs and files.

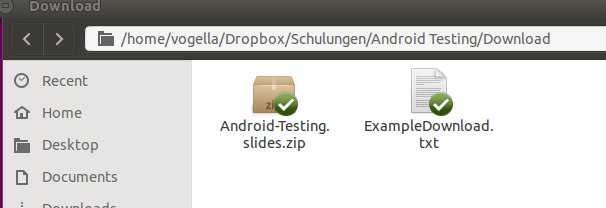
Ubuntu uses Nautilus as file explorer. Use the Dash or click on the icon in the task manager to start it.

To be able to copy the current path, press Ctrl+L.
1.2. Adding entries to the launcher
To add new entries to the launcher you can create an .desktop file and drag the file on the launcher.
1.2.1. Adding Eclipse to the launcher
To lock Eclipse to the launcher first create an eclipse.desktop file for Eclipse.
In the command-line enter:
gedit ~/.local/share/applications/eclipse.desktopThis file should include the following information:
[Desktop Entry]
Type=Application
Name=Eclipse
Comment=Eclipse Integrated Development Environment
Icon= home/vogella/eclipse/icon.xpm
Exec= home/vogella/eclipse/eclipse
Terminal=false
Categories=Development;IDE;Java;
StartupWMClass=Eclipse| Modify the icon and exec path to the path where you installed Eclipse. |
Now add execution permission to eclipse.desktop in the command-line
chmod +x ~/.local/share/applications/eclipse.desktopFinally you can add Eclipse to the launcher. To achieve this you can either use the command-line and enter
nautilus ~/.local/share/applicationsselect eclipse.desktop and drop it on the launcher or you can start Eclipse and then press Lock to Launcher on the Eclipse icon in the launcher.
The following example creates an entry to start Eclipse with different shortcuts for different workspaces.
[Desktop Entry]
Icon=application-x-executable
Name=eclipse
Type=Application
Exec=/home/vogella/Eclipse37/eclipse

X-Ayatana-Desktop-Shortcuts=Docu;vogella;business

[Docu Shortcut Group]
Name=Docu
Exec=/home/vogella/Eclipse37/eclipse -data /home/vogella/workspace/docu
TargetEnvironment=Unity

[vogella Shortcut Group]
Name=vogella
Exec=/home/vogella/Eclipse37/eclipse -data /home/vogella/workspace/vogella
TargetEnvironment=Unity

[business Shortcut Group]
Name=business
Exec=/home/vogella/Eclipse37/eclipse -data /home/vogella/workspace/business
TargetEnvironment=Unity
Useful shortcuts
The following lists a few useful shortcuts for the Unity window manager.
| Shorcut | Description |
|---|---|
Long press on Super (Windows key) |
Opens up help for the most common keyboard shortcuts |
Alt+Left Mouse Click |
Allows to move the current window |
1.3. Using the console
To open a console open the 'Dash' and type in 'Terminal'. Alternatively, you can use the shortcut Ctrl+Alt+T.
This opens a console window that allows you to issue commands.
1.4. Using the vim command line editor
Ubuntu offers several editors that are installed by default. The most common command line editor is vim.
To install vim on your Ubuntu machine use the following command.
sudo apt-get install vimStart vim from the command line. vim has two modes, one editing mode and other mode in which you can move within the file.
Here is a minimal command reference for vim:
-
i - Enter interactive mode to edit the file
-
Escape - Leave interactive mode
-
/ - Search in file
-
:wq - Saves the file and exists vim
-
:q! - Exists vim without saving
Find files
The following demonstrates the usage of the find command.
| Command | Description |
|---|---|
find dir -name "pattern" 2>/dev/null |
Finds all files which recursively apply to the pattern "pattern" starting from the directory "dir". The 2> sends all error messages to the null device. |
find . -name '*.java' -newer build.xml -print |
Search for all java files newer than the file build.xml |
find . -name '*.java' -mtime +7 -print |
Search for all java files newer than 7 dates |
find . -name '*.java' -mtime +7 -print0 |
xargs -0 grep 'swt' |
The find command can also be combined with the grep command.
See Using the grep command.
Calculate the size of a folder
The following calculates the size (disk usage))of a folder "folder1" in megabyte.
du -sh folder1Remove files
Use the command rm pattern to delete files.
Be careful with the usage of this command.
There is no way to undo deletions.
# Remove all files which ends with .class in the current directory
rm *.class
# find all files which ends with .class recursive in all directories below the current one and delete them
find . -type f -name "*.class" -exec rm -vf {} \;
Processes
To see all running processes on your system use the ps -aux command.
Change owner of files and directories
Command |
Description |
chown -R www-data:www-data mydir |
Change recursively the owner and the group of the directory "mydir" and its subdirectories. |
Creating links
You can create a soft link to a file or directory using the following command.
# Create a new soft link via
# ln -s target link

# For example
ln -s ~/workspace/e4-dev e4tools
Zipping files
To zip or unzip files on the command line you can use the following commands.
# Zip all pdf files in the ~/tmp/pdf/ diretory
zip ~/targetdir/myzip.zip ~/tmp/pdf/*.pdf


# Unzip the zip file
unzip ~/targetdir/myzip.zip
1.5. Remove tailing whitespace from files
To remove tailing whitespace from existing files you can use the following command.
find . -type f -name '*' -exec sed --in-place 's/[[:space:]]\+$//' {} \+2. User management
Creating new users
To create a new user via the console use the following commands.
This creates the user, set his password and a home directory for the user.
The -m parameter is responsible for creating the home directory of the user.
# create user called "newuser" with home directory
sudo useradd -m -s /bin/bash newuser

# assign password to the "newuser" user
sudo passwd newuser
You can create new user groups and add the user to the new group with the following command.
# see existing groups for the user
groups newuser

sudo addgroup gerrit
sudo adduser newuser gerrit

# alternative you can also use the usermod
# command but without -a this removes the user
# from existing groups

# sudo usermod -aG gerrit newuser
2.1. Giving root access
Careful: The following command allows the user to execute sudo commands (root).
# add admin rights to the user "newuser"
sudo adduser newuser admin

# alternative "newuser" can be added to the sudo group
sudo adduser newuser sudo

# afterwards to may want to lock
# the root user
# CAREFUL!!!

sudo passwd -l root
To change the default shell of the user to bash set the last entry of the corresponding user in the /usr/passwd file to /bin/bash.
This is demonstrated in the following example.
testuser:x:1001:1001::/home/testuser:/bin/bashManually creating the home directory
In case you need to create the home directory at a later stage you can use the following command which creates the home directory and change this ownership of the directory.
# alternatively to using the -m option
# you could create the
# home directory manually
sudo mkdir /home/newuser
sudo chown newuser /home/newuser
sudo chgrp newuser /home/newuser
Deleting users
To delete a user use the following command.
# delete the user with the name "userName"
userdel userName

# delete the user and its home directory
userdel -r userName
3. Environment Variables
| Command | Description |
|---|---|
echo $VARIABLE |
Prints the content of the environment variable |
sudo /etc/init.d/tomcat5 start/stop |
Starts / stops the tomcat server |
sudo -i |
Switches to root |
3.1. Add a directory to the path
The
PATH
environment variable is where the system will look for
executable
files. To temporary add the
/home/vogella/bin
directory
to the
PATH
use the following command.
export PATH=$PATH:/home/vogella/binIf you want to add a directory permanently to the path, you can
edit /
create the file
.bashrc
and add the following line to
the
file. Every new directory in the path
must start with :.
PATH=$PATH:path_to_new_directoryOpen a new shell to make the changes in the .bashrc file active.
4. Important files
| File | Description |
|---|---|
/etc/issue |
Contains the Ubuntu version you are running |
lsb_release -a |
Prints out the Ubuntu version you are running |
/etc/apt/sources.list |
Contains the available sources for software installation |
/usr/share/tomcat |
Installation directory for tomcat |
/var/www/vhosts/domain1 |
Contains on my v-server the user directory for a specific domain which is hosted on this server |
5. Package management
On the command line Ubuntu allows to install / remove and search for packages via the following commands.
| Command | Description |
|---|---|
sudo apt-get install paketname |
Installs a package |
apt-cache search openjdk |
Search for all packages that contain openjdk. The found package can get installed via the "apt-get install" command. |
apt-cache show eclipse |
Write down the metadata of a package, e.g., the package description and the package maintainer |
sudo apt-get remove package |
Removes a package but leave the configuration data active |
sudo apt-get purge package |
Removes a package and orphaned dependencies and its configuration files |
sudo apt-get update |
Update the local package list |
sudo apt-get upgrade |
Updates any installed packages for which an update is available. Will not install new packages or remove packages to satisfy dependencies. |
sudo apt-get dist-upgrade |
Install available updates for the Ubuntu release you already have installed. Also installs new packages or removes existing packages to satisfy dependencies. |
dpkg -L packagename |
Lists all files and their location in a package |
sudo updatedb; locate javac |
Updates the installation database and locates the javac command. |
To search for the installed packages use the following command.
cat /var/log/dpkg.log | grep "\ install\ "6. ShellScript
6.1. Writing a shell script
Shell scripts are short programs that are written in a shell programming language. They are interpreted by a shell process in the console. You can create these programs via a text editor and execute them in a terminal window. A bash shell scripts starts with "#!", the so-called "shebang".
Create a text file called start.sh with the following content.
#!/bin/bash
clear
echo "Hello, world."
You also have to make this file executable via:
chmod a+x start.shNow you can call the shell script via ./yourScript.
It should print "Hello, world" to the console.
6.2. Batch renaming files
The following is an example how to recursively rename all files called "article.xml" to "001_article.xml" from the current home directory.
#!/bin/bash

find . -name "article.xml" -exec rename 's/article/001_article/;' '{}' \;
For to rename all extensions from ".xml" to ".adoc" you can use:
find . -name "*.xml" -exec rename 's/xml/adoc/;' '{}' \;6.3. Generating a Maven build file
The following is an example in which you want to create a Maven build file for all directories in the current directory.
#!/bin/bash

echo "Hello"

GROUP_ID="com.vogella.test"
PARENT_ARTIFACT_ID="com.vogella.test.parent"

FULLDIR=`pwd`
BASEDIR=`basename $FULLDIR`
echo "Creating pom.xml for $BASEDIR"

cat > pom.xml <<- EOM
<project xmlns="https://maven.apache.org/POM/4.0.0"
xmlns:xsi="https://www.w3.org/2001/XMLSchema-instance"
xsi:schemaLocation="https://maven.apache.org/POM/4.0.0
https://maven.apache.org/maven-v4_0_0.xsd">
<modelVersion>4.0.0</modelVersion>
<groupId>$GROUP_ID</groupId>
<artifactId>$BASEDIR</artifactId>
<version>1.0.0-SNAPSHOT</version>
<packaging>pom</packaging>

<parent>
<groupId>$GROUP_ID</groupId>
<artifactId>$PARENT_ARTIFACT_ID</artifactId>
<version>1.0.0-SNAPSHOT</version>
</parent>

<modules>
EOM

modules=`ls -l|  grep '^d'  | awk '{ print "<module>"$9"</module>" }'`

echo "$modules" >> pom.xml


cat >> pom.xml <<- EOM
</modules>
</project>
EOM
7. systemd
systemd is used as Ubuntus default init system.
Services can be started and stopped with systemctl:
# start service
systemctl start <service-name>
# stop service
systemctl stop <service-name>
# restart service
systemctl restart <service-name>
journalctl is used to access the log files of a systemd service:
journalctl -u <service-name>8. SDKMAN!
SDKMAN! is a tool for managing parallel versions of multiple Software Development Kits on most Unix based systems. It provides a convenient Command Line Interface (CLI) and API for installing, switching, removing and listing Candidates. It provides different versions for Java, Gradle, Maven and much more.
It is super easy to install.
curl -s "https://get.sdkman.io" | bash
source "$HOME/.sdkman/bin/sdkman-init.sh"
To see all available versions of a certain package use the sdk list packageName command.
sdk list javaTo use a certain version, use the sdk list packageName version command.
sdk use java 11.0.1-openTo change the default, use sdk default packageName version.
9. Networking with Linux
9.1. SSH access to the server
The ssh command provides secure, encrypted access to a server.
Use ssh IP-address or ssh your_hostname to access the server.
To upload your public ssh key that allows you to login automatically into a server use the following command.
ssh-copy-id youruser@yourserver|
You can also assign a shortname for an IP address via the For example, to create an alias called foo for the IP address 144.76.74.162 and to use the user called testing switch to
your |
9.2. Execute a shell script on a remote machine
Tmux allows to run multiple command line sessions that continue to run even after you log out from SSH. You can later connect to them again.
To create a new tmux session named database type this into your console:
tmux new -s databaseTo detach from your current session press C-b d. Your session will continue to run in the background.
To see all running background processes use the following command
tmux lsTo attach for example to the first one again use:
tmux attach -t 0To attach to a named session just replace 0 with the respective session name:
tmux attach -t databaseTo scroll in tmux use Ctrl-b+[ . Now you can use the normal scroll keys to scroll. Press q to quit scroll mode.
9.3. See all open ports on your machine
You see all listeners on your machine via the following command. Port which listen to 127.0.0.1 cannot get accessed from external.
netstat -anltp | grep "LISTEN"9.4. Firewall
Ubuntu provides a uncomplicated firewall (ufw). To install it and only allow SSH, FTP, and webtraffic use the following command.
sudo apt-get install ufw
sudo ufw allow 80/tcp
sudo ufw allow 22/tcp
sudo ufw allow 443/tcp
sudo ufw allow 21/tcp
sudo ufw enable
9.5. Network commands
The following commands give you an overview of your network connections.
| Command | Description |
|---|---|
lspci -nn |
|
grep -i net |
|
lsusb |
|
iwconfig |
|
ifconfig |
Shows the network connections |
lsmod |
|
python -m SimpleHTTPServer |
Start web server serving current directory tree at https://localhost:8000/ |
9.6. HTTP debugging with curl
curl is a command line tool to issue and receive http (and other) request. For example, if you want to see the HTTP output of a webpage, use the following command.
curl http://www.vogella.com
// Or
curl -G http://www.vogella.com
If you want to the HTTPrequest header (including the HTTP status codes, use the following command. This is nice to see if your server delivers a 404 return code for your self-defined error page.
curl -I http://www.vogella.comYou can set HTTP header information with the -h flag. For example, to request a certain MIME type use the -H’Accept:MIME' option.
curl -I http://www.vogella.com -H'Accept:text/plain'To use curl behind a proxy.
curl -x proxy:8080 -G http://www.vogella.com|
If you are using Microsoft Windows, see curl for Windows. |
9.7. IRC
For IRC communication you can use the tool xchat. To install it, use "sudo apt-get install xchat".
9.8. FTP
For FTP access you can install filezilla via sudo apt-get install filezilla or map the ftp access to a virtual device.
To map the device select your desktop. Select the file menu and the entry "Connect to server".
10. Installing a FTP server
To install an easy to use and configure ftp server use the following command.
sudo apt-get install vsftpd11. Mail server Configuring your server to send out emails
In case you want to send out emails from your PHP sites you have to configure an email client. A simple one is exim4, a setup description can be found under the following links: https://help.ubuntu.com/community/Exim4 and https://wiki.debian.org/GmailAndExim4.
sudo apt-get install exim4Here is an example /etc/exim4/update-exim4.conf.conf file.
dc_eximconfig_configtype='smarthost'
dc_other_hostnames=''
dc_local_interfaces='127.0.0.1 ; ::1'
dc_readhost='gilbert.vogella.com'
dc_relay_domains=''
dc_minimaldns='false'
dc_relay_nets=''
dc_smarthost='smtp.gmail.com:587'
CFILEMODE='644'
dc_use_split_config='true'
dc_hide_mailname='false'
dc_mailname_in_oh='true'
You need to enter valid user credentials in the passwd.client file in the following format.
gmail-smtp.l.google.com:youruser@gmail.com:yourpassword
*google.com:youruser@gmail.com:yourpassword
smtp.gmail.com:youruser@gmail.com:yourpassword
Afterwards, you need to enable the new configuration with the following command.
sudo update-exim4.confThe log files are located in /var/log/exim4.
To trace them use
tail -f /var/log/exim4/mainlog|
Sometimes Google blocks the account access, because you try to login from another IP then normally. Open https://www.google.com/accounts/DisplayUnlockCaptcha and then try to send an e-mail using for example: |
12. MySQL
For a description of MySQL and its installation in Ubuntu see MySQL - Tutorial.
13. Apache Tomcat
13.1. Important Files
| File | Description |
|---|---|
/usr/share/tomcat5/ |
Installation directory of Tomcat |
psa-webapps |
Installation directory for webapps in a vhost environment |
/usr/share/tomcat5/conf |
Configuration Directory for Tomcat |
/etc/default/tomcat5 |
Contains default settings for tomcat. Most important the used java version (jdk). |
/var/log/tomcat5 |
Log files of tomcat |
13.2. Important Commands
| Command | Description |
|---|---|
/etc/init.d/tomcat5 restart |
Restart the tomcat web server |
14. PDF files
14.1. Command line tool pdftk
The "pdftk" command line tool allows to rework existing pdf files, e.g., extract pages or change the orientation of the pdf file.
You can install it via the following command.
sudo apt-get install pdftkFor example, to extract pages from a pdf document you can use the "cat" option.
# Extract certain pages from a pdf document
# "dont_ask" will override existing files without warning
pdftk Eclipse4book-20120429.pdf cat 25-27 87-91 95 output Eclipse4-Exercise.pdf dont_ask
14.2. Converting .odp file to pdf in batch
If you have LibreOffice installed, you can convert .odp files on the command line to pdf files.
soffice --nologo --invisible --convert-to pdf --outdir ./pdf *.odp15. Command line tools for adjusting images
ImageMagick allows to convert images in batch see ImageMagick Command line Options.
For example, the following adjusts the DPI size of images to 300.
convert -units PixelsPerInch -density 300 input.png output.png16. Command line tool for recording the screen
byzanz allows to record a specified area on the screen with different output formats and custom settings.
It can be installed with this command:
sudo apt-get install byzanzSee byzanz command line options for details about the usage.
The following example creates an animated output.gif file of the screen in the area of (x=0, y=0, width=800, height=1024) with the duration of 20 seconds.
byzanz-record --duration=20 --x=0 --y=0 --width=800 --height=1024 output.gifBesides the gif format also flv, ogg, ogv and byzanz formats are supported.
17. UI tool for recording the screen
A simple tool to create screen recordings is called peek, which is available on GitHub: https://github.com/phw/peek
On Ubuntu it can be installed like this:
sudo add-apt-repository ppa:peek-developers/stable
sudo apt update
sudo apt install peek
18. Spell checking with hunspell
The command line tool hunspell allows you to check the spelling of a document. For example, you can check an XML document written in English called "input.xml" with the command.
# parameter -H defines that the input is an XML file
hunspell -d en_US -H -l input.xml
The following trigger an interactive session for spell checking.
With
(i) you can add a word to your local hunspell directory, which is
located in your home directory under
.hunspell_en_US
in case you using the US en checker.
You can check all words in a batch mode with the -l parameter.
# parameter -H defines that the input is an XML file
# all incorrectly spelled words are listed because of the
# -l parameter
hunspell -d en_US -H -l input.xml
19. Connection
19.1. Telnet / ssh client for Windows
To connect to your Linux system via telnet or via ssh from Windows you can use putty.
19.2. Switch to Console mode from Graphical User Interface
In case your Linux system is running under a graphical user interface (KDE, GNOME, …) and you need access to the console, use the Ctr+Alt+F1 shortcut keys to switch to the first console. To switch back to Desktop mode, use the Ctrl+Alt+F7 shortcut keys.
20. Tips
20.1. Creating a bootable USB disk with unetbootin
The default program for creating a bootable USB disk is Startup Disk Creator. This crashes frequently during the creation of a boot disk. The program unetbootin is much more stable. You can install it via the following command and start it on the command line.
sudo apt-get install unetbootin20.2. Remote xserver
The x2go server allows to install a X-server on a remote server and access it via a client from a different machine. More information can be found on https://wiki.x2go.org/.
21. Broadway
This section describes, how you can display the Eclipse IDE or any other GTK+ application in your web browser using the GDK Broadway backend.
21.1. Start a Broadway server
To display Eclipse or any other application in your web browser, you need to start a Broadway server which comes with GTK+.
Simply open a Terminal window and start a Broadway server by typing the following:
start broadwaydIf you want to set a specific port, just append :offset.
start broadwayd :5
The default port is 8080 and as we chose 5 as our offset, the actual port is now 8085.
21.2. Using Broadway to run a GTK+ application
You can use any GTK3 application, like Eclipse or gedit in the browser. This demonstrate how to start such an application. Start another Terminal window and type the following:
GDK_BACKEND=broadway gedit
If you started your Broadway server with a specific port offset (e.g., to use 8085 as a port), use the following command:
GDK_BACKEND=broadway BROADWAY_DISPLAY=:5 gedit
You can now open your web browser and go to https://localhost:8080 (or 8085) and see your application running.
21.3. Starting Eclipse
GDK_BACKEND=broadway BROADWAY_DISPLAY=:5 java -jar ./plugins/org.eclipse.equinox.launcher_1.4.0.v20161219-1356.jar21.4. Using Broadway to start a runtime Eclipse from the Eclipse IDE
Make sure that you use Eclipse Neon or above.
To now display Eclipse in your web browser, open Eclipse itself.
Eclipse can start itself with the help of a new run configuration.
To create one, click on the small black arrow next to the Run button 
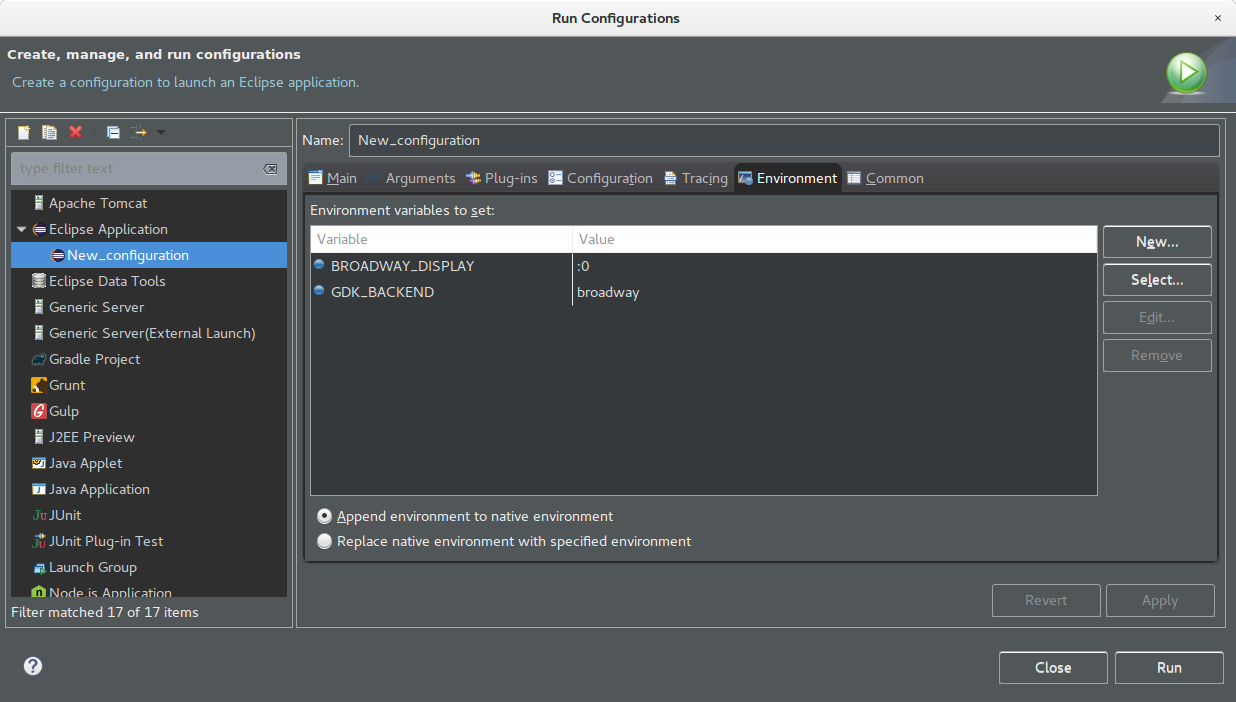
If you started your Broadway server with a port offset, just replace :0 with your selected offset. You can now open your web browser and go to https://localhost:8080 (or 8085) and see Eclipse running.
22. Links and literature
22.1. vogella Java example code
If you need more assistance we offer Online Training and Onsite training as well as consulting