Eclipse Commands tutorial. This tutorials describes how to add commands, menus and toolbar entries to the Eclipse IDE. This article is based on Eclipse Neon (4.6).
1. Introduction to commands
Eclipse framework use the commands framework to contribute actions to the user interface.
A command in Eclipse is a declarative description of a component and is independent from the implementation details.
A command can be categorized, assigned to the user interface and a key binding can be defined for the command. The behavior of a command is defined via a handler.
1.1. Defining commands with Eclipse 3.x API
Eclipse 3.x API uses extension points to define commands. Three extensions points play a role here. The following extension points are relevant to define a menu or toolbar contribution for an Eclipse plug-in.
| Extension Point | Description |
|---|---|
org.eclipse.ui.command |
Declarative description of the component |
org.eclipse.ui.handlers |
Defines the behavior, e.g., the Java class which should be called |
org.eclipse.ui.menu |
Where and how should the command be included in the user interface, e.g., menu, popup menu, toolbar, etc. |
2. Defining the command usage in the UI
2.1. Menu extension points
The org.eclipse.ui.menu extension point is used to define where the command is visible in the application
For example, you could define that the command is visible in the application menu or in a view menu.

The menuContribution contribution has an ID value that allows to identify the contribution.
menuContribution has an locationURI attribute that allows defining where in the user interface a command is displayed. The different attribute values are summarized in the following table.
| Contribution to | Description | Uri |
|---|---|---|
Application menu |
Displays the command in the menu of the application |
menu:org.eclipse.ui.main.menu |
Application toolbar |
displays the command in the toolbar of the application |
toolbar:org.eclipse.ui.main.toolbar |
View toolbar |
displays the command in the toolbar of the view |
toolbar:viewId - For example, to display a menu to view with the "View1" ID use "toolbar:View1". |
Context menu / pop-up |
Command is displayed in a context menu, e.g., right-click on an object |
popup:ID |
2.2. Defining the position of a menu extension
Can you define the position of a command. For example, the Save All menu entry should be positioned after the Save menu entry.
You can define the relative position of a command in this locationURI by using the pattern ?before=ID or ?after=ID.
The ID can be an existing separator name, menu ID, or item ID. The command is placed before or after the element with the corresponding ID.
For example, to place a command in the fileMenu menu behind the oneEntry menu entry, use the menu:fileMenu?after=oneEntry locationURI.
3. Handler
3.1. Command Handler
The org.eclipse.ui.handlers extension point connects the command to a certain class which is called once the command is executed.
The behavior of a command is defined via handlers.
The handler is the class which is executed once the command is called.
It must implement the IHandler interface from the org.eclipse.core.commands package.
You can extend the org.eclipse.core.commands.AbstractHandler class that provides a default implementation for the IHandler interface.
The execute() method is called, if the handler is executed.
In the execute() method you get access system values via the HandlerUtil class.
3.2. Validity of handlers
Handler can be defined with conditions (activeWhen) under which define the conditions under which the handlers are valid for a command. You can define several handlers for a command. Only one handler can be valid for a command for a certain condition. If several handlers are valid, the Eclipse runtime does disable the command.
4. Prerequisites for this tutorial
This tutorial assumes that you have basic understanding of development for the Eclipse platform. Please see Eclipse RCP Tutorial or Eclipse plug-in Tutorial if you need any basic information.
5. Tutorial: Commands and menus
5.1. Exercise: Defining commands
In this exercise, you create a command that allows to exit the application. Create a new RCP project "de.vogella.rcp.commands.first" using the "Hello RCP" template. Click on the plugin.xml and select the Extensions tab. Press the Add… button.
Search for the extension "org.eclipse.ui.commands". Select it and press finish.
Create a new command by right-click on your extension point and by selecting New → command.
| If you only see an "Generic" entry you most likely have not downloaded "Eclipse for RCP/Plug-in Developers". Please see Eclipse Installation. |

Set the ID to "de.vogella.rcp.commands.first.commands.Exit" and the name to "Exit". Enter the class "de.vogella.rcp.commands.first.commands.ExitHandler" as defaultHandler.
Press the hyperlink "defaultHandler" to create the class which should extend "org.eclipse.core.commands.AbstractHandler".
package de.vogella.rcp.commands.first.commands;

import org.eclipse.core.commands.AbstractHandler;
import org.eclipse.core.commands.ExecutionEvent;
import org.eclipse.core.commands.ExecutionException;
import org.eclipse.ui.handlers.HandlerUtil;

public class ExitHandler extends AbstractHandler {

    @Override
    public Object execute(ExecutionEvent event) throws ExecutionException {
        HandlerUtil.getActiveWorkbenchWindow(event).close();
        return null;
    }

}
5.2. Using commands in menus
The command that we defined should be used in a menu.
Add an extension to the org.eclipse.ui.menus extension point.
Right-click on the extension point and select .
Create a new menu contribution with the "menu:org.eclipse.ui.main.menu" locationURI. Make sure this URL is correct spelled, otherwise your menu will not be shown.

Right-click your menucontribution and select . Add a menu with the "File" label and the "fileMenu" ID.
Select your menu, right-click on it, select New→Command. Maintain your commandID. Set the label to "Exit" and the tooltip to "Exits the application".
This should result in a plugin.xml file which looks like the following.
<?xml version="1.0" encoding="UTF-8"?>
<?eclipse version="3.4"?>
<plugin>

   <extension
         id="application"
         point="org.eclipse.core.runtime.applications">
      <application>
         <run
               class="de.vogella.rcp.commands.first.Application">
         </run>
      </application>
   </extension>
   <extension
         point="org.eclipse.ui.perspectives">
      <perspective
            name="RCP Perspective"
            class="de.vogella.rcp.commands.first.Perspective"
            id="de.vogella.rcp.commands.first.perspective">
      </perspective>
   </extension>
   <extension
         point="org.eclipse.ui.commands">
      <command
            defaultHandler="de.vogella.rcp.commands.first.commands.ExitHandler"
            id="de.vogella.rcp.commands.first.commands.Exit"
            name="Exit">
      </command>
   </extension>
   <extension
         point="org.eclipse.ui.menus">
      <menuContribution
            locationURI="menu:org.eclipse.ui.main.menu">
         <menu
               id="fileMenu"
               label="File">
            <command
                  commandId="de.vogella.rcp.commands.first.commands.Exit"
                  label="Exit"
                  style="push"
                  tooltip="Exit the application">
            </command>
         </menu>
      </menuContribution>
   </extension>

</plugin>
Run the example. You should see a menu with a "File" entry and if you select the "Exit" entry your application should exit.

6. Tutorial: Commands and toolbars
6.1. Overview
You can add commands to the application toolbar and to a view toolbar.
6.2. Application toolbar (coolbar)
Create a new project "de.vogella.rcp.intro.commands.toolbar". Use the "RCP application with a view" as a template. Create a command "de.vogella.rcp.intro.commands.toolbar.Hello" with the default handler "de.vogella.rcp.intro.commands.toolbar.handler.Hello". This handler opens a JFace Dialog.
package de.vogella.rcp.intro.commands.toolbar.handler;

import org.eclipse.core.commands.AbstractHandler;
import org.eclipse.core.commands.ExecutionEvent;
import org.eclipse.core.commands.ExecutionException;
import org.eclipse.jface.dialogs.MessageDialog;
import org.eclipse.ui.handlers.HandlerUtil;

public class Hello extends AbstractHandler {

    @Override
    public Object execute(ExecutionEvent event) throws ExecutionException {
        MessageDialog.openInformation(HandlerUtil.getActiveWorkbenchWindow(
                event).getShell(), "Info", "Info for you");
        return null;
    }

}
Add a menucontribution to the "org.eclipse.ui.menus extension" point. Set the location URI to "toolbar:org.eclipse.ui.main.toolbar". Add a toolbar to your menu contribution.
Add the command "de.vogella.rcp.intro.commands.toolbar.Hello" to the toolbar. Assign a label and an icon to it.
Activate the application toolbar via ApplicationWorkbenchWindowAdvisor via the configurer.setShowCoolBar(true); call.
package de.vogella.rcp.intro.commands.toolbar;

import org.eclipse.swt.graphics.Point;
import org.eclipse.ui.application.ActionBarAdvisor;
import org.eclipse.ui.application.IActionBarConfigurer;
import org.eclipse.ui.application.IWorkbenchWindowConfigurer;
import org.eclipse.ui.application.WorkbenchWindowAdvisor;

public class ApplicationWorkbenchWindowAdvisor extends WorkbenchWindowAdvisor {

    public ApplicationWorkbenchWindowAdvisor(
            IWorkbenchWindowConfigurer configurer) {
        super(configurer);
    }

    public ActionBarAdvisor createActionBarAdvisor(
            IActionBarConfigurer configurer) {
        return new ApplicationActionBarAdvisor(configurer);
    }

    public void preWindowOpen() {
        IWorkbenchWindowConfigurer configurer = getWindowConfigurer();
        configurer.setInitialSize(new Point(400, 300));
        configurer.setShowStatusLine(false);
        configurer.setShowCoolBar(true);
        configurer.setTitle("RCP Application");
    }
}
The result should look like the following. If you select the element in the toolbar an information dialog should open.
6.3. Contribution to the View Toolbar
You can add a command directly to a view toolbar. For this you extend the previous example. Change the class "Perspective" to the following (a standalone view does not have a own toolbar).
package de.vogella.rcp.intro.commands.toolbar;

import org.eclipse.ui.IPageLayout;
import org.eclipse.ui.IPerspectiveFactory;

public class Perspective implements IPerspectiveFactory {

    public void createInitialLayout(IPageLayout layout) {
        String editorArea = layout.getEditorArea();
        layout.setEditorAreaVisible(false);
        layout.setFixed(true);

        layout.addView(View.ID, IPageLayout.LEFT, 1.0f, editorArea);
    }

}
Create a new menu contribution to the extension point "org.eclipse.ui.menus" with the locationURI: "toolbar:de.vogella.rcp.intro.commands.toolbar.view". toolbar: tells the system to add it to the toolbar while the second argument is the ID of your view.
Create then a new command for this menucontribution and set the command id to "de.vogella.rcp.intro.commands.toolbar.Hello". Assign the label "Say Hello" to it.
Run the application to see your new view contribution.
6.4. Drop down list
The following adds a dropdown list to the application coolbar.
This creation is a bit strange. You create a helper drop-down command to which later the other (real) commands will be assigned to.
Therefore, create a command with the ID "referenceToMenuId". Maintain the default handler. For example, you could reuse "de.vogella.rcp.intro.commands.toolbar.handler.Hello".
Add a new menucontribution to the org.eclipse.ui.menus extension point.
Set the location URI to "toolbar:org.eclipse.ui.main.toolbar".
Add a toolbar to this extension and a new command to this new toolbar.
As the ID use referenceToMenuId give it a label and an icon and change the style to "pulldown".
Create a new menucontribution and set the locationURI to: "menu:referenceToMenuId"
|
referenceToMenuId is the ID we used earlier in the command. |
Add your exiting command "de.vogella.rcp.intro.commands.toolbar.Hello" two times to this menu. Use different labels.
Run your application, it should now have a drop-down list in the application toolbar.
|
Add the command "referenceToMenuId" to your existing view toolbar contribution to get the drop-down menu in your view. |
7. Tutorial: Commands and context menus
In this example, you add a context menu to an SWT table widget. Create a new project called de.vogella.rcp.intro.commands.popup based on the "RCP application with a view" example.
Create a new command with the
de.vogella.rcp.intro.commands.popup.showSelected
ID
and the name
Show.
In this example, we will not use the default handler. Therefore
add the
org.eclipse.ui.handlers
extension point
to your plugin.xml file
and add a handler. The first
parameter is the
commandId and the
second
the class for
the handler. Use
de.vogella.rcp.intro.commands.popup.handler.ShowSelected
as class name.
Implement now the code for your handler. I just print the selected elements to the console.
package de.vogella.rcp.intro.commands.popup.handler;

import java.util.Iterator;

import org.eclipse.core.commands.AbstractHandler;
import org.eclipse.core.commands.ExecutionEvent;
import org.eclipse.core.commands.ExecutionException;
import org.eclipse.jface.viewers.ISelection;
import org.eclipse.jface.viewers.IStructuredSelection;
import org.eclipse.ui.handlers.HandlerUtil;

public class ShowSelected extends AbstractHandler {

    @SuppressWarnings("unchecked")
    @Override
    public Object execute(ExecutionEvent event) throws ExecutionException {
        ISelection selection = HandlerUtil.getActiveWorkbenchWindow(event)
                .getActivePage().getSelection();
        if (selection != null & selection instanceof IStructuredSelection) {
            IStructuredSelection strucSelection = (IStructuredSelection) selection;
            for (Iterator<Object> iterator = strucSelection.iterator(); iterator
                    .hasNext();) {
                Object element = iterator.next();
                System.out.println(element.toString());
            }
        }
        return null;
    }

}
Add a new menuContribution with the locationURI "popup:de.vogella.rcp.intro.commands.popup.view", where "de.vogella.rcp.intro.commands.popup.view" is the ID of your view which has been automatically created for you.
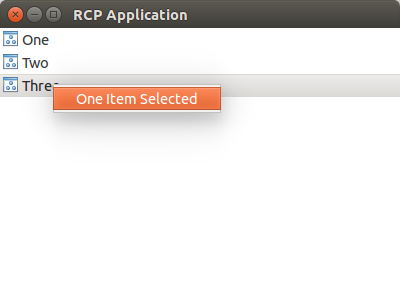
Right-click your new menuContribution and select New → Command. Assign your command to the field "commandId". Label it "One Item selected".
Now you have add a MenuManager to your view. Select the
View
class and change it to the following.
package de.vogella.rcp.intro.commands.popup;

import java.util.ArrayList;
import java.util.List;

import org.eclipse.jface.action.MenuManager;
import org.eclipse.jface.viewers.ArrayContentProvider;
import org.eclipse.jface.viewers.LabelProvider;
import org.eclipse.jface.viewers.TableViewer;
import org.eclipse.swt.SWT;
import org.eclipse.swt.graphics.Image;
import org.eclipse.swt.widgets.Composite;
import org.eclipse.swt.widgets.Menu;
import org.eclipse.ui.ISharedImages;
import org.eclipse.ui.PlatformUI;
import org.eclipse.ui.part.ViewPart;

public class View extends ViewPart {

    private TableViewer viewer;

    class ViewLabelProvider extends LabelProvider {
        @Override
        public Image getImage(Object obj) {
            return PlatformUI.getWorkbench().getSharedImages().getImage(ISharedImages.IMG_OBJ_ELEMENT);
        }
    }

    @Override
    public void createPartControl(Composite parent) {
        viewer = new TableViewer(parent, SWT.MULTI | SWT.H_SCROLL | SWT.V_SCROLL);
        viewer.setContentProvider(ArrayContentProvider.getInstance());
        viewer.setLabelProvider(new ViewLabelProvider());

        viewer.setInput(getData());
        // Create a menu manager and create context menu
        MenuManager menuManager = new MenuManager();
        Menu menu = menuManager.createContextMenu(viewer.getTable());
        // set the menu on the SWT widget
        viewer.getTable().setMenu(menu);
        // register the menu with the framework
        getSite().registerContextMenu(menuManager, viewer);

        // make the viewer selection available
        getSite().setSelectionProvider(viewer);
    }

    /**
     * Passing the focus request to the viewer's control.
     */
    @Override
    public void setFocus() {
        viewer.getControl().setFocus();
    }

    private List<String> getData() {
        List<String> list = new ArrayList<String>();
        list.add("One");
        list.add("Two");
        list.add("Three");
        return list;
    }
}
Run your application. If you perform a right-click on the table, your menu should become visible. If you select it menu then the names of the selected items should be written to the console.
8. Links and Literature
8.2. vogella Java example code
If you need more assistance we offer Online Training and Onsite training as well as consulting