This tutorial contains notes about Eclipse Package Drone.
1. Package Drone
Package Drone is an artifact manager like Artifactory or Nexus, which is based on OSGi. Since this artifact manager itself is based on OSGi it comes with strong support for OSGi environments.
2. Install Package Drone
2.1. Installation on unix systems
Package drone offers installers for several unix systems including Ubuntu, CentOs, OpenSuse and others.
2.2. Using the plain zip
Download locations
After downloading the ZIP it can be extracted and started like a normal OSGi application.
2.3. Running Package Drone from the Eclipse IDE
Package drone provides an easy to use Oomph setup.
The Oomph installer can be downloaded on: https://download.eclipse.org
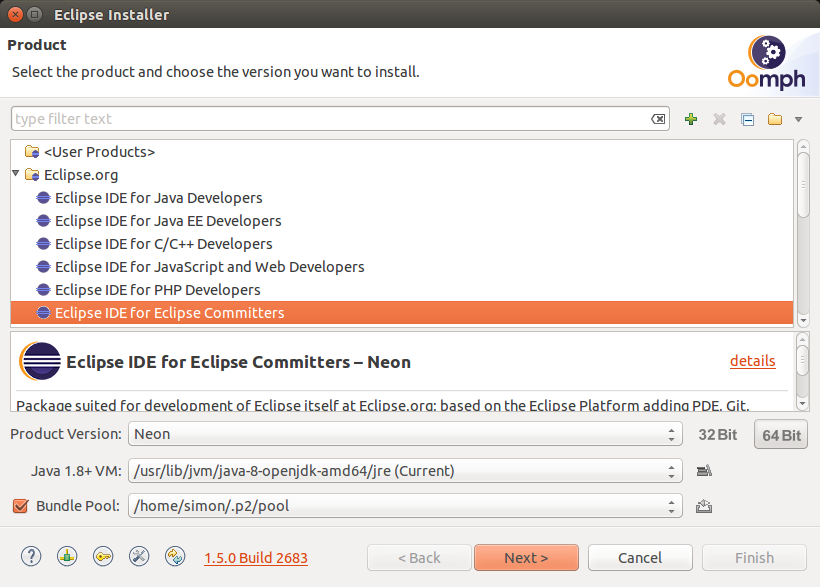
After starting the Oomph installer and switching to its advanced mode the "Eclipse IDE for Eclipse Committers" can be chosen.
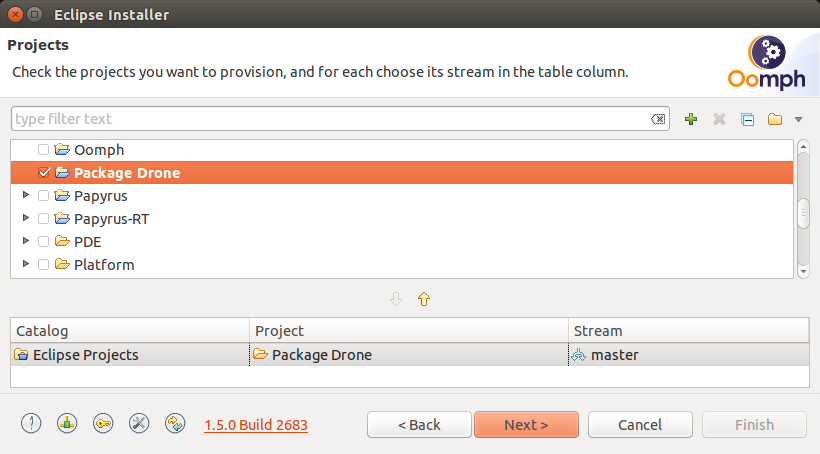
On the next page of the Eclipse Installer the Package Drone profile has to be chosen.
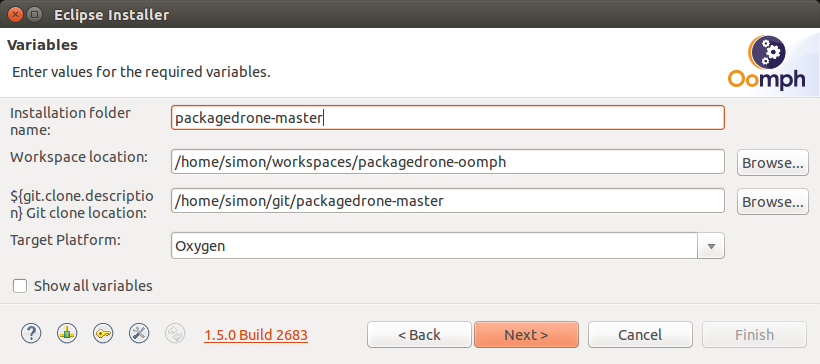
When pressing Next > some workspace and install settings can be applied.
After pressing Next > again the profile settings can be seen.
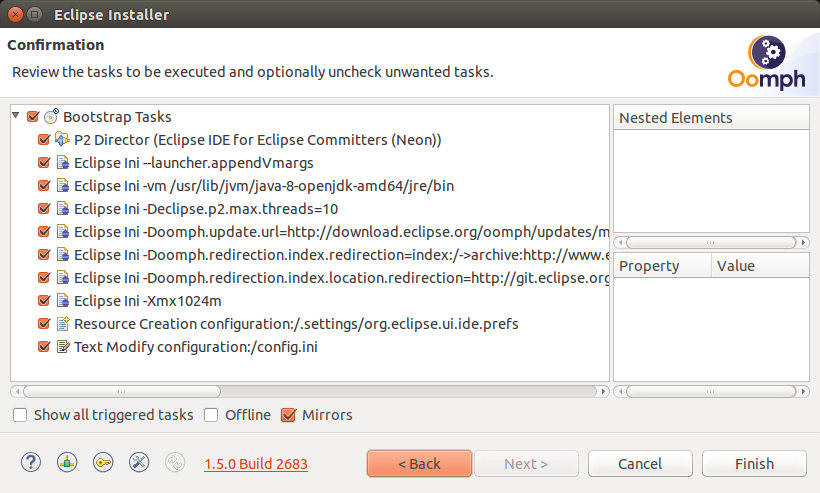
When Finish is pressed a setup Eclipse IDE containing the Package Drone project is available.
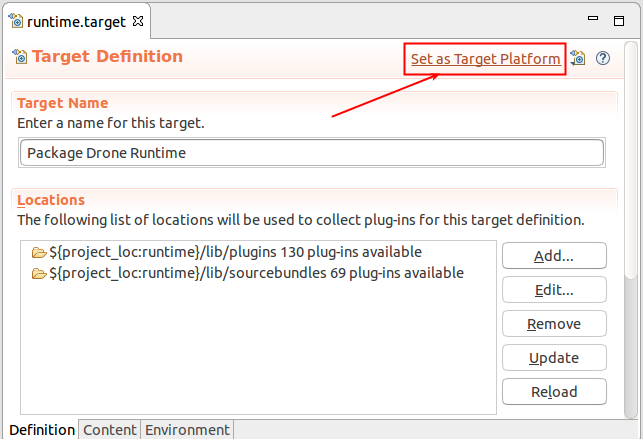
After starting the Eclipse IDE there will be a runtime project to setup the target platform.
There are two ways to download the libs for the target definition:
-
Run the build.ant build file of the runtime project with Apache Ant
-
Run a
mvn clean installbuild with Apache Maven in the runtime folder on the pom.xml
After that the target definition file can be used to set the target platform.
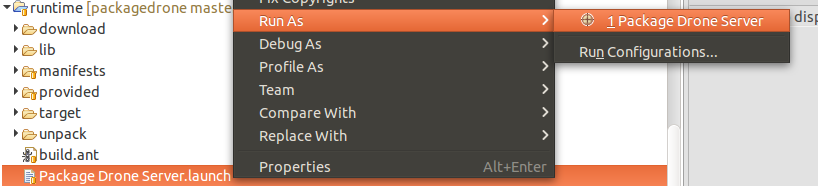
To launch Package Drone from the IDE the Package Drone Server.launch file can be used.
3. Channels and Aspects
A Channel is a binary repository instance, where binary files like *.jar files can be deployed to.
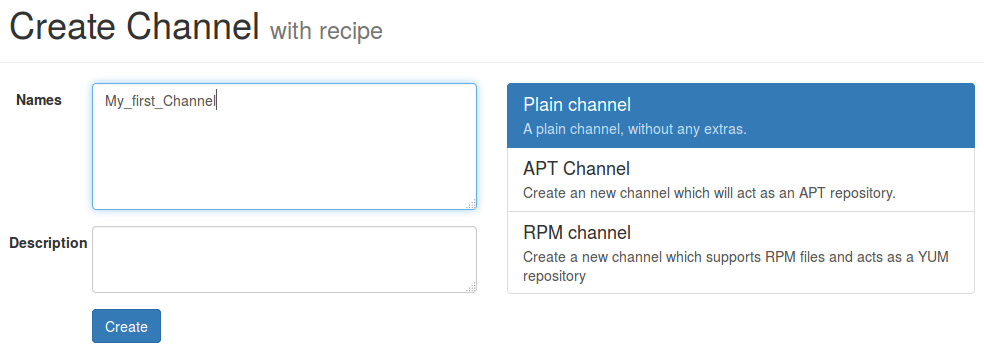
Package Drone provides 3 channel types:
-
Plain Channel
-
APT Channel
-
RPM Channel
4. Exercise: Setup Package Drone
To run Package Drone use:
~$ cd /{package-drone-directory}/
~$ ./server
By default, Package Drone uses
https://localhost:8080/
as URL, which leads to this:
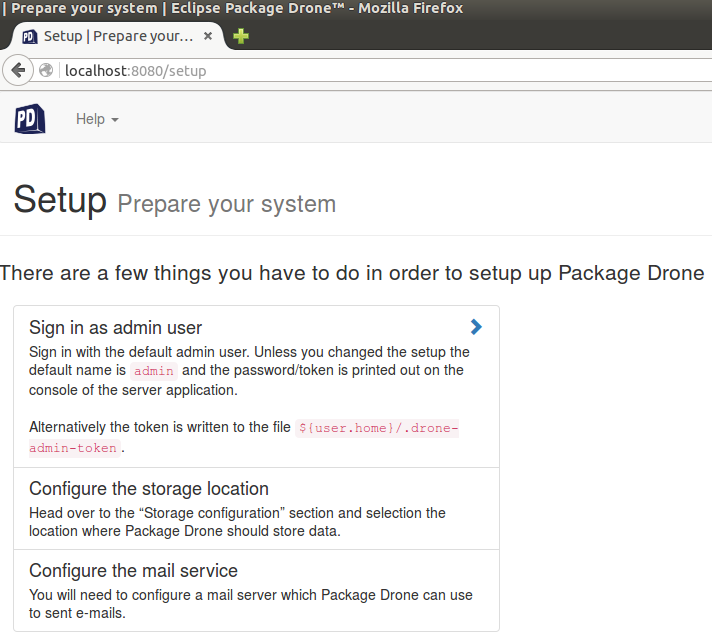
The Sign in link can be found on the right hand side of the web page.
In the console should appear something similar to this:

This User and Password are supposed to be used to sign in for the first time.
After the login a new user with Admin and Manager rights should be created.
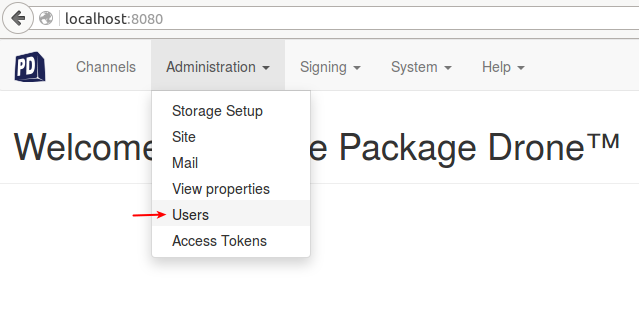
Then press on Add user to create it.

Pressing Submit will result in the user overview.
First of all a new password should be generated by clicking the Change password link.
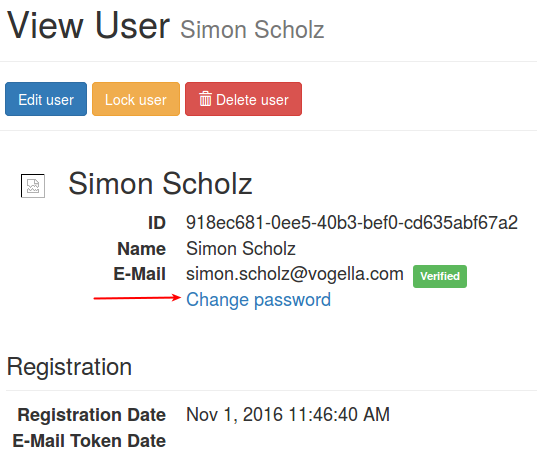
To get all necessary rights for the user press the Edit user button and check the ADMIN and MANAGER role.

5. Exercise: Setup Channels
Once a user with the MANAGER role has been created and is signed in, a new Channel can be created.
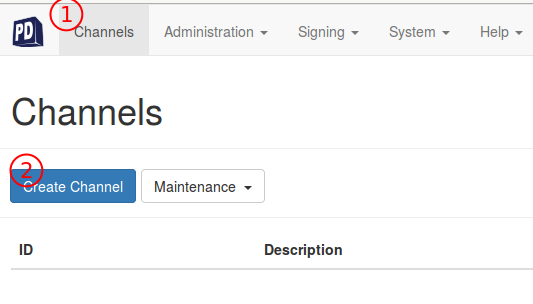
1.) Click on the Channel Section 2.) Then press the Create Channel button
6. Exercise: Deploying to a Channel
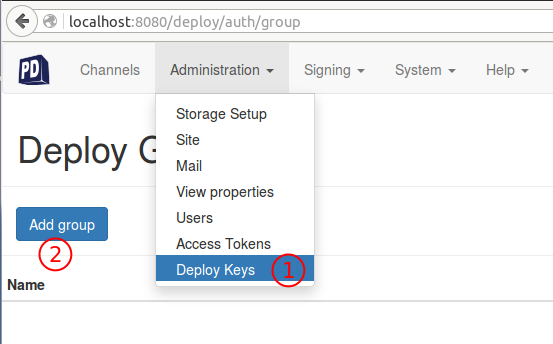
To deploy to a Channel with Maven or Gradle a Deploy Group has to be created.
-
Press on Menu:Administration[Deploy Keys]
-
Press add group
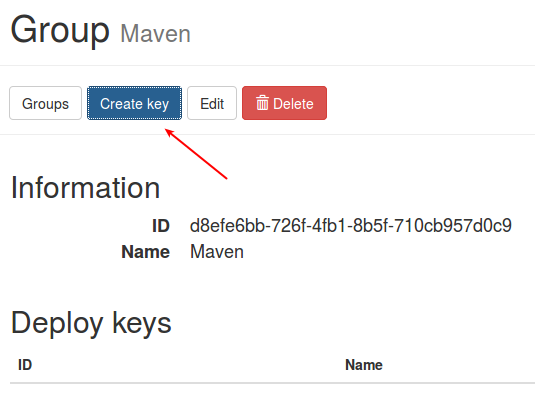
Create a group called Maven and create a key for this group.
Once a deploy key has been created it can be applied to a Channel.
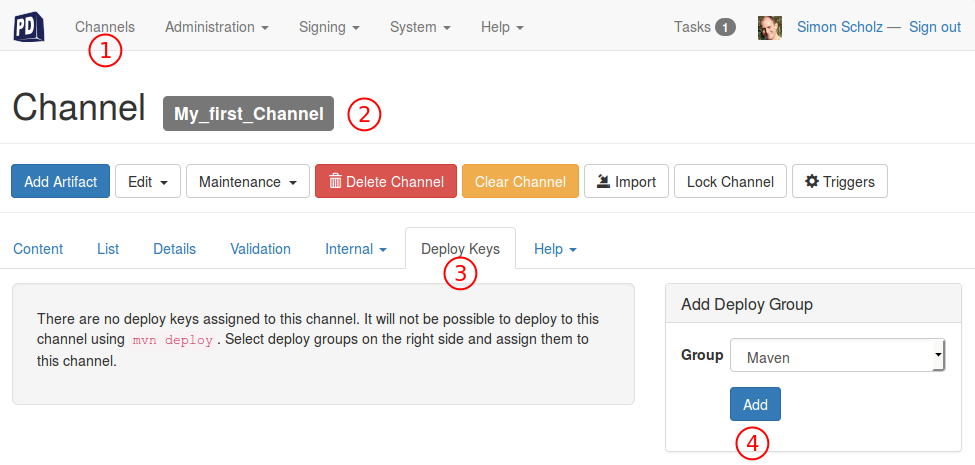
-
Select Channels Section
-
Select the previously created channel in the list, e.g., My_first_Channel
-
Go to Deploy Keys
Add the Deploy Group, which just has been created
When clicking on the View Maven settings link, the following dialog, containing the maven setup, will appear.
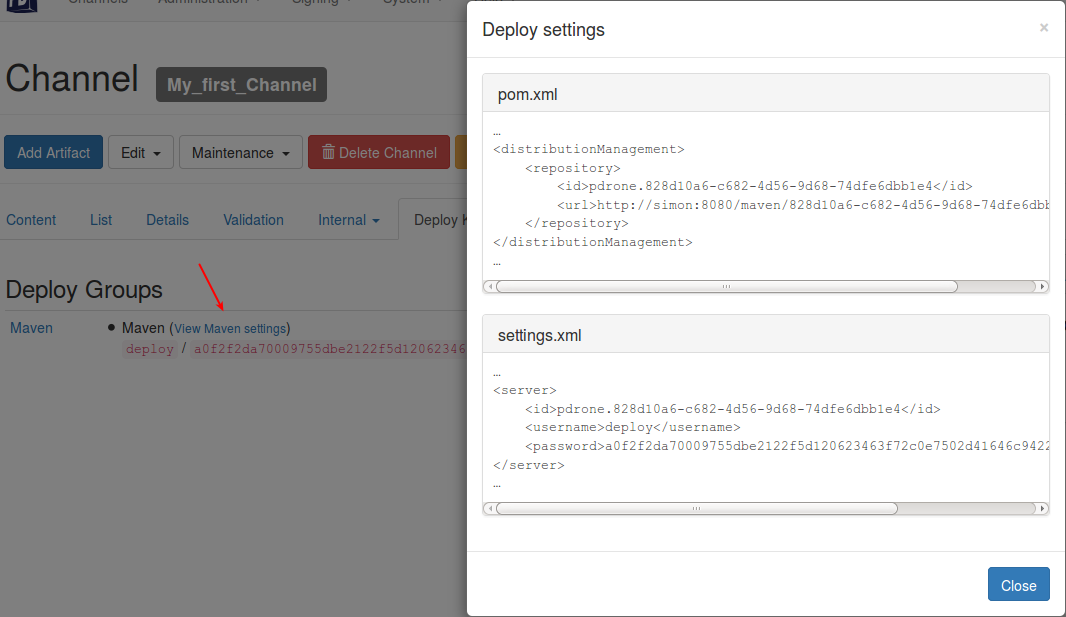
These settings can then be specified in the pom.xml and settings.xml file.
Finally mvn clean deploy can be called on a Maven project to deploy it to the Package Drone instance.
|
For the usage in a Gradle project, please see Gradle tutorial |
7. Exercise: Use Aspects
So called Aspects can be applied to a Channel like this:
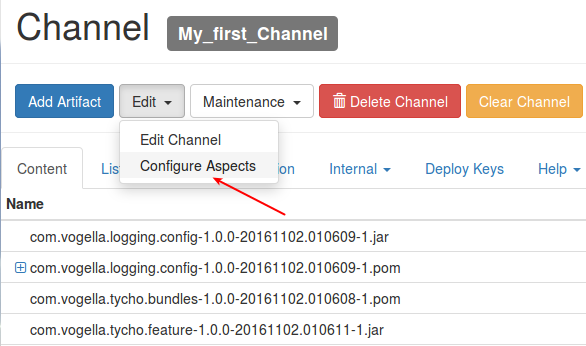
In the Channel aspects section additional Aspects can be added.
Default categories of additional Aspects:
-
Debian
-
Maven
-
OSGi
-
Other
-
RPM
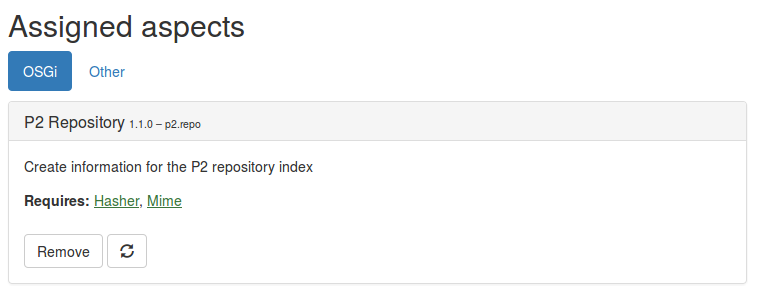
7.1. Exercise: The P2 Repository Aspect
When OSGi bundles have been added to a channel, it is usually helpful to provide these bundles as p2 update site. For example, when bundles and features should be provided for a Maven Tycho build, which only works with p2 update sites.
Package Drone has the capability to automatically generate a p2 update site by using the P2 Repository Aspect.
The P2 Repository Aspect can be found in the OSGi category of the Channel aspects section.
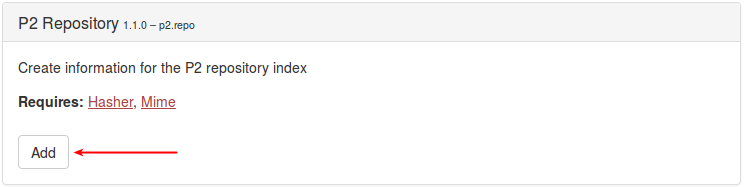
The P2 Repository Aspect requires the Hasher and Mine Aspect. But when pressing on the Add button, one can confirm to Add with dependencies, to also add the Hasher and Mine Aspect.
The p2 update site for this Channel be accessed with this URL schema: {server}:{port}/p2/{channel-id}, e.g.,
https://localhost:8080/p2/828d10a6-c682-4d56-9d68-74dfe6dbb1e4/
|
Do not add the Tycho Cleaner or the P2 Meta Data Generator Aspect, otherwise these Aspects would interfere with the P2 Repository Aspect and cause invalid results. |
8. PackageDrone resources
8.1. vogella Java example code
If you need more assistance we offer Online Training and Onsite training as well as consulting