Nexus Repository Manager. This article describes how to use and install the Nexus Repository Manager.
1. Nexus Repository Manager
1.1. What is a Repository Manager
An repository manager allows to store and retrieve build artifacts. The most popular examples for repository manager are Maven Central Repository and jcenter at Bintray, which you can use to retrieve your dependencies for a Maven build.
1.2. What is Nexus?
A Nexus installation brings you such a repository for your company. So you can host your own repositories, but also use Nexus as a proxy for public repositories. With such a proxy the time to receive an artifact is reduced and it saves bandwidth. Nexus allows you to host your private build artifacts. Nexus is avaialable as commercial and Open Source distribution.
2. Installation of Nexus
To install the open-source version of Nexus you need to visit Nexus OSS and download the TGZ version or the ZIP version. Currently the latest version is 3.13.0.
To start Nexus, after extracting, the
nexus
script must be
executed with a
start
parameter in the
nexus
folder:
cd /NEXUS_FOLDER/nexus ./bin/nexus start
And in case you want to stop Nexus you just have to write stop instead of start:
cd /NEXUS_FOLDER/nexus ./bin/nexus stop
3. Configuration of Nexus
Once the nexus repository manager has been started, its web interface can be accessed under this URL:
https://localhost:8081/nexus/
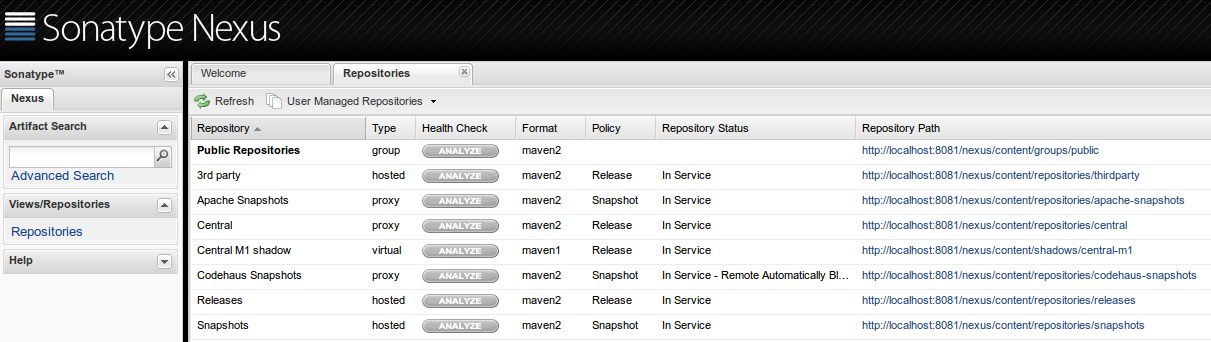
The Nexus contains some repositories by default:
3.1. User Settings
The default user is
admin
and the password is
admin123.
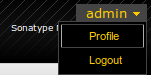
The login can be found in the top right corner.
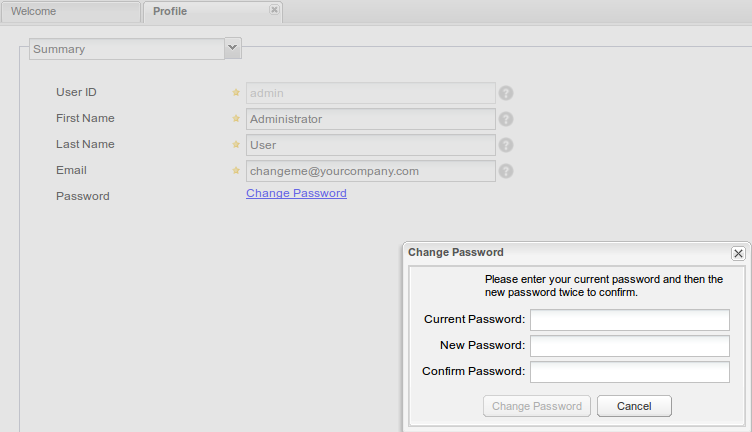
After logging in the credentials can be changed in the profile settings.
4. Creating a repository
We want to have a separate repository for our p2 artifacts. This can be created like this:
-
Login to the nexus
https://localhost:8081/nexus/
with User
adminand passwordadmin123. -
Click on Repositories on the right hand side.
-
Select and use the following data:
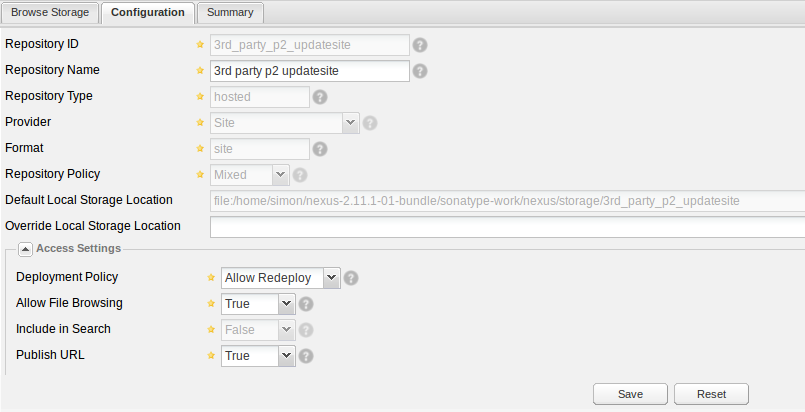
Now you got a custom repository, which is hosted on your local nexus installation.
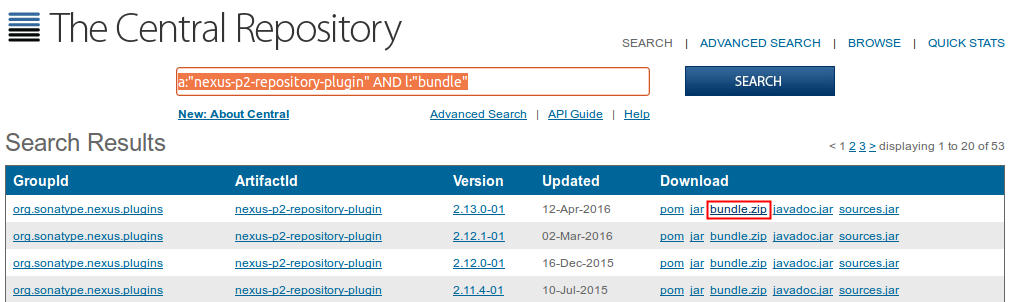
5. P2 Nexus Plugins
With the Nexus P2 Bridge Plugin and the Nexus P2 Repository Plugin it is possible to create a proxy repository for p2 update sites. Use the Search Maven to find these plugins.
5.1. Installing p2 Plugins
Download the bundle.zip of your search result.
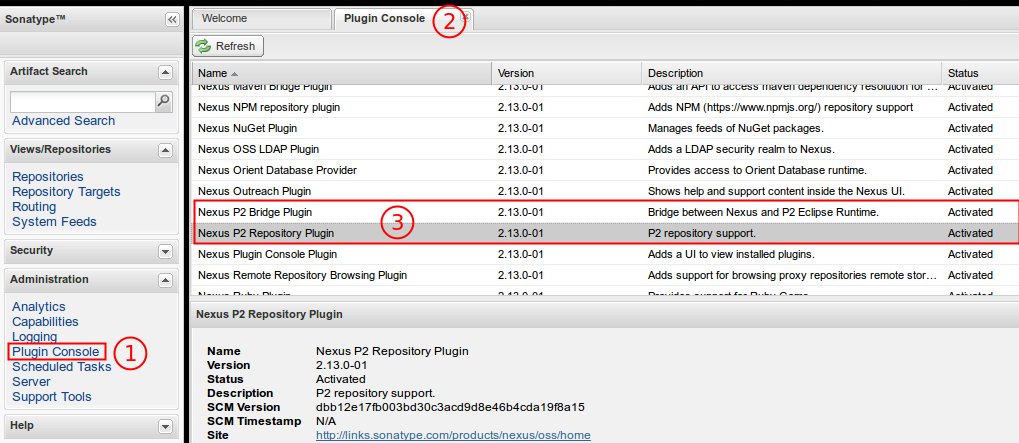
These two downloaded bundle.zip files that contain the nexus plugins have to be extracted into the sonatype-work/nexus/plugin-repository folder of the Nexus installation.
The nexus server has to be restarted to install the plugins.
./bin/nexus restart
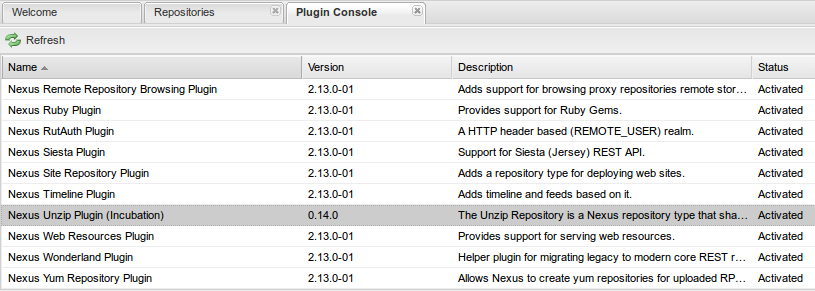
To validate that these plugins are properly installed the plugin console can be used.
5.2. Creating a proxy for p2 update sites
In the repositories tab a Proxy Repository can be created.
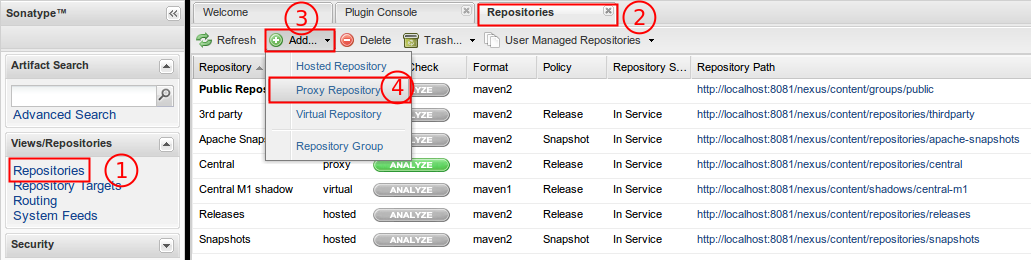
A Repository ID and a Repository Name has to be specifed. (1)
The previously installed p2 plugins offer additional providers like p2. (2)
The Remote Storage Location is the p2 update site url, e.g., https://download.eclipse.org/eclipse/updates/4.6milestones.
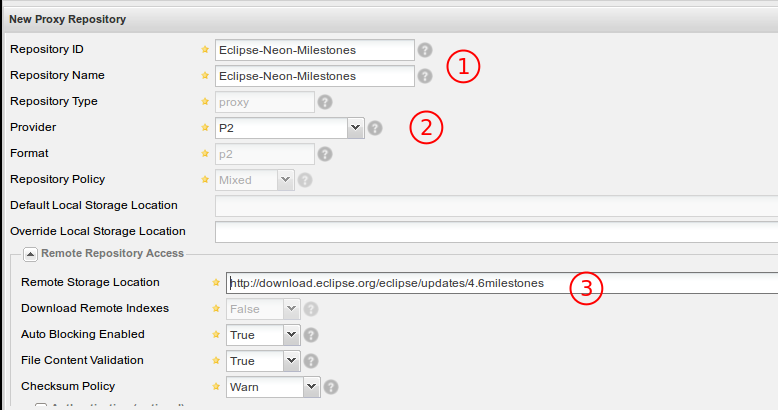
Finally this must be saved and then the new proxy will be created.
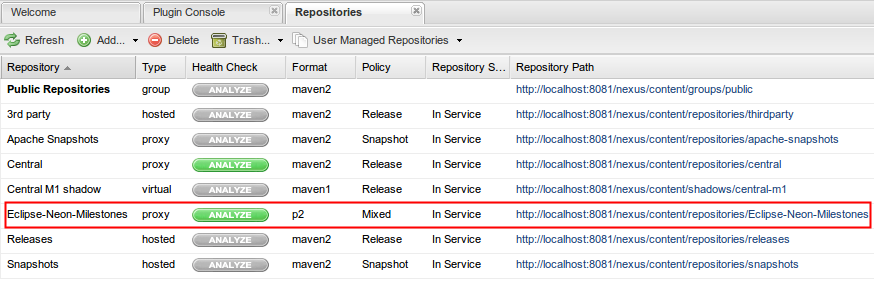
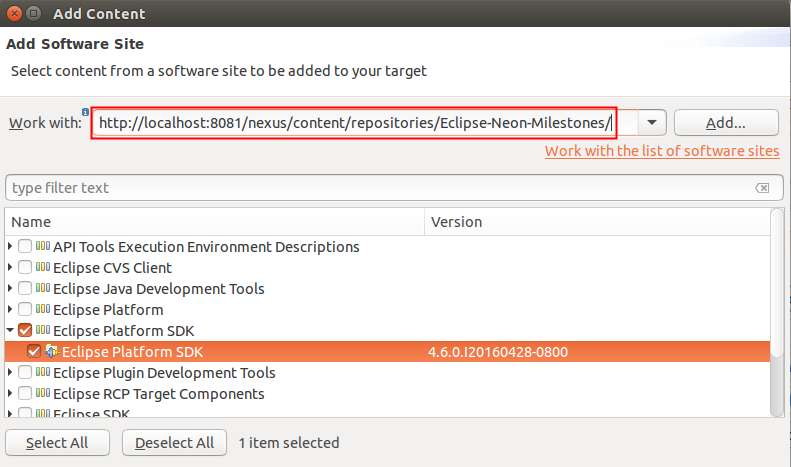
After settings this up, a target definition can make use of this proxy, but using the given URL:
https://localhost:8081/nexus/content/repositories/Eclipse-Neon-Milestones/
6. Tycho/Nexus Unzip Plugin
The Tycho/Nexus Unzip Plugin can be used to create virtual repositories for unzipped versions of zipped p2 update site.
6.1. Installing the Tycho/Nexus Unzip Plugin
Download the
bundle.zip
of the
Tycho/Nexus Unzip Plugin
The downloaded
bundle.zip
file that contains the nexus plugins has to be extracted into the
sonatype-work/nexus/plugin-repository
folder of the Nexus installation.
The nexus server has to be restarted to install the plugins.
./bin/nexus restart
To validate that these plugins are properly installed the plugin console can be used.
6.2. Setting up an unzip repository
See the Tycho wiki on GitHub for information how to setup the unzip plug-in.
7. Nexus online resources
7.1. vogella Java example code
If you need more assistance we offer Online Training and Onsite training as well as consulting