This article describes the usage of Dagger 2 within standard Java applications and within Android applications.
1. Introduction to the concept of dependency injection
See Dependency Injection for an introduction into the concept of dependency injection.
2. Dependency injection with Dagger 2
2.1. What is Dagger 2?
Dagger 2 is dependency injection framework. It is based on the Java Specification Request (JSR) 330. It uses code generation and is based on annotations. The generated code is relatively easy to read and debug.
Dagger 2 uses the following annotations:
-
@Moduleand@Provides: define classes and methods that provide dependencies -
@Inject: request dependencies. Can be used on a constructor, a field, or a method -
@Component: enable selected modules and used for performing dependency injection
Dagger 2 uses generated code to access the fields and not reflection. Therefore it is not allowed to use private fields for field injection.
2.2. Defining dependency providers (object providers)
The term dependency injection context is typically used to describe the set of objects that can be injected.
In Dagger 2, classes annotated with @Module are responsible for providing objects that can be injected.
Such classes can define methods annotated with @Provides.
The returned objects from these methods are available for dependency injection.
Methods annotated with @Provides can also express dependencies via method parameters.
These dependencies are fulfilled by Dagger 2, if possible.
2.3. Defining dependencies (object consumers)
You use the @Inject annotation to define a dependency.
If you annotate a constructor with @Inject, Dagger 2 can also use an instance of this object to fulfill dependencies.
This was done to avoid the definition of lots of @Provides methods for these objects.
2.4. Connecting consumers and providers
The @Component is used on an interface.
Such an interface is used by Dagger 2 to generate code.
The base pattern for the generated class is that Dagger is used as prefix followed by the interface name.
This generate class has a create method that allows configuring the objects based on the given configuration.
The methods defined on the interface are available to access the generated objects.
A @Component interface defines the connection between provider of objects (modules) and the objects that expresses a dependency.
The following table gives an overview of the usage of the Dagger annotations.
| Annotation | Usage |
|---|---|
|
Used on classes that contains methods annotated with |
|
Can be used on methods in classes annotated with |
|
Single instance of this provided object is created and shared. |
|
Used on an interface. This interface is used by Dagger 2 to generate code that uses the modules to fulfill the requested dependencies. |
2.5. Scope annotations
You can use the @Singleton annotation to indicate that there should be only one instance of the object.
2.6. Special treatment of fields in Dagger
Dagger 2 does not inject fields automatically.
It can also not inject private fields.
If you want to use field injection you have to define a method in your @Component interface that takes the instance into which you want to inject as parameter.
2.7. Using Dagger 2 with Eclipse and Maven
To use Eclipse and Maven together with Dagger 2 you can install the Maven tooling and the apt plug-in that allows Maven to configure the annotation processors.
For Eclipse Maven support use the update site of your release and afterwards install the m2e-apt tooling via the https://download.jboss.org/jbosstools/updates/m2e-extensions/m2e-apt update site.
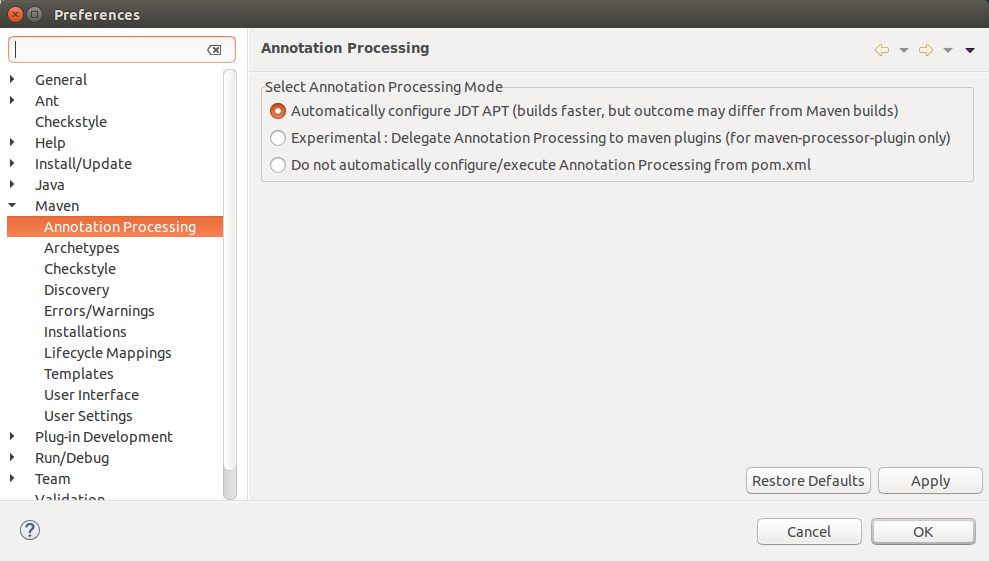
After the installation you must enable apt-processing on via the Eclipse preferences in . Select Automatically configure JDT APT.
3. Exercise: Dependency injection with Dagger 2
In this example, you use Dagger 2 in a standard Java program managed by Maven.
This exercise can be done via any Java IDE you like, for example the Eclipse IDE with the Maven tooling installed. Or it can be developed and compiled via a text editor and the Maven command line. If you use Eclipse, ensure to install the Eclipse Maven tooling.
3.1. Create example project for the usage of Dagger 2
Create a new Maven project with the com.vogella.java.dagger2 top-level package.
3.2. Define or adjust Maven build file
Adjust your pom.xml to the following.
<project xmlns="http://maven.apache.org/POM/4.0.0" xmlns:xsi="http://www.w3.org/2001/XMLSchema-instance"
    xsi:schemaLocation="http://maven.apache.org/POM/4.0.0 http://maven.apache.org/xsd/maven-4.0.0.xsd">
    <modelVersion>4.0.0</modelVersion>
    <groupId>com.vogella.java.dagger2</groupId>
    <artifactId>com.vogella.java.dagger2</artifactId>
    <version>0.0.1-SNAPSHOT</version>
    <name>com.vogella.java.dagger2</name>

    <dependencies>
        <dependency>
            <groupId>com.google.dagger</groupId>
            <artifactId>dagger</artifactId>
            <version>2.4</version>
        </dependency>
        <dependency>
            <groupId>com.google.dagger</groupId>
            <artifactId>dagger-compiler</artifactId>
            <version>2.4</version>
            <optional>true</optional>
        </dependency>
    </dependencies>
    <build>
        <plugins>
            <plugin>
                <artifactId>maven-compiler-plugin</artifactId>
                <version>3.3</version>
                <configuration>
                    <source>1.8</source>
                    <target>1.8</target>
                </configuration>
            </plugin>
        </plugins>
    </build>
</project>
3.3. Define classes that have a dependency
Define the following two classes that express dependencies.
package com.vogella.java.dagger2;

import jakarta.inject.Inject;

public class User {

    private String firstName;
    private String lastName;

    public User(String firstName, String lastName) {
        this.firstName = firstName;
        this.lastName = lastName;
    }

    @Override
    public String toString() {
        return "User [firstName=" + firstName + ", lastName=" + lastName + "]";
    }
}
package com.vogella.java.dagger2;
import jakarta.inject.Inject;
public class BackendService {
@Inject
public User user;
private String serverUrl;
@Inject
public BackendService(@Named("serverUrl") String serverUrl) {
this.serverUrl = serverUrl;
}
public boolean callServer() {
if (user !=null && serverUrl!=null && serverUrl.length()>0) {
System.out.println("User: " + user + " ServerUrl: " + serverUrl);
return true;
}
return false;
}
}3.4. Define modules that provide dependencies
Define two classes that act as providers for dependencies.
package com.vogella.java.dagger2.modules;

import jakarta.inject.Named;
import javax.inject.Singleton;

import com.vogella.java.dagger2.BackendService;

import dagger.Module;
import dagger.Provides;

@Module
public class BackEndServiceModule {

    @Provides
    @Singleton
    BackendService provideBackendService(@Named("serverUrl") String serverUrl) {
       return new BackendService(serverUrl);
    }

    @Provides
    @Named("serverUrl")
    String provideServerUrl() {
       return "https://www.vogella.com/";
    }

    @Provides
    @Named("anotherUrl")
    String provideAnotherUrl() {
       return "https://www.google.com";
    }

}
package com.vogella.java.dagger2.modules;
import javax.inject.Singleton;
import com.vogella.java.dagger2.User;
import dagger.Module;
import dagger.Provides;
@Module
public class UserModule {
@Provides
@Singleton
User providesUser() {
return new User("Lars", "Vogel");
}
}3.5. Define components
Components define from which modules (or other components) dependencies are provided. Dagger 2 uses this interface to generate the accessor class that provides the methods defined in the interface.
package com.vogella.java.dagger2.component;

import javax.inject.Singleton;

import com.vogella.java.dagger2.BackendService;
import com.vogella.java.dagger2.modules.BackEndServiceModule;
import com.vogella.java.dagger2.modules.UserModule;

import dagger.Component;

@Singleton
@Component(modules = { UserModule.class, BackEndServiceModule.class })
public interface MyComponent {

    // provide the dependency for dependent components
    // (not needed for single-component setups)
    BackendService provideBackendService();

    // allow to inject into our Main class
    // method name not important
    void inject(Main main); (1)
}| 1 | Method that allows injecting into BackendServer for the fields |
3.6. Use the generated dagger code
The usage of the generated code is demonstrated by the following test class.
package com.vogella.java.dagger2.main;

import com.vogella.java.dagger2.BackendService;
import com.vogella.java.dagger2.component.DaggerMyComponent;
import com.vogella.java.dagger2.component.MyComponent;

public class Main {

    @Inject
    BackendService backendService; // (1)

    private MyComponent component;

    private Main() {
        component = DaggerMyComponent.builder().build();
        component.inject(this);
    }

    private void callServer() {
        boolean callServer = backendService.callServer();
        if (callServer) {
            System.out.println("Server call was successful. ");
        } else {
            System.out.println("Server call failed. ");
        }
    }

    public static void main(String[] args) {
        Main main = new Main();
        main.callServer();
    }
}| 1 | Fields are not automatically injected hence the method call to inject the fields |
4. Dagger 2 and Android
4.1. Using dependency injection with Android
Many Android components, e.g., activities, are instantiated by the Android framework and not in your code. This makes it difficult to supply dependencies via constructors to Android components.
4.2. Using Dagger 2 in Android
To enable Dagger 2 add the following dependencies to your build.gradle file.
compile 'com.google.dagger:dagger:2.10'
annotationProcessor 'com.google.dagger:dagger-compiler:2.10'
If you want to use classes from the dagger.android package, like DaggerActivity, also add the following dependencies to your build.gradle file. This is also needed, if you want to inject Activities components like activities or fragments.
compile 'com.google.dagger:dagger-android:2.10'
annotationProcessor 'com.google.dagger:dagger-android-processor:2.10'
If you want to use the support libraries with Dagger 2, you also have to add the following to your build.gradle
compile 'com.google.dagger:dagger-android-support:2.10'5. Exercise: Dependency injection in Android activities with Dagger 2
In this exercise the usage of the Dagger 2 dependency injection framework in an Android application is demonstrated. In our simple app, there is an activity that allows a user to authenticate his credentials. The result value of the implementation is displayed in a text field.
|
Android studio does not build the project automatically, hence you frequently get compilation errors because the generated code is not yet there. Select to trigger the generation of the code. |
5.1. Create project
Create a new project with the top-level package com.vogella.android.dagger2simple. Use the Empty Activity template.
The activity layout file should look similar to the following:
<?xml version="1.0" encoding="utf-8"?>
<LinearLayout xmlns:android="http://schemas.android.com/apk/res/android"
              xmlns:tools="http://schemas.android.com/tools"
              android:layout_width="match_parent"
              android:layout_height="match_parent"
              android:orientation="vertical"
              tools:context=".MainActivity">

    <TextView
        android:id="@+id/target"
        android:layout_width="wrap_content"
        android:layout_height="wrap_content"
        android:text="Hello"
        android:textAppearance="@android:style/TextAppearance.DeviceDefault.Large"/>
</LinearLayout>
5.2. Enter Gradle dependencies
Add the following dependencies to your app/build.gradle file.
compile 'com.google.dagger:dagger:2.11'
compile 'com.google.dagger:dagger-android:2.11'
annotationProcessor 'com.google.dagger:dagger-android-processor:2.11'
annotationProcessor 'com.google.dagger:dagger-compiler:2.11'|
If you are getting an like Error:Conflict with dependency 'com.google.code.findbugs:jsr305' in project ':app' you can add the following to your |
5.3. Define your dependency graph
As mentioned above, Android components (activities, fragments, etc.) are instantiated by the Android framework which makes it difficult to use dependency injection on them. Fortunately, Dagger provides classes that simplifies the dependency injection into Android components.
Create a class named NetworkApi. This class will be injected into the activity.
package com.vogella.android.dagger2simple;

import jakarta.inject.Inject;

public class NetworkApi {

    @Inject
    public NetworkApi(){
    }

    public boolean validateUser(String username, String password) {
        // imagine an actual network call here
        // for demo purpose return false in "real" life
        if (username == null || username.length() == 0) {
            return false;
        } else {
            return true;
        }
    }
}
With the @Inject annotation on the constructor, we instruct Dagger that an object of this class can be injected into other objects.
Dagger automatically calls this constructor, if an instance of this class is requested.
Adjust your activity to receive an instance of NetworkApi.
This demonstrates the dependency injection with the NetworkApi.
package com.vogella.android.dagger2simple;

import android.app.Activity;
import android.os.Bundle;
import android.widget.TextView;

import jakarta.inject.Inject;

import dagger.android.AndroidInjection;

public class MainActivity extends Activity {

    @Inject
    NetworkApi networkApi;

    @Override
    protected void onCreate(Bundle savedInstanceState) {
        AndroidInjection.inject(this);
        super.onCreate(savedInstanceState);
        setContentView(R.layout.activity_main);
        boolean injected = networkApi == null ? false : true;
        TextView userAvailable = (TextView) findViewById(R.id.target);
        userAvailable.setText("Dependency injection worked: " + String.valueOf(injected));
    }
}
Create am application object.
package com.vogella.android.dagger2simple;

import android.app.Activity;
import android.app.Application;

public class MyApplication extends Application {

    @Override
    public void onCreate() {
        super.onCreate();
    }
}
Register the Application class via the manifest like the following.
<?xml version="1.0" encoding="utf-8"?>
<manifest xmlns:android="http://schemas.android.com/apk/res/android"
    package="com.vogella.android.dagger2simple" >

    <application
        android:name=".MyApplication"
        android:allowBackup="true"
        android:icon="@mipmap/ic_launcher"
        android:label="@string/app_name"
        android:theme="@style/AppTheme" >
        <activity
            android:name=".MainActivity"
            android:label="@string/app_name" >
            <intent-filter>
                <action android:name="android.intent.action.MAIN" />

                <category android:name="android.intent.category.LAUNCHER" />
            </intent-filter>
        </activity>
    </application>

</manifest>
Create a module named MyApplicationModule like the following.
package com.vogella.android.dagger2simple;


import dagger.Module;
import dagger.Provides;
import dagger.android.ContributesAndroidInjector;

@Module
public abstract class MyApplicationModule {
    @ContributesAndroidInjector
    abstract MainActivity contributeActivityInjector();
}
It extends the AndroidInjector to perform injection on a concrete Android component type (in our case MainActivity).
5.4. Update your Application class and prepare dependency injection
Create an interface called MyApplicationComponent. This component is responsible for injecting the Application class.
package com.vogella.android.dagger2simple;

import dagger.Component;
import dagger.android.AndroidInjectionModule;
import dagger.android.AndroidInjector;

@Component(modules = { AndroidInjectionModule.class, MyApplicationModule.class})
public interface MyApplicationComponent extends AndroidInjector<MyApplication> {
}
In the @Component annotation the modules are specified that are used to create the implementation of the component.
While we reference our ActivityModule to inject activities, we also reference the AndroidInjectionModule which is needed to ensure the binding of the Android base types (Activities, Fragments, etc.).
Adjust MyApplication to the following.
package com.vogella.android.dagger2simple;

import android.app.Activity;
import android.app.Application;

import jakarta.inject.Inject;

import dagger.android.DispatchingAndroidInjector;
import dagger.android.HasActivityInjector;

public class MyApplication extends Application implements HasActivityInjector {
    @Inject
    DispatchingAndroidInjector<Activity> dispatchingAndroidInjector;

    @Override
    public void onCreate() {
        super.onCreate();
        DaggerMyApplicationComponent.create().inject(this);
    }

    @Override
    public DispatchingAndroidInjector<Activity> activityInjector() {
        return dispatchingAndroidInjector;
    }
}
Select to trigger the generation of the code.
Here, we use our MyApplicationComponent (now prefixed with Dagger) to inject our Application class. This way a DispatchingAndroidInjector is injected which is then returned when an injector for an activity is requested (through activityInjector()).
5.5. Validate
Run your application, the user interface should report that dependency injection worked. If not, have a look at the generated classes in the app/build/generated/apt folder. The generated classes by Dagger are well structured and should give a hint what went wrong.
5.6. Optional: Use the @Provides annotation
If you have a class that you want to make injectable and you are not allowed to change it (to annotate the constructor), you have the possibility to provide a new static method to your module that returns an instance of that class to make it injectable.
If you prefer this way, remove the @Inject annotation from the NetworkApi constructor, and add the following lines to your ActivityModule class.
    @Provides
    static NetworkApi provideNetworkApi(){
        return new NetworkApi();
    }
6. Replacing @Module classes in tests
For tests you can your custom modules and setup Dagger to use them. The generated builder of Dagger contains methods to set the module. You can use the Dagger build to replace the generated class with the one which should be used for testing.
This also works well with Mockito. Assume you have the following class you want to test.
public class ImportantClass {
    private MyRestService restService;
    private MyLogger logger;

    @Inject public MainService(MyRestService restService, MyLogger logger) {
        this.restService = restService;
        this.logger = logger;
    }

    public void perform() {
        String s = restService.getData();
        logger.write(s.toUpperCase());
    }
}
You can test this class with Mockito.
public class ImportantClassTest {

public class MainServiceTest {

    @Rule public MockitoRule mockitoRule = MockitoJUnit.rule();

    @Mock MyRestService restService;

    @Mock MyLogger logger;

    @InjectMocks ImportantClass importClassToBeTested;

    @Test
    public void performShouldWriteOutput() {
        when(restService.getData()).thenReturn("abc");

        importClassToBeTested.perform();

        verify(logger).print("ABC");
    }
}
}
Better support for replacing Dagger dependencies is offered by https://github.com/fabioCollini/DaggerMock.
7. Dagger resources
7.1. vogella Java example code
If you need more assistance we offer Online Training and Onsite training as well as consulting