This tutorial describes the usage of Maven within the Eclipse IDE for building Java applications.
1. Using Maven with the Eclipse IDE
The Eclipse IDE provides support for the Maven build. This support is developed in the M2Eclipse project.
It provides an editor for modifying the pom file and downloads dependencies if required. It manages the classpath of the projects in the IDE. You can use wizards to import existing Maven projects and to create new Maven projects.
2. Installation and configuration of Maven for Eclipse
2.1. Installation of the Maven tooling for the Eclipse IDE
Most Eclipse IDE downloads already include support for the Maven build system.
To check, use and check if you can see the Maven logo (with the M2E) sign.

If Maven support is not yet installed, the following description can be used to install it.
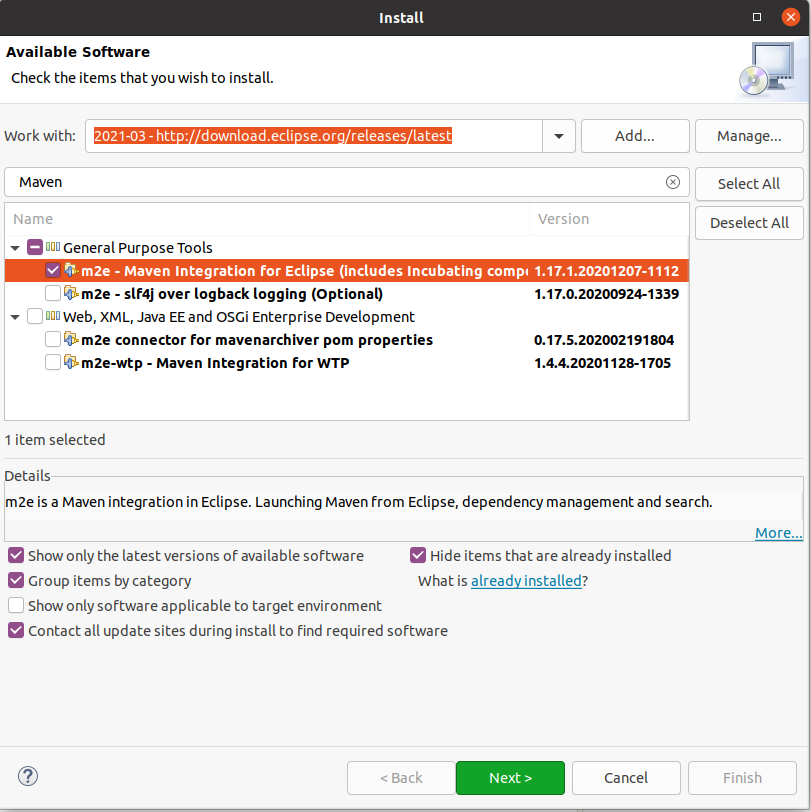
Installation of Maven support into the Eclipse IDE
To install Maven support, select the menu entry. To use the latest release, enter the following URL in the Works with field.
https://download.eclipse.org/releases/latestFor the usage of Maven for Java projects, you only need the m2e component.
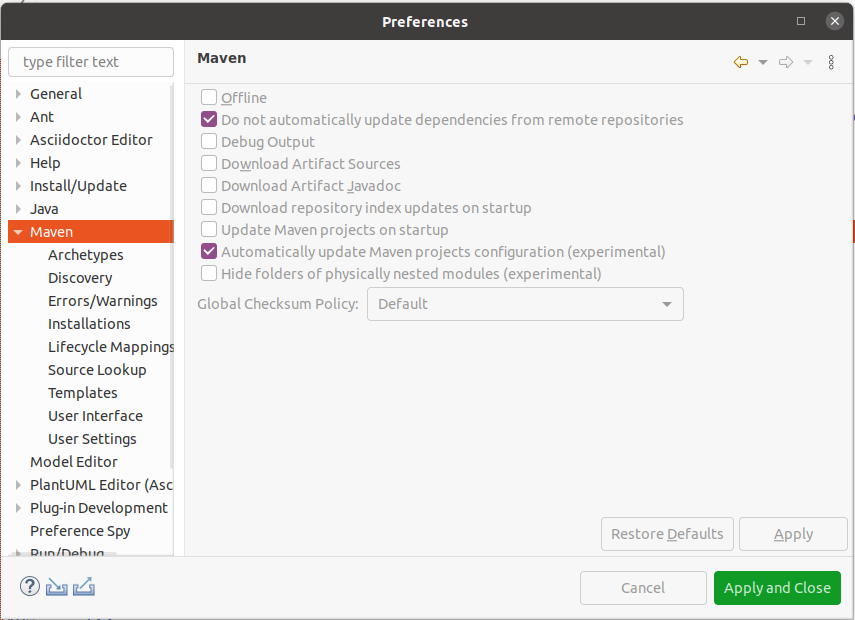
2.2. Configure automatically updates of Maven dependencies
In most cases it is useful if changes in the Maven configuration automatically updates the project settings.
Therefore, et the Automatically update Maven projects configuration flag under .
3. Exercise: Create a new Maven project via the Eclipse IDE
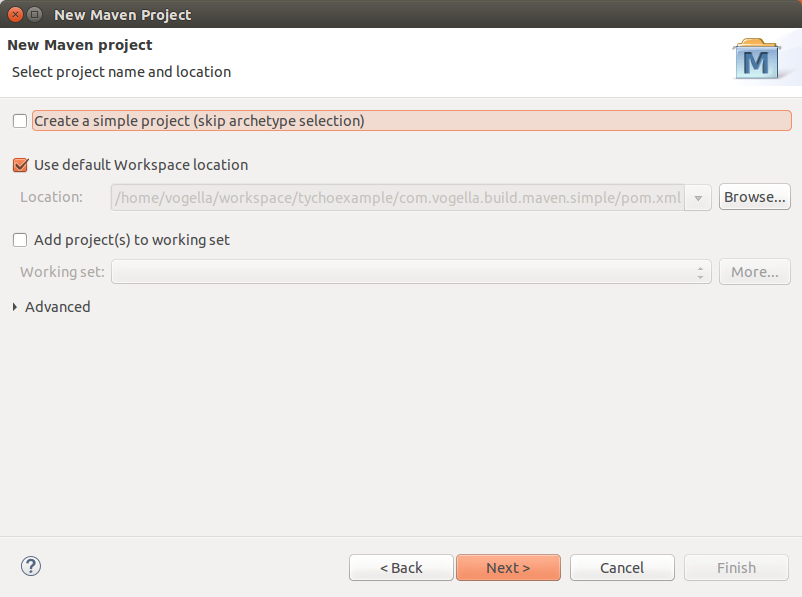
In this exercise, you learn how to create a new Maven project with the Eclipse === Create Maven project
Create a new Maven project via .
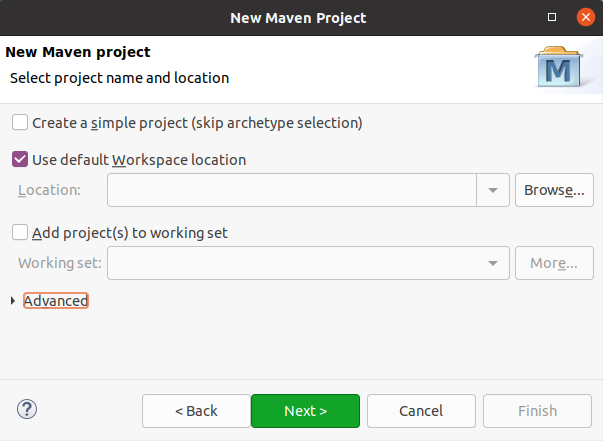
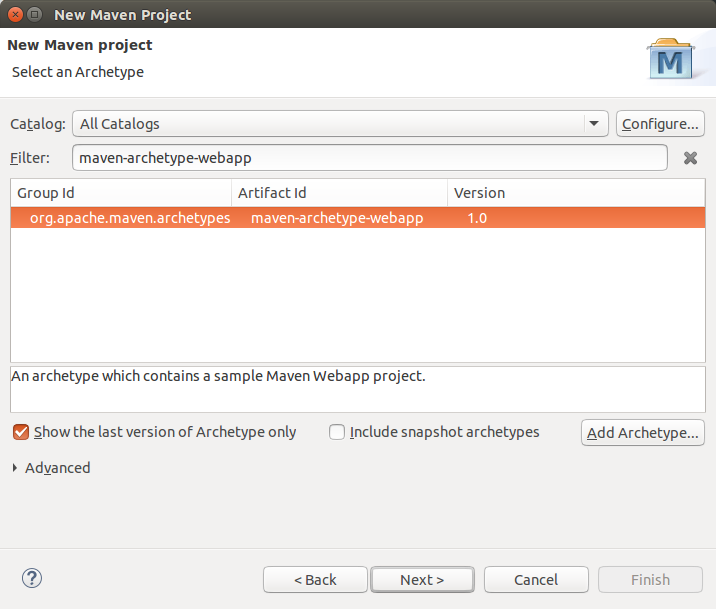
On the first wizard page, you can select if you want to create a simple project. In this case you skip the archetype selection. In this exercise we want to use an archetype as template for our project creation.
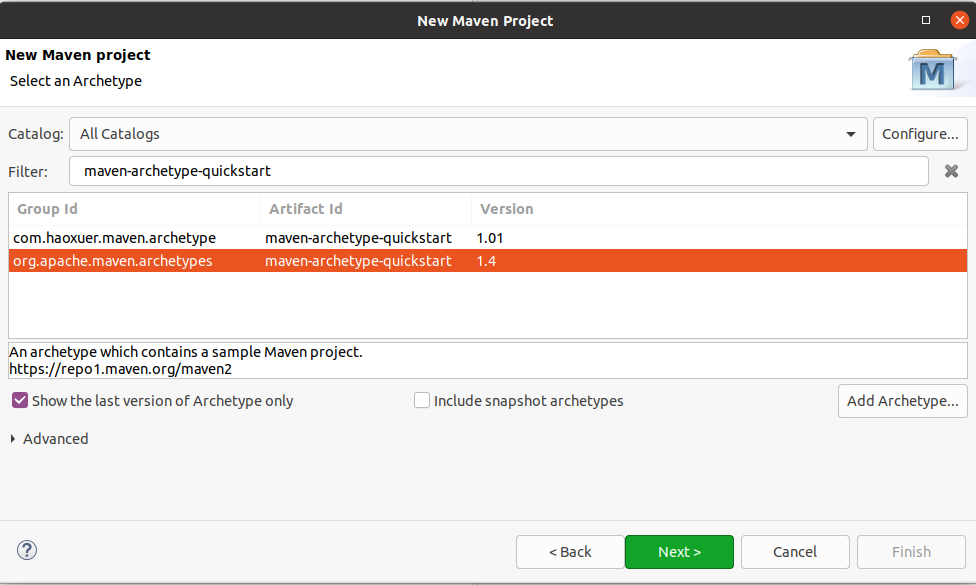
Press next, filter for the "maven-archetype-quickstart" archetype and select the entry with the apache group.
This is the classical Maven example archetype for project creation.
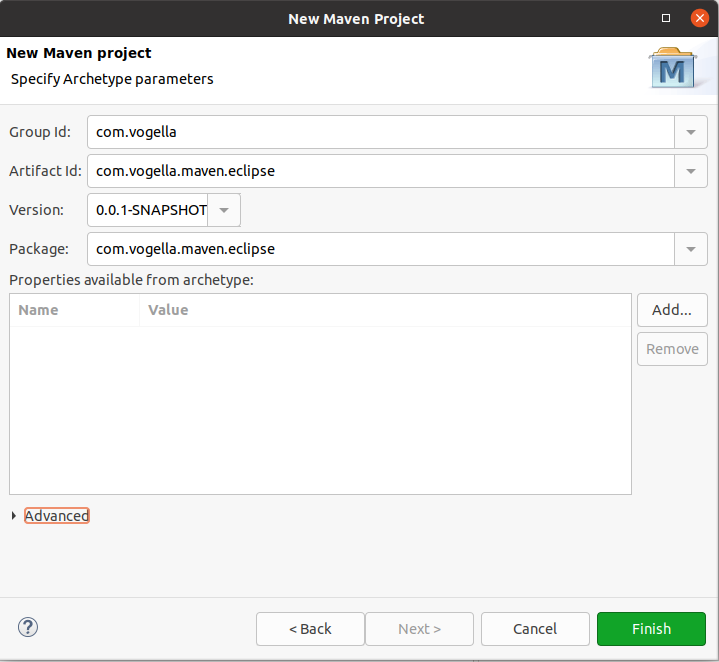
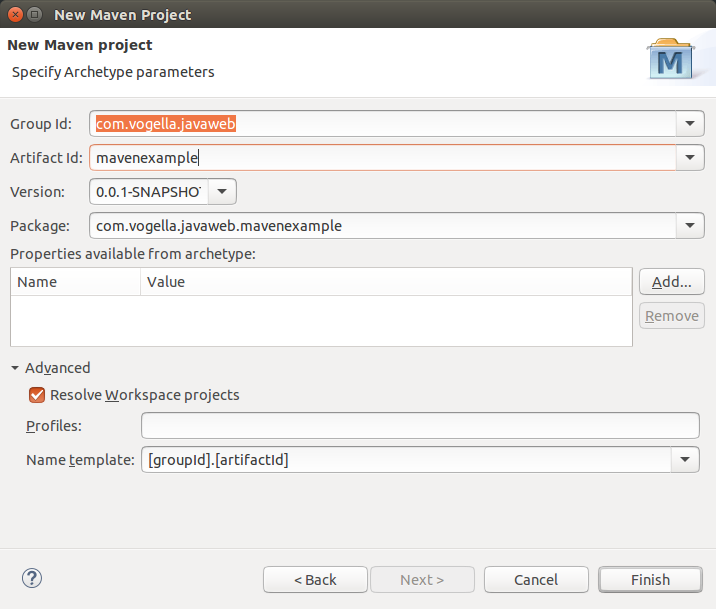
On the last tab enter the GAV of your project similar to the following screenshot.
3.1. Update project to use Java
Change the pom file of the generated project to use Java 11. For this copy the following code onto the content via the pom.xml tab of the Maven editor.
<?xml version="1.0" encoding="UTF-8"?>

<project xmlns="https://maven.apache.org/POM/4.0.0" xmlns:xsi="https://www.w3.org/2001/XMLSchema-instance"
  xsi:schemaLocation="https://maven.apache.org/POM/4.0.0 https://maven.apache.org/xsd/maven-4.0.0.xsd">
  <modelVersion>4.0.0</modelVersion>

  <groupId>com.vogella</groupId>
  <artifactId>com.vogella.maven.eclipse</artifactId>
  <version>0.0.1-SNAPSHOT</version>

  <name>com.vogella.maven.eclipse</name>
  <url>https://www.vogella.com</url>

  <properties>
    <project.build.sourceEncoding>UTF-8</project.build.sourceEncoding>
    <maven.compiler.source>11</maven.compiler.source>
    <maven.compiler.target>11</maven.compiler.target>
  </properties>
</project>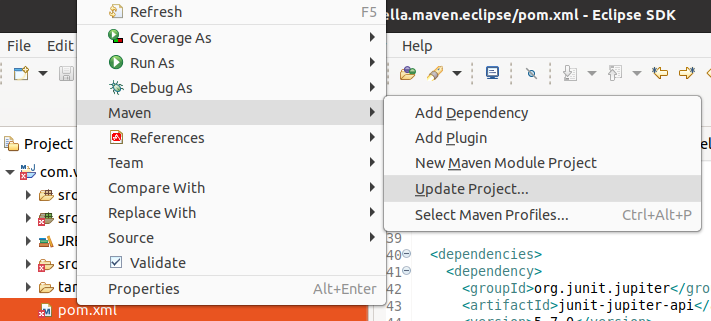
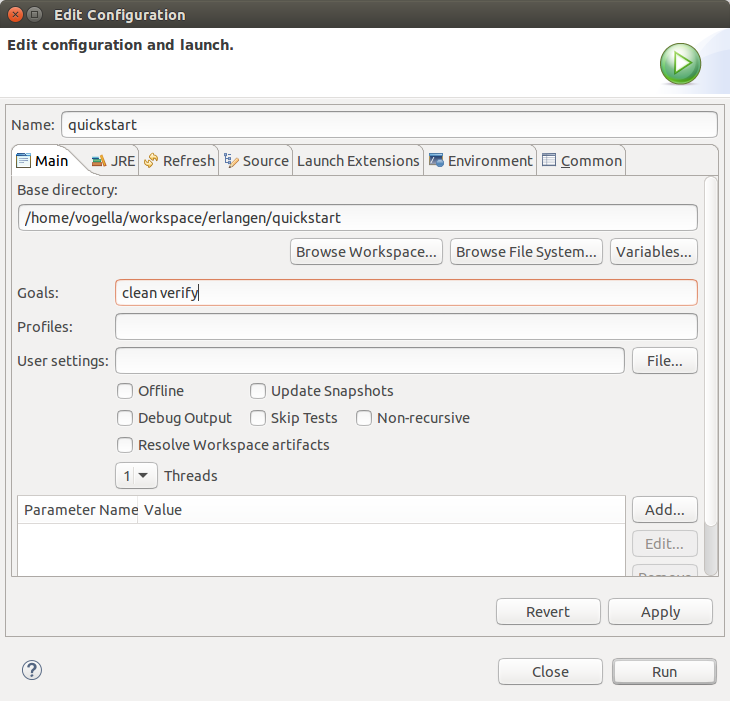
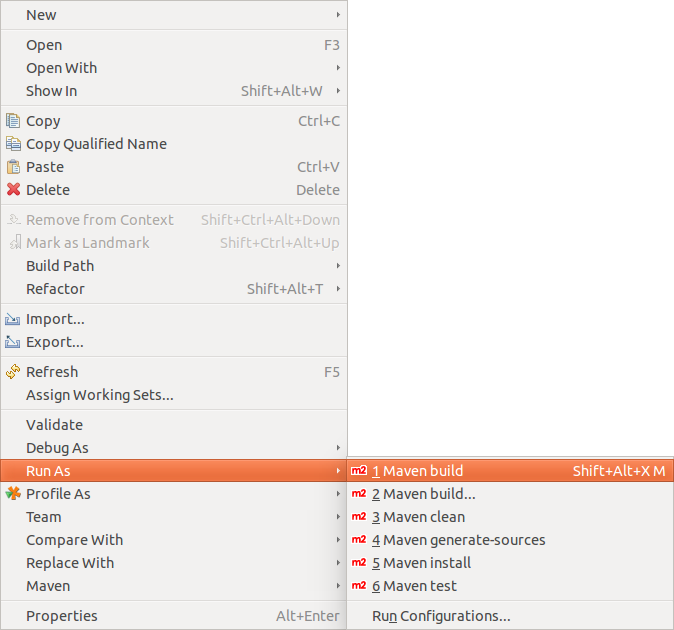
3.3. Validate
Validate that the Maven build is correctly configured by running the build. For this right-click the pom.xml file and select .
This opens a dialog that allows defining the parameters for the start.
Enter clean verify in the Goals: field and press the Run button.
4. Exercise: Adjust generated project to use JUnit5 and external libraries
In this exercise, you adjust your generated project to use JUnit5.
4.1. Change generated project
Change the pom file of the generated project to use JUnit 5. For this copy the following code onto the content via the pom.xml tab of the Maven editor.
<?xml version="1.0" encoding="UTF-8"?>

<project xmlns="https://maven.apache.org/POM/4.0.0" xmlns:xsi="https://www.w3.org/2001/XMLSchema-instance"
  xsi:schemaLocation="https://maven.apache.org/POM/4.0.0 https://maven.apache.org/xsd/maven-4.0.0.xsd">
  <modelVersion>4.0.0</modelVersion>

  <groupId>com.vogella</groupId>
  <artifactId>com.vogella.maven.eclipse</artifactId>
  <version>0.0.1-SNAPSHOT</version>

  <name>com.vogella.maven.eclipse</name>
  <url>https://www.vogella.com</url>

  <properties>
    <project.build.sourceEncoding>UTF-8</project.build.sourceEncoding>
    <maven.compiler.source>11</maven.compiler.source>
    <maven.compiler.target>11</maven.compiler.target>
  </properties>

  (1)
  <build>
    <plugins>
      <plugin>
        <artifactId>maven-surefire-plugin</artifactId>
        <version>2.22.2</version>
      </plugin>
      <plugin>
        <artifactId>maven-failsafe-plugin</artifactId>
        <version>2.22.2</version>
      </plugin>
    </plugins>
  </build>

  (2)
  <dependencies>
    <dependency>
      <groupId>org.junit.jupiter</groupId>
      <artifactId>junit-jupiter-api</artifactId>
      <version>5.7.2</version>
      <scope>test</scope>
    </dependency>
    <dependency>
      <groupId>org.junit.jupiter</groupId>
      <artifactId>junit-jupiter-engine</artifactId>
      <version>5.7.2</version>
      <scope>test</scope>
    </dependency>
  </dependencies>

</project>4.3. Update test
Update your generated test to JUnit 5 via the following:
package com.vogella.maven.eclipse;


import static org.junit.jupiter.api.Assertions.assertTrue;

import org.junit.jupiter.api.Test;

public class AppTest
{
    @Test
    public void shouldAnswerWithTrue()
    {
        assertTrue( true );
    }
}
4.4. Adding dependencies to your project
The Eclipse Maven tooling makes adding dependencies to the classpath of your project simple. In can directly add it to your pom file, or use the Dependencies tab of the pom editor.
Switch to the Dependencies tab and press the Add button.
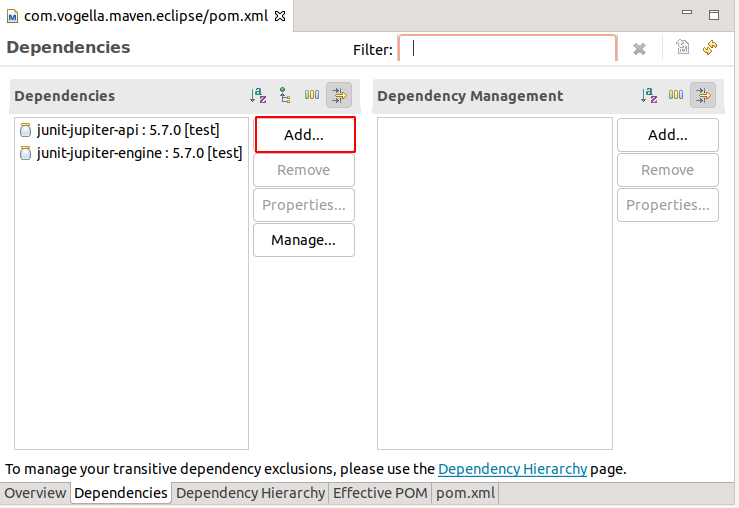
In this example, we add Gson as a dependency. For this we use the latest GAV which we find via https://mvnrepository.com/artifact/com.google.code.gson/gson
|
If the Maven index was downloaded you can search directly this dependency via the dialog. 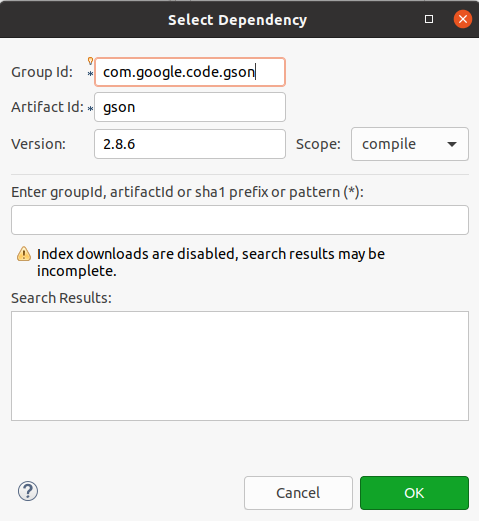 |
Right-click your project and select and update your project.
4.5. Use library
Change or create the App.java class in your src/main/java folder.
This classes uses Gson.
As Maven added it to your classpath, it should compile and you should be able to start the class via Eclipse.
package com.vogella.maven.lars;

import com.google.gson.Gson;

public class App
{
    public static void main( String[] args )
    {
        Gson gson = new Gson();
        System.out.println(gson.toJson("Hello World!") );
    }
}
4.6. Validate
Run the Maven build again and verify that the build runs successfully.
5. Exercise: Converting a Java project (create with Eclipse) to Maven
This exercise demonstrates how to convert a Java project to a Maven project.
5.1. Create Java project
Create a new Java project called com.vogella.build.maven.simple in Eclipse.
Add one class called Main.
This class should have a main method, which write "Hello Maven!" to the command line.
package com.vogella.build.maven.simple;

public class Main {

    public static void main(String[] args) {
        System.out.println("Hello Maven!");
    }
}
5.2. Convert to Maven project
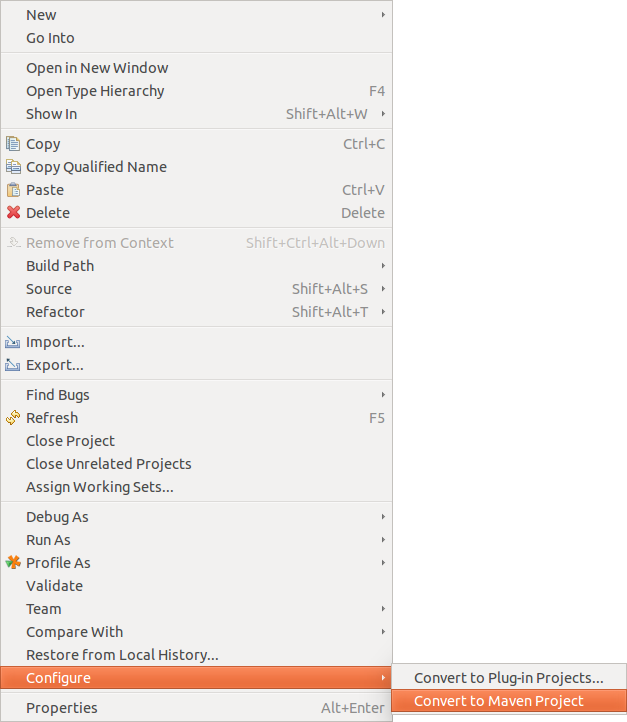
Select your project, right-click on it and select .
This creates a pom.xml file similar to the following.
<project
    xmlns="http://maven.apache.org/POM/4.0.0"
    xmlns:xsi="http://www.w3.org/2001/XMLSchema-instance"
    xsi:schemaLocation="http://maven.apache.org/POM/4.0.0 http://maven.apache.org/xsd/maven-4.0.0.xsd">
  <modelVersion>4.0.0</modelVersion>
  <groupId>com.vogella.build.maven.simple</groupId>
  <artifactId>com.vogella.build.maven.simple</artifactId>
  <version>0.0.1-SNAPSHOT</version>
  <build>
    <sourceDirectory>src</sourceDirectory>
    <plugins>
      <plugin>
        <artifactId>maven-compiler-plugin</artifactId>
        <version>3.1</version>
        <configuration>
          <source>1.8</source>
          <target>1.8</target>
        </configuration>
      </plugin>
    </plugins>
  </build>
</project>
5.3. Execute the Maven build
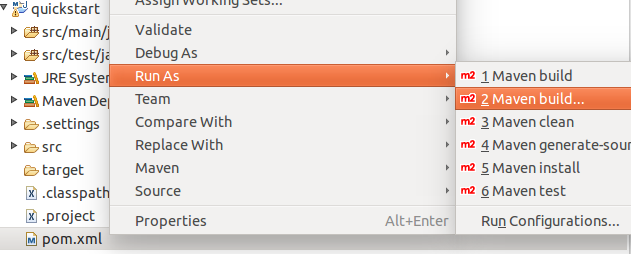
Right-click the pom.xml file and select .
Enter "clean install" as Goal.
| You have to enter the goals manually. The Select… button does not work, the dialog it displays is always empty. |
Press the Finish button. This starts the build, which you can follow in the Console view.
Once the build finishes, press F5 on the project to refresh it. You see a target folder that contains the build artifacts, e.g., a JAR file.
6. Exercise: Create a Java web project in Eclipse using Maven
This exercise demonstrates how to create a web application in Eclipse that uses Maven. It assumes that you have already configured Eclipse for the creation of web applications.
6.1. Create a Maven web project
Create a new Maven project called com.vogella.javaweb.maven.first via the entry. On the archetype selection, select the maven-archetype-webapp entry and click the Next button.
Enter the group, artifact and version of your new Maven component.
|
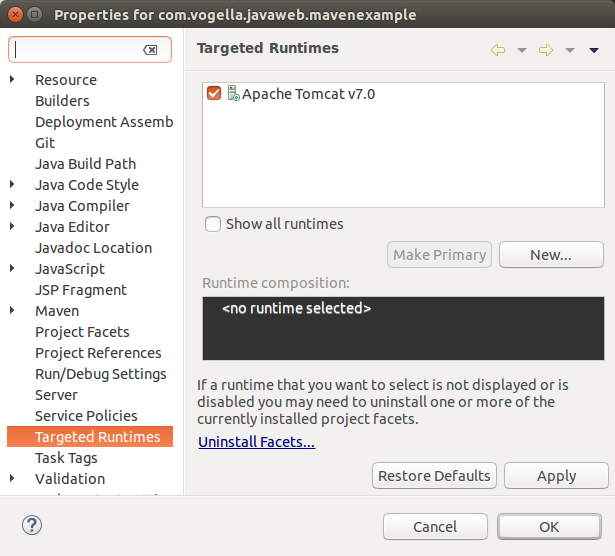
You may see the error: The superclass "javax.servlet.http.HttpServlet" was not found on the Java Build Path. To fix this, right-click on your project and select Properties. On the Targeted Runtimes select your web server entry, e.g., Tomcat. |
6.2. Build your project
Run your mvn clean verify build command from Eclipse.
Validate that there are no issues with the build.
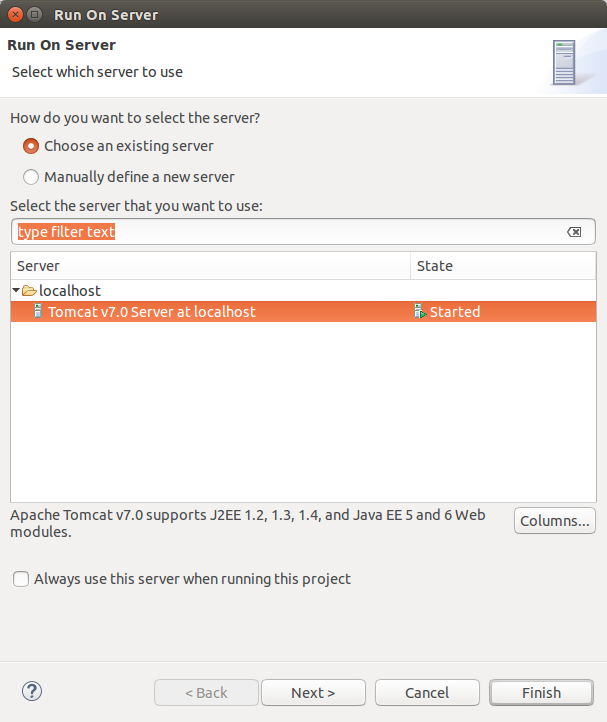
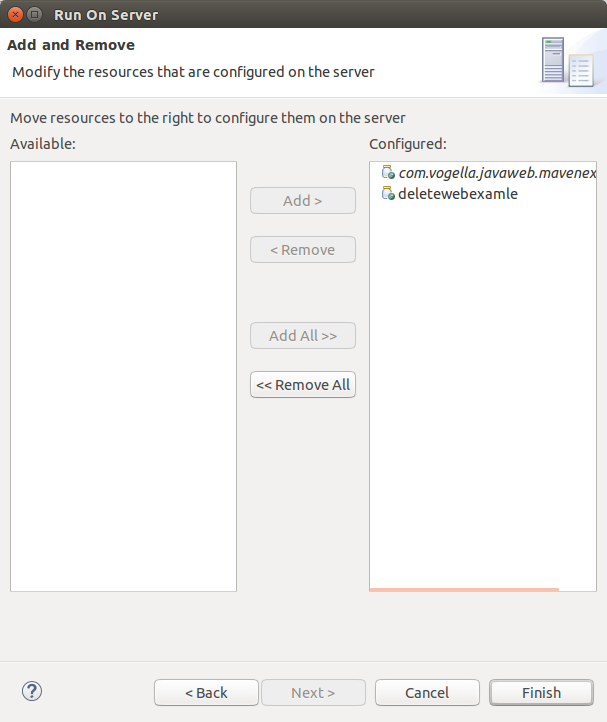
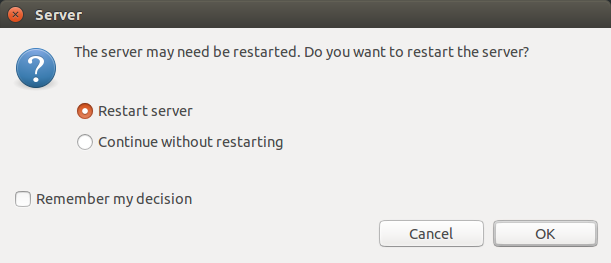
6.3. Run on the server
Right-click your project and select the menu entry.
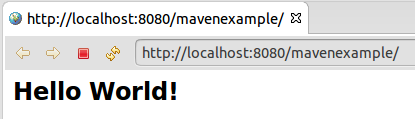
If you open a browser you should be able to access your webapplication.
7. Exercise: Debug tests
Add a breakpoint in Eclipse in one of your tests.
Start your Maven build on the command line with the debug parameter.
mvn -Dmaven.surefire.debug testThis stop the command line build once the tests are executed and listen on port 5005 for a remote connection.
In Eclipse select the and create a new Remote Java Application run configuration.
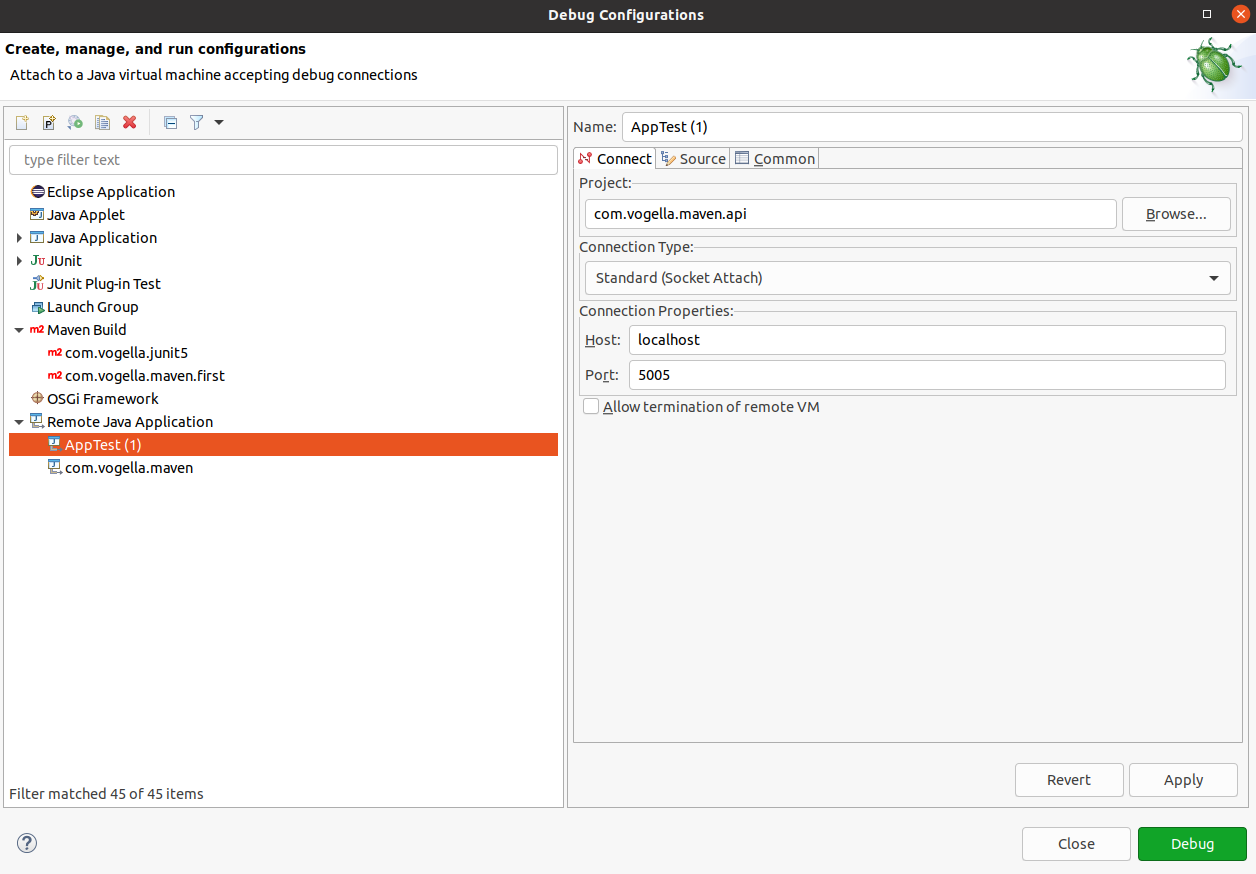
Ensure to enter the correct project and the port 5005. Press the Debug button to connect to the running build. You can now debug your test.
8. References for Webdevelopment with Eclipse
To use Maven in Eclipse for Java web development, you should install an configure the Eclipse web development tools (WTP). See Eclipse Web Development Tools for a tutorial.
9. Eclipse Maven (m2e) resources
9.1. vogella Java example code
If you need more assistance we offer Online Training and Onsite training as well as consulting