Eclipse RCP Help System. This article describes how to add help to an Eclipse 3.x RCP application. It is based on Eclipse Neon (4.6).
1. Eclipse Help
1.1. Overview
Eclipse has a build-in help system that allows to start and access the help system directly from your Eclipse RCP application. The Eclipse help system is based on HTML, the "org.eclipse.help.toc" extension points and additional XML files that point to the HTML files.
Via the extension point you describe the first level structure and point to XML files. These XML files contain references to the relevant HTML files.
Typically help content is delivered via separate plug-ins. To use help in your Eclipse RCP project either add the following plug-ins and their dependencies to your product:
-
org.eclipse.help.ui
-
org.eclipse.help.webapp
-
org.eclipse.equinox.http.jetty
or if you product is feature-based add the org.eclipse.help feature and org.eclipse.ui.forms plug-in to your product configuration file.
Eclipse defines several predefined commands which you can use in your RCP application.
-
"org.eclipse.ui.help.displayHelp" - Opens the help
-
"org.eclipse.ui.help.helpSearch" - Open the Search
-
"org.eclipse.ui.help.dynamicHelp" - Opens the Help specific for the current selection if this is configured in the application
1.2. Extension point
The following shows an example of an extension for "org.eclipse.help.toc". The toc entry that has the primary="true" flag set will be treated as a main entry in the help, all others will be treated as subtopics. Topics not flagged as "primary" will not show up in the help hierarchy unless they are linked to from at least one primary toc file. The file attribute points to the XML file which describes the content.
<?xml version="1.0" encoding="utf-8"?>
<?eclipse version="3.4"?>
<plugin>

   <extension
         point="org.eclipse.help.toc">
      <toc
            file="toc.xml"
            primary="true">
      </toc>
      <toc
            file="tocconcepts.xml">
      </toc>
      <toc
            file="tocgettingstarted.xml">
      </toc>
      <toc
            file="tocreference.xml">
      </toc>
      <toc
            file="tocsamples.xml">
      </toc>
      <toc
            file="toctasks.xml">
      </toc>
   </extension>

</plugin>
The primary toc file defines anchor points to which other toc files can contribute content. For example, the following "toc.xml" defines two anchor points "gettingstarted" and "samples". This approach is called "bottom-up composition". Eclipse help files can also be build with a "top-down nesting" approach but this tutorial not only use "bottom-up composition". "Bottom-up composition" allow that the top level toc does not know who is extending its anchors. New plug-ins could add new content to these anchors without the need to change the primary toc. This concept is close to the extension point mechanism in Eclipse.
<?xml version="1.0" encoding="utf-8"?>
<?NLS TYPE="org.eclipse.help.toc"?>

<toc label="Address Book Help" topic="html/toc.html[
   <topic label="Getting Started">
      <anchor id="gettingstarted"/>
   </topic>
   <topic label="Samples">
      <anchor id="samples"/>
   </topic>
</toc>
The following shows the non primary ""tocgettingstarted.xml" file. Via the href attribute this toc file links the chapters to actual HTML files. The "link_to" attribute points to the anchors of the primary toc.
<?xml version="1.0" encoding="utf-8"?>
<?NLS TYPE="org.eclipse.help.toc"?>

<toc label="Getting Started" link_to="toc.xml#gettingstarted">
    <topic label="Main Topic"  href="html/gettingstarted/maintopic.html[
        <topic label="Sub Topic" href="html/gettingstarted/subtopic.html" />
    </topic>
    <topic label="Main Topic 2">
        <topic label="Sub Topic 2" href="html/gettingstarted/subtopic2.html" />
    </topic>
</toc>
1.3. Internationalization
To support several languages in your help plug-in place the content into a special directory into your plug-in called "nl/language/country" thereby country is optional. For example, to provide English and German content use "nl/en" and "nl/de".
The help system will first search in the "nl/language/country" directory, afterwards in the "nl/language" directory and if it does not find anything there then it searches in the root folder of the plug-in directory.
Typically translations of help content are provides via Fragment projects for the primary help plug-in. At runtime, the host plug-in and its fragments are merged to one.
1.4. Generating Eclipse Help
Writing the HTML and XML files for the Eclipse help can be time consuming. One frequently used approach is to write Docbook files. Docbook source files can be converted into PDF, HTML and Eclipse help files via the Docbook XSLT stylesheets.
1.5. Context sensitive help
You can add context sensitive help to your application using the extension point "org.eclipse.help.contexts". This extension point defines a file for a certain plug-in.
<extension
      point="org.eclipse.help.contexts">
   <contexts
         file="contextDefinitionFile.xml"
         plugin="de.vogella.helptest">
   </contexts>
</extension>
This file defines Id’s and links to the HTML pages of the help system. The file can be maintained with the specialized "Context Help Editor".
<?xml version="1.0" encoding="utf-8"?>
<contexts>
    <context id="myId">
        <description> This is a sample F1 help string.</description>
        <topic href="contexts/RelatedContext1.html" label="Help Related Topic 1" />
        <topic href="contexts/RelatedContext2.html" label="Help Related Topic 2" />
    </context>
</contexts>
To assign these id to your SWT controls you can use the following code:
PlatformUI.getWorkbench().getHelpSystem().setHelp(control, "myId");If the user opens the dynamic help via the command "org.eclipse.ui.help.dynamicHelp" then the corresponding help is displayed.
1.6. ActiveHelp
You can link from the help to Eclipse commands. This feature is called ActiveHelp and requires that you add a small JavaScript snippet to your HTML code. You find an example for how to use this in the Eclipse help. Search for "Active Help".
2. Prerequisites for this tutorial
This tutorial assumes that you have basic understanding of development for the Eclipse platform. Please see Eclipse RCP Tutorial or Eclipse plug-in Tutorial if you need any basic information.
3. Example
3.1. Project with help
The following will demonstrate how to create the help in a separated plug-in that contains all help related content.
Create a new Eclipse RCP project "de.vogella.rcp.help.application" with the template "RCP application with a view". Create another plug-in (not RCP application) "de.vogella.rcp.help.content" with the template "Plug-in with sample help content". Select the following options.
Add the following plug-ins as a dependency to your "de.vogella.rcp.help.content" plugin.
-
org.eclipse.help.ui
-
org.eclipse.help.webapp
-
org.eclipse.equinox.http.jetty
Add the command to "org.eclipse.ui.help.displayHelp" to the main menu in "de.vogella.rcp.help.content". Optionally you can assign the key "F1" via the extension point "org.eclipse.ui.bindings" to the command.
Create a launch configuration which includes "de.vogella.rcp.help.application" and "de.vogella.rcp.help.content" and all dependencies and run your application. You should be able to open the help content via the menu.
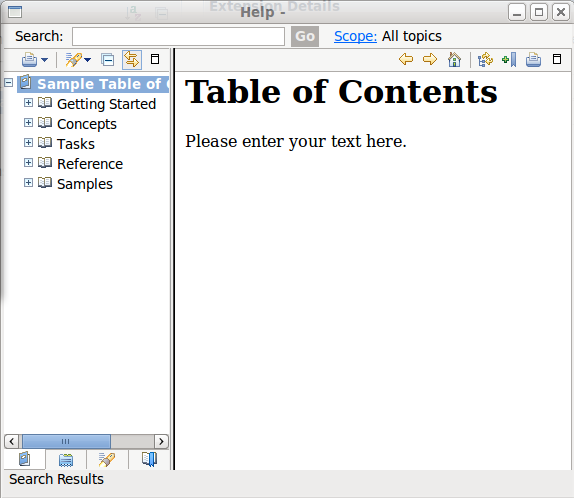
To understand the structure of the help file check your plugin.xml and you see that the extension point "org.eclipse.help.toc" is used to point to toc*.xml files which describes the help content.
3.2. Adding search and context sensitive help
You can add a search dialog and context sensitive help to your application. To do this you add the commands "org.eclipse.ui.help.helpSearch" and "org.eclipse.ui.help.dynamicHelp" to your application. Unfortunately, you have to activate these in the "ApplicationActionBarAdvisor" class via the following coding.
package de.vogella.rcp.help.application;

import org.eclipse.ui.IWorkbenchWindow;
import org.eclipse.ui.actions.ActionFactory;
import org.eclipse.ui.actions.ActionFactory.IWorkbenchAction;
import org.eclipse.ui.application.ActionBarAdvisor;
import org.eclipse.ui.application.IActionBarConfigurer;

public class ApplicationActionBarAdvisor extends ActionBarAdvisor {

    protected void makeActions(IWorkbenchWindow window) {
        register(ActionFactory.HELP_SEARCH.create(window));
        register(ActionFactory.DYNAMIC_HELP.create(window));
    }

    public ApplicationActionBarAdvisor(IActionBarConfigurer configurer) {
        super(configurer);
    }

}
Now you can call the help search and the context sensitive help. To define the targets for the context sensitive search create a file "context.xml" in your help plug-in with the following content.
<contexts>
   <context id="message">
      <description>This is the sample context-sensitive help. There is a link to the help content below.</description>
      <topic href="html/gettingstarted/subtopic.html" label="Subtopic" />
   </context>
</contexts>
You then have to define an extension "org.eclipse.help.contexts" that points to the file "context.xml".
<extension
         point="org.eclipse.help.contexts">
    <contexts
            file="context.xml"
            plugin="de.vogella.rcp.help.content">
    </contexts>
</extension>
After this you can assign the help to individual controls. For example you can assign the help to your table control.
Text text = new Text(parent, SWT.NONE);
text.setText("Hello");
PlatformUI.getWorkbench().getHelpSystem().setHelp(text, "message");
4. Links and literature
4.2. vogella Java example code
If you need more assistance we offer Online Training and Onsite training as well as consulting