Eclipse JFace Table. This tutorial explains the usage of Eclipse JFace TableViewer API.
1. JFace table viewer
1.1. Using tables with JFace
You can use the TableViewer class to create tables using the JFace framework.
This class wraps the Table widget and makes it simpler to use with a custom data model.
The table widget can still be accessed to set its properties.
// define the TableViewer
viewer = new TableViewer(parent, SWT.MULTI | SWT.H_SCROLL
            | SWT.V_SCROLL | SWT.FULL_SELECTION | SWT.BORDER);

// create the columns
// not yet implemented
createColumns(viewer);

// make lines and header visible
final Table table = viewer.getTable();
table.setHeaderVisible(true);
table.setLinesVisible(true);
1.2. Content provider for JFace tables
A content provider supplies the data that should be displayed in a viewer like TableViewer.
Eclipse provides an implementation of this interface via the ArrayContentProvider class.
The ArrayContentProvider class supports Arrays or Collections as input, containing the domain data.
You can implement your own content provider for a table by implementing the interface IStructuredContentProvider from the org.eclipse.jface.viewers package.
The getElements() method converts the viewer’s input into an array of elements.
Once the setInput() method on the viewer is called, it uses the content provider to convert it.
This is the reason why the content provider must be set before the setInput() method is called.
Each object in the Array returned by the content provider is displayed as an individual element by the viewer. In the case of the table viewer, each object is displayed as an individual row.
The usage of the content provider is demonstrated with the following code snippet.
// this code is placed after the definition of
// the viewer

// set the content provider
viewer.setContentProvider(ArrayContentProvider.getInstance());

// provide the input to the viewer
// setInput() calls getElements() on the
// content provider instance
viewer.setInput(someData...);
1.3. Columns and label providers
Columns for a JFace TableViewer object are defined by creating instances of the TableViewerColumn class.
Each TableViewerColumn object needs to have a label provider assigned to it via the setLabelProvider() method.
The label provider defines what data is displayed in the column.
The label provider for a table viewer column is called per row and gets the corresponding object as its input.
It uses this input to determine which data is displayed in the column for this row.
Typically, the label provider returns a String, but more complex implementations are possible.
The setLabelProvider() method on the TableViewerColumn expects an instance of the abstract CellLabelProvider class.
A default implementation of this class is provided by the ColumnLabelProvider class.
Its usage is demonstrated in the following code snippet.
// create a column for the first name
TableViewerColumn colFirstName = new TableViewerColumn(viewer, SWT.NONE);
colFirstName.getColumn().setWidth(200);
colFirstName.getColumn().setText("Firstname");
colFirstName.setLabelProvider(new ColumnLabelProvider() {
    @Override
    public String getText(Object element) {
        Person p = (Person) element;
        return p.getFirstName();
    }
});

// create more text columns if required...

// create column for married property of Person
// uses getImage() method instead of getText()
// CHECKED and UNCHECK are fields of type ImageDescriptor

TableViewerColumn colMarried = new TableViewerColumn(viewer, SWT.NONE);
colMarried.getColumn().setWidth(200);
colMarried.getColumn().setText("Married");
colMarried.setLabelProvider(new ColumnLabelProvider() {

    private ResourceManager resourceManager = new LocalResourceManager(JFaceResources.getResources());

    @Override
    public String getText(Object element) {
        return null;  // no string representation, we only want to display the image
    }

    @Override
    public Image getImage(Object element) {
        if (((Person) element).isMarried()) {
            return resourceManager.create(CHECKED);
        }
        return resourceManager.create(UNCHECKED);
    }

    @Override
    public void dispose() {
        super.dispose();
        resourceManager.dispose();
    }
});
The above code uses two fields that contain Image instances.
These fields could for example be initialized via the following code.
Using the classes in this code requires a dependency on the org.eclipse.core.runtime plug-in.
// fields for your class
// assumes that you have these two icons
// in the "icons" folder
private final ImageDescriptor CHECKED = getImageDescriptor("checked.svg");
private final ImageDescriptor UNCHECKED = getImageDescriptor("unchecked.svg");

// more code...

private static ImageDescriptor getImageDescriptor(String file) {
    Bundle bundle = FrameworkUtil.getBundle(this.getClass());
    URL url = FileLocator.find(bundle, new Path("icons/" + file), null);
    return ImageDescriptor.createFromURL(url);
}
1.4. Reflect data changes in the viewer
To reflect data changes in the data model that is displayed by the viewer, you can call the viewer.refresh() method.
This method updates the viewer based on the data that is assigned to it.
To change the data use the viewer.setInput() method.
1.5. Selection change listener
Via the addSelectionChangedListener method you can add a listener to a viewer.
This listener is an implementation of the ISelectionChangedListener interface.
The following code shows an example that gets the selected element of the viewer.
viewer.addSelectionChangedListener(new ISelectionChangedListener() {
    @Override
    public void selectionChanged(SelectionChangedEvent event) {
        IStructuredSelection selection = viewer.getStructuredSelection();
        Object firstElement = selection.getFirstElement();
        // do something with it
    }
});
1.6. Selecting elements of the Table
There are many different ways to select an element in a table.
Either the low-level SWT Table API can be used:
viewer.getTable().select(int index);
viewer.getTable().select(int[] indices);
viewer.getTable().select(int start, int end);
viewer.getTable().selectAll();
Or the JFace TableViewer API:
StructuredSelection structuredSelection = new StructuredSelection(listOfPersons);
viewer.setSelection(structuredSelection);
// or
// Second param is used to reveal (make visible) the selection in the viewer
viewer.setSelection(structuredSelection, true);
In typical cases, it is desirable to select certain objects; therefore, the JFace API is more commonly used. But if the indices are known or all items should be selected the low-level SWT API is sufficient.
2. Prerequisites
The following provides an example of how to build a table with the JFace Viewer framework.
It assumes that you are familiar with creating Eclipse RCP applications or Eclipse plug-ins.
3. Tutorial: JFace Table Viewer
3.1. Overview of the example
We will build an Eclipse RCP application which displays data of persons in a JFace table. Each person is displayed in one individual row. This tutorial covers the basic setup of a JFace table.
The final application will look like this.
3.2. Project creation and data model
Create a new RCP Project de.vogella.jface.tableviewer using the "RCP application with a view" as a template.
Create a package "de.vogella.jface.tableviewer.model" and the following class "Person".
package de.vogella.jface.tableviewer.model;

import java.beans.PropertyChangeListener;
import java.beans.PropertyChangeSupport;

public class Person {
    private String firstName;
    private String lastName;
    private boolean married;
    private String gender;
    private Integer age;
    private PropertyChangeSupport propertyChangeSupport = new PropertyChangeSupport(
            this);

    public Person() {
    }

    public Person(String firstName, String lastName, String gender,
            boolean married) {
        super();
        this.firstName = firstName;
        this.lastName = lastName;
        this.gender = gender;
        this.married = married;
    }

    public void addPropertyChangeListener(String propertyName,
            PropertyChangeListener listener) {
        propertyChangeSupport.addPropertyChangeListener(propertyName, listener);
    }

    public void removePropertyChangeListener(PropertyChangeListener listener) {
        propertyChangeSupport.removePropertyChangeListener(listener);
    }

    public String getFirstName() {
        return firstName;
    }

    public String getGender() {
        return gender;
    }

    public String getLastName() {
        return lastName;
    }

    public boolean isMarried() {
        return married;
    }

    public void setFirstName(String firstName) {
        propertyChangeSupport.firePropertyChange("firstName", this.firstName,
                this.firstName = firstName);
    }

    public void setGender(String gender) {
        propertyChangeSupport.firePropertyChange("gender", this.gender,
                this.gender = gender);
    }

    public void setLastName(String lastName) {
        propertyChangeSupport.firePropertyChange("lastName", this.lastName,
                this.lastName = lastName);
    }

    public void setMarried(boolean isMarried) {
        propertyChangeSupport.firePropertyChange("married", this.married,
                this.married = isMarried);
    }

    public Integer getAge() {
        return age;
    }

    public void setAge(Integer age) {
        propertyChangeSupport.firePropertyChange("age", this.age,
                this.age = age);
    }

    @Override
    public String toString() {
        return firstName + " " + lastName;
    }

}
The Person class represents the data model for this example.
It has PropertyChange support, which is not necessary for this example but is nice if you would later extend this example with Eclipse Data Binding support.
Create the ModelProvider class which is an in-memory representation of your data.
This class is defined as a Singleton.
package de.vogella.jface.tableviewer.model;

import java.util.ArrayList;
import java.util.List;

public enum ModelProvider {
    INSTANCE;

    private List<Person> persons;

    private ModelProvider() {
        persons = new ArrayList<Person>();
        // Image here some fancy database access to read the persons and to
        // put them into the model
        persons.add(new Person("Rainer", "Zufall", "male", true));
        persons.add(new Person("Reiner", "Babbel", "male", true));
        persons.add(new Person("Marie", "Dortmund", "female", false));
        persons.add(new Person("Holger", "Adams", "male", true));
        persons.add(new Person("Juliane", "Adams", "female", true));
    }

    public List<Person> getPersons() {
        return persons;
    }

}
3.3. Define the viewer
Change the View
package de.vogella.jface.tableviewer;

import org.eclipse.jface.resource.ImageDescriptor;
import org.eclipse.jface.resource.JFaceResources;
import org.eclipse.jface.resource.LocalResourceManager;
import org.eclipse.jface.resource.ResourceManager;
import org.eclipse.jface.viewers.ArrayContentProvider;
import org.eclipse.jface.viewers.ColumnLabelProvider;
import org.eclipse.jface.viewers.TableViewer;
import org.eclipse.jface.viewers.TableViewerColumn;
import org.eclipse.swt.SWT;
import org.eclipse.swt.graphics.Image;
import org.eclipse.swt.layout.GridData;
import org.eclipse.swt.layout.GridLayout;
import org.eclipse.swt.widgets.Composite;
import org.eclipse.swt.widgets.Label;
import org.eclipse.swt.widgets.Table;
import org.eclipse.swt.widgets.TableColumn;
import org.eclipse.swt.widgets.Text;
import org.eclipse.ui.part.ViewPart;

import de.vogella.jface.tableviewer.model.ModelProvider;
import de.vogella.jface.tableviewer.model.Person;

public class View extends ViewPart {
    public static final String ID = "de.vogella.jface.tableviewer.view";

    private TableViewer viewer;
    private ResourceManager resourceManager;
    // We use icons
    private Image checkedImage;
    private Image uncheckedImage;

    public void createPartControl(Composite parent) {
        // Create resource manager for automatic disposal of images
        resourceManager = new LocalResourceManager(JFaceResources.getResources(), parent);

        // Load images using resource manager
        checkedImage = resourceManager.createImage(Activator.getImageDescriptor("icons/checked.svg"));
        uncheckedImage = resourceManager.createImage(Activator.getImageDescriptor("icons/unchecked.svg"));

        GridLayout layout = new GridLayout(2, false);
        parent.setLayout(layout);
        Label searchLabel = new Label(parent, SWT.NONE);
        searchLabel.setText("Search: ");
        final Text searchText = new Text(parent, SWT.BORDER | SWT.SEARCH);
        searchText.setLayoutData(new GridData(GridData.GRAB_HORIZONTAL
                | GridData.HORIZONTAL_ALIGN_FILL));
        createViewer(parent);
    }

    private void createViewer(Composite parent) {
        viewer = new TableViewer(parent, SWT.MULTI | SWT.H_SCROLL
                | SWT.V_SCROLL | SWT.FULL_SELECTION | SWT.BORDER);
        createColumns(parent, viewer);
        final Table table = viewer.getTable();
        table.setHeaderVisible(true);
        table.setLinesVisible(true);

        viewer.setContentProvider(new ArrayContentProvider());
        // Get the content for the viewer, setInput will call getElements in the
        // contentProvider
        viewer.setInput(ModelProvider.INSTANCE.getPersons());
        // make the selection available to other views
        getSite().setSelectionProvider(viewer);
        // Set the sorter for the table

        // Layout the viewer
        GridData gridData = new GridData();
        gridData.verticalAlignment = GridData.FILL;
        gridData.horizontalSpan = 2;
        gridData.grabExcessHorizontalSpace = true;
        gridData.grabExcessVerticalSpace = true;
        gridData.horizontalAlignment = GridData.FILL;
        viewer.getControl().setLayoutData(gridData);
    }

    public TableViewer getViewer() {
        return viewer;
    }

    // This will create the columns for the table
    private void createColumns(final Composite parent, final TableViewer viewer) {
        String[] titles = { "First name", "Last name", "Gender", "Married" };
        int[] bounds = { 100, 100, 100, 100 };

        // First column is for the first name
        TableViewerColumn col = createTableViewerColumn(titles[0], bounds[0], 0);
        col.setLabelProvider(new ColumnLabelProvider() {
            @Override
            public String getText(Object element) {
                Person p = (Person) element;
                return p.getFirstName();
            }
        });

        // Second column is for the last name
        col = createTableViewerColumn(titles[1], bounds[1], 1);
        col.setLabelProvider(new ColumnLabelProvider() {
            @Override
            public String getText(Object element) {
                Person p = (Person) element;
                return p.getLastName();
            }
        });

        // now the gender
        col = createTableViewerColumn(titles[2], bounds[2], 2);
        col.setLabelProvider(new ColumnLabelProvider() {
            @Override
            public String getText(Object element) {
                Person p = (Person) element;
                return p.getGender();
            }
        });

        // now the status married
        col = createTableViewerColumn(titles[3], bounds[3], 3);
        col.setLabelProvider(new ColumnLabelProvider() {
            @Override
            public String getText(Object element) {
                return null;
            }

            @Override
            public Image getImage(Object element) {
                if (((Person) element).isMarried()) {
                    return checkedImage;
                } else {
                    return uncheckedImage;
                }
            }
        });

    }

    private TableViewerColumn createTableViewerColumn(String title, int bound, final int colNumber) {
        final TableViewerColumn viewerColumn = new TableViewerColumn(viewer,
                SWT.NONE);
        final TableColumn column = viewerColumn.getColumn();
        column.setText(title);
        column.setWidth(bound);
        column.setResizable(true);
        column.setMoveable(true);
        return viewerColumn;

    }

    /**
     * Passing the focus request to the viewer's control.
     */
    public void setFocus() {
        viewer.getControl().setFocus();
    }
}
The createColumns method creates the table columns, headers, sets the size of the columns and makes the columns re-sizable.
The createTableViewerColumn() method has three parameters.
The third is currently unused, but we will use it in the
advanced tutorial.
|
Please note that we use icons for the married status.
If the icons folder does not exist in your project, create it.
You can download suitable icons from Google Fonts icons, saving them as checked.svg and unchecked.svg in the icons folder.
Alternatively, you can only use the setText() method.
|
3.4. Run
Run the example. The application should display a non-working search field and a table.
4. JFace table features
4.1. Column editing support
To make a column in a table editable, you need an object of type EditingSupport.
The following code shows an example of an EditingSupport implementation.
package de.vogella.jface.tableviewer.edit;

import org.eclipse.jface.viewers.CellEditor;
import org.eclipse.jface.viewers.EditingSupport;
import org.eclipse.jface.viewers.TableViewer;
import org.eclipse.jface.viewers.TextCellEditor;

import com.vogella.eclipse.viewer.Person;

public class FirstNameEditingSupport extends EditingSupport {

    private final TableViewer viewer;
    private final CellEditor editor;

    public FirstNameEditingSupport(TableViewer viewer) {
        super(viewer);
        this.viewer = viewer;
        this.editor = new TextCellEditor(viewer.getTable());
    }

    @Override
    protected CellEditor getCellEditor(Object element) {
        return editor;
    }

    @Override
    protected boolean canEdit(Object element) {
        return true;
    }

    @Override
    protected Object getValue(Object element) {
        return ((Person) element).getFirstName();
    }

    @Override
    protected void setValue(Object element, Object userInputValue) {
        ((Person) element).setFirstName(String.valueOf(userInputValue));
        viewer.update(element, null);
    }
}
The EditingSupport implementation defines how the content can be changed.
The getCellEditor() method returns an object of type CellEditor.
This object creates the controls to change the data.
The canEdit() method defines whether the cell can be edited.
The getValue() method receives the current object and returns the value that should be edited.
The method setValue() in EditingSupport receives the value modified by the user.
In this method, you assign the value to your data object.
JFace provides the following default implementations for cell editors:
-
TextCellEditor -
ColorCellEditor -
CheckboxCellEditor -
DialogCellEditor -
ComboBoxViewerCellEditor
The TableViewerColumn class provides the setEditingSupport() method to set the editor for the table column.
colFirstName.setEditingSupport(new FirstNameEditingSupport(viewer));From an application design perspective, editing within a table can be cumbersome for the user. If the end user has to edit a large amount of data, you should offer a dialog, wizard, or part to edit the data.
4.2. Filtering data
A JFace viewer supports filtering of data via the setFilters() or addFilter() methods.
These methods expect ViewerFilter objects as arguments.
For each registered ViewerFilter object the select() method is called.
The method returns true if the data should be shown and false if it should be filtered.
package de.vogella.jface.tableviewer.filter;

import org.eclipse.jface.viewers.Viewer;
import org.eclipse.jface.viewers.ViewerFilter;

import de.vogella.jface.tableviewer.model.Person;

public class PersonFilter extends ViewerFilter {

    private String searchString;

    public void setSearchText(String s) {
        // ensure that the value can be used for matching
        this.searchString = ".*" + s + ".*";
    }

    @Override
    public boolean select(Viewer viewer,
            Object parentElement,
            Object element) {
        if (searchString == null || searchString.length() == 0) {
            return true;
        }
        Person p = (Person) element;
        if (p.getFirstName().matches(searchString)) {
            return true;
        }
        if (p.getLastName().matches(searchString)) {
            return true;
        }
        return false;
    }
}
All filters are checked whenever the input of the viewer changes, or whenever its refresh() method is called.
If more than one filter is defined for a viewer, all filters must return true to display the data.
4.3. Sorting data with ViewerComparator
JFace supports sorting of the viewer content via the setComparator() method on the viewer object.
This method expects a ViewerComparator object.
By default, it will sort based on the toString() method of the objects in the viewer.
// sort according to due date
viewer.setComparator(new ViewerComparator() {
    public int compare(Viewer viewer, Object e1, Object e2) {
        Todo t1 = (Todo) e1;
        Todo t2 = (Todo) e2;
        return t1.getDueDate().compareTo(t2.getDueDate());
    };
});
4.4. TableColumnLayout
With the TableColumnLayout class you can define the width of the columns in the table.
This can be done based on a fixed or percentage value.
Using TableColumnLayout requires a Composite which only contains the table widget.
This Composite gets the TableColumnLayout assigned.
Composite tableComposite = new Composite(parent, SWT.NONE);
TableColumnLayout tableColumnLayout = new TableColumnLayout();
tableComposite.setLayout(tableColumnLayout);
TableViewer viewer =
    new TableViewer(tableComposite,
            SWT.MULTI |
            SWT.H_SCROLL |
            SWT.V_SCROLL |
            SWT.FULL_SELECTION |
            SWT.BORDER);
The TableColumnLayout requires that you define a fixed or relative size for all columns.
// fixed size
tableColumnLayout.
    setColumnData(colFirstName.getColumn(),
            new ColumnPixelData(50));

// alternatively use relative size
// last parameter defines if the column is allowed
// to be resized
tableColumnLayout.
    setColumnData(colFirstName.getColumn(),
            new ColumnWeightData(20, 200, true));
4.5. Changing the selection highlight color
It is possible to change the selection color of the line in a JFace table via a listener.

The following code is an example implementation for this.
package e4.parts;

import org.eclipse.jface.viewers.TableViewer;
import org.eclipse.swt.SWT;
import org.eclipse.swt.graphics.Color;
import org.eclipse.swt.graphics.GC;
import org.eclipse.swt.graphics.RGB;
import org.eclipse.swt.widgets.Composite;
import org.eclipse.swt.widgets.Event;
import org.eclipse.swt.widgets.Listener;
import org.eclipse.swt.widgets.Table;
import org.eclipse.swt.widgets.TableColumn;

public class CustomTableViewer {

    static Color goldColor = new Color(new RGB(255, 215, 0));

    public static TableViewer createTableViewer(Composite parent) {
        TableViewer tableViewer = new TableViewer(parent, SWT.FULL_SELECTION);
        Table table = tableViewer.getTable();
        table.setHeaderVisible(true);
        table.setLinesVisible(true);

        // Define columns
        String[] titles = { "Column 1", "Column 2" };
        for (String title : titles) {
            TableColumn column = new TableColumn(table, SWT.NONE);
            column.setText(title);
            column.setWidth(100);
        }
        table.addListener(SWT.EraseItem, new Listener() {
            public void handleEvent(Event event) {
                event.detail &= ~SWT.HOT;
                if ((event.detail & SWT.SELECTED) == 0)
                    return; /// item not selected

                Table table = (Table) event.widget;
                int clientWidth = table.getClientArea().width;

                GC gc = event.gc;
                Color oldBackground = gc.getBackground();

                gc.setBackground(goldColor);
                gc.fillRectangle(0, event.y, clientWidth, event.height);

                gc.setBackground(oldBackground);
                event.detail &= ~SWT.SELECTED;
            }
        });

        return tableViewer;
    }
}
4.6. Flexible styling or drawing the content of a column
A StyledCellLabelProvider supports flexible styling of the content in a column.
StyledCellLabelProvider extends CellLabelProvider and allows you to style the text which is displayed in the cell.
The following example shows how to use a StyledCellLabelProvider.
In this example, a portion of a predefined text is highlighted.
// define column
TableViewerColumn colTesting = new TableViewerColumn(viewer, SWT.NONE);
colTesting.getColumn().setText("Testing");
colTesting.getColumn().setWidth(200);

// set label provider
colTesting.setLabelProvider(new StyledCellLabelProvider() {
    @Override
    public void update(ViewerCell cell) {
        cell.setText("This is a test (15)");
        StyleRange myStyledRange =
                new StyleRange(16, 2, null,
                        Display.getCurrent().getSystemColor(SWT.COLOR_YELLOW));
        StyleRange[] range = { myStyledRange };
        cell.setStyleRanges(range);
        super.update(cell);
    }
});
As a result, the number "15" will be highlighted as depicted in the following screenshot.

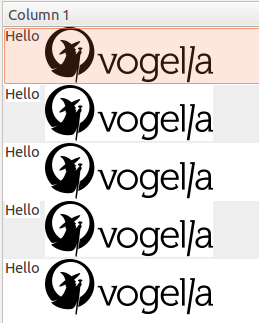
The OwnerDrawLabelProvider class is a label provider that handles custom drawing.
The following example draws a text and an image into the cell.
TableViewerColumn colHelloAndIcon = new TableViewerColumn(viewer, SWT.NONE);
colHelloAndIcon.getColumn().setText("Column 1");
colHelloAndIcon.getColumn().setWidth(200);

// ICON is an Image
colHelloAndIcon.setLabelProvider(new OwnerDrawLabelProvider() {
    @Override
    protected void measure(Event event, Object element) {
        Rectangle rectangle = ICON.getBounds();
        event.setBounds(new Rectangle(
            event.x,
            event.y,
            rectangle.width + 200 ,
            rectangle.height));
    }

    @Override
    protected void paint(Event event, Object element) {
        Rectangle bounds = event.getBounds();
        event.gc.drawText("Hello", bounds.x, bounds.y);
        Point point = event.gc.stringExtent("Hello");
        event.gc.drawImage(ICON, bounds.x + 5 + point.x, bounds.y);
    }
});
4.7. Table column menu and hiding columns
You can add a menu to your table. This menu can include a menu entry for each column. This allows you to add arbitrary popup actions to your columns.
You can use it, for example, to hide and show columns based on the width setting as demonstrated in the following code snippet.
// define the menu and assign to the table
contextMenu = new Menu(viewer.getTable());
viewer.getTable().setMenu(contextMenu);

// create your columns as usual...

// afterwards add a MenuItem for each column to the table menu
for (TableColumn tableColumn : viewer.getTable().getColumns() ){
    createMenuItem(contextMenu, tableColumn);
}

// the createMenuItem() method adds a MenuItem
// per column to the menu

private void createMenuItem(Menu parent, final TableColumn column) {
    final MenuItem itemName = new MenuItem(parent, SWT.CHECK);
    itemName.setText(column.getText());
    itemName.setSelection(column.getResizable());
    itemName.addSelectionListener(new SelectionAdapter() {
          @Override
          public void widgetSelected(SelectionEvent e) {
            if (itemName.getSelection()) {
                column.setWidth(150);
                column.setResizable(true);
            } else {
                column.setWidth(0);
                column.setResizable(false);
            }
        }
    });
}
4.8. Tooltips for viewers
You can use tooltips for the cells of the viewer. To achieve this, you have to activate the tooltips for a viewer.
// activate the tooltip support for the viewer
ColumnViewerToolTipSupport.enableFor(viewer, ToolTip.NO_RECREATE);
In your CellLabelProvider you specify the related methods for displaying the tooltip.
colFirstName.setLabelProvider(new ColumnLabelProvider() {
  @Override
  public String getText(Object element) {
    Person p = (Person) element;
    return p.getFirstName();
  }

  @Override
  public String getToolTipText(Object element) {
    return "Tooltip (" + ((Person)element).getLastName() + ")";
  }

  @Override
  public Point getToolTipShift(Object object) {
    return new Point(5, 5);
  }

  @Override
  public int getToolTipDisplayDelayTime(Object object) {
    return 100; // msec
  }

  @Override
  public int getToolTipTimeDisplayed(Object object) {
    return 5000; // msec
  }
});
4.9. Virtual tables with LazyContentProvider
If you have a huge number of lines that you want to display in the table, you can use a LazyContentProvider.
This provider allows you to fetch the data when it is needed instead of loading everything into memory.
As a result of the lazy loading, you gain a better memory footprint and improve performance for a large set of data.
The following code demonstrates its usage.
private class MyLazyContentProvider implements ILazyContentProvider {
  private TableViewer viewer;
  private Person[] elements;

  public MyLazyContentProvider(TableViewer viewer) {
    this.viewer = viewer;
  }

  public void dispose() {
  }

  public void inputChanged(Viewer viewer, Object oldInput, Object newInput) {
    this.elements = (Person[]) newInput;
  }

  public void updateElement(int index) {
    viewer.replace(elements[index], index);
  }
}
// create your table with the virtual flag
final TableViewer v = new TableViewer(shell, SWT.VIRTUAL);
// create TableColumns with label providers as before...
// ...
v.setContentProvider(new MyLazyContentProvider(v));
// special settings for the lazy content provider
v.setUseHashlookup(true);
// create the model and set it as input
Person[] model = createModel();
v.setInput(model);
// you must explicitly set the items count
v.setItemCount(model.length);4.10. Alternative table implementations
It is possible to use other table implementations. Most notable is the NatTable implementation. It provides a flexible and powerful framework for creating tables, grids and trees that show great performance for a huge number of rows and columns.
5. Sort content of table columns
A ViewerComparator allows sorting the table.
The following example will allow sorting the table based on different columns.
package de.vogella.jface.tableviewer.sorter;

import org.eclipse.jface.viewers.Viewer;
import org.eclipse.jface.viewers.ViewerComparator;
import org.eclipse.swt.SWT;

import de.vogella.jface.tableviewer.model.Person;

public class MyViewerComparator extends ViewerComparator {
    private int propertyIndex;
    private static final int DESCENDING = 1;
    private int direction = DESCENDING;

    public MyViewerComparator() {
        this.propertyIndex = 0;
        direction = DESCENDING;
    }

    public int getDirection() {
        return direction == 1 ? SWT.DOWN : SWT.UP;
    }

    public void setColumn(int column) {
        if (column == this.propertyIndex) {
            // Same column as last sort; toggle the direction
            direction = 1 - direction;
        } else {
            // New column; do an ascending sort
            this.propertyIndex = column;
            direction = DESCENDING;
        }
    }

    @Override
    public int compare(Viewer viewer, Object e1, Object e2) {
        Person p1 = (Person) e1;
        Person p2 = (Person) e2;
        int rc = 0;
        switch (propertyIndex) {
        case 0:
            rc = p1.getFirstName().compareTo(p2.getFirstName());
            break;
        case 1:
            rc = p1.getLastName().compareTo(p2.getLastName());
            break;
        case 2:
            rc = p1.getGender().compareTo(p2.getGender());
            break;
        case 3:
            if (p1.isMarried() == p2.isMarried()) {
                rc = 0;
            } else
                rc = (p1.isMarried() ? 1 : -1);
            break;
        default:
            rc = 0;
        }
        // If descending order, flip the direction
        if (direction == DESCENDING) {
            rc = -rc;
        }
        return rc;
    }

}
In View change the method createTableViewerColumn and create a new method getSelectionAdapter().
This method will add a listener to the columns.
If one of the columns is selected, the sorting column in ViewerComparator will be set.
package de.vogella.jface.tableviewer;

import org.eclipse.jface.resource.ImageDescriptor;
import org.eclipse.jface.resource.JFaceResources;
import org.eclipse.jface.resource.LocalResourceManager;
import org.eclipse.jface.resource.ResourceManager;
import org.eclipse.jface.viewers.ArrayContentProvider;
import org.eclipse.jface.viewers.ColumnLabelProvider;
import org.eclipse.jface.viewers.TableViewer;
import org.eclipse.jface.viewers.TableViewerColumn;
import org.eclipse.swt.SWT;
import org.eclipse.swt.events.SelectionAdapter;
import org.eclipse.swt.events.SelectionEvent;
import org.eclipse.swt.graphics.Image;
import org.eclipse.swt.layout.GridData;
import org.eclipse.swt.layout.GridLayout;
import org.eclipse.swt.widgets.Composite;
import org.eclipse.swt.widgets.Label;
import org.eclipse.swt.widgets.Table;
import org.eclipse.swt.widgets.TableColumn;
import org.eclipse.swt.widgets.Text;
import org.eclipse.ui.part.ViewPart;

import de.vogella.jface.tableviewer.model.ModelProvider;
import de.vogella.jface.tableviewer.model.Person;
import de.vogella.jface.tableviewer.sorter.MyViewerComparator;

public class View extends ViewPart {
    public static final String ID = "de.vogella.jface.tableviewer.view";
    private MyViewerComparator comparator;

    private TableViewer viewer;
    private ResourceManager resourceManager;
    // We use icons
    private Image checkedImage;
    private Image uncheckedImage;

    public void createPartControl(Composite parent) {
        // Create resource manager for automatic disposal of images
        resourceManager = new LocalResourceManager(JFaceResources.getResources(), parent);

        // Load images using resource manager
        checkedImage = resourceManager.createImage(Activator.getImageDescriptor("icons/checked.svg"));
        uncheckedImage = resourceManager.createImage(Activator.getImageDescriptor("icons/unchecked.svg"));

        GridLayout layout = new GridLayout(2, false);
        parent.setLayout(layout);
        Label searchLabel = new Label(parent, SWT.NONE);
        searchLabel.setText("Search: ");
        final Text searchText = new Text(parent, SWT.BORDER | SWT.SEARCH);
        searchText.setLayoutData(new GridData(GridData.GRAB_HORIZONTAL
                | GridData.HORIZONTAL_ALIGN_FILL));
        createViewer(parent);
        // Set the sorter for the table
        comparator = new MyViewerComparator();
        viewer.setComparator(comparator);

    }

    private void createViewer(Composite parent) {
        viewer = new TableViewer(parent, SWT.MULTI | SWT.H_SCROLL
                | SWT.V_SCROLL | SWT.FULL_SELECTION | SWT.BORDER);
        createColumns(parent, viewer);
        final Table table = viewer.getTable();
        table.setHeaderVisible(true);
        table.setLinesVisible(true);

        viewer.setContentProvider(new ArrayContentProvider());
        // Get the content for the viewer, setInput will call getElements in the
        // contentProvider
        viewer.setInput(ModelProvider.INSTANCE.getPersons());
        // make the selection available to other views
        getSite().setSelectionProvider(viewer);

        // Layout the viewer
        GridData gridData = new GridData();
        gridData.verticalAlignment = GridData.FILL;
        gridData.horizontalSpan = 2;
        gridData.grabExcessHorizontalSpace = true;
        gridData.grabExcessVerticalSpace = true;
        gridData.horizontalAlignment = GridData.FILL;
        viewer.getControl().setLayoutData(gridData);
    }

    public TableViewer getViewer() {
        return viewer;
    }

    // This will create the columns for the table
    private void createColumns(final Composite parent, final TableViewer viewer) {
        String[] titles = { "First name", "Last name", "Gender", "Married" };
        int[] bounds = { 100, 100, 100, 100 };

        // First column is for the first name
        TableViewerColumn col = createTableViewerColumn(titles[0], bounds[0], 0);
        col.setLabelProvider(new ColumnLabelProvider() {
            @Override
            public String getText(Object element) {
                Person p = (Person) element;
                return p.getFirstName();
            }
        });

        // Second column is for the last name
        col = createTableViewerColumn(titles[1], bounds[1], 1);
        col.setLabelProvider(new ColumnLabelProvider() {
            @Override
            public String getText(Object element) {
                Person p = (Person) element;
                return p.getLastName();
            }
        });

        // now the gender
        col = createTableViewerColumn(titles[2], bounds[2], 2);
        col.setLabelProvider(new ColumnLabelProvider() {
            @Override
            public String getText(Object element) {
                Person p = (Person) element;
                return p.getGender();
            }
        });

        // now the status married
        col = createTableViewerColumn(titles[3], bounds[3], 3);
        col.setLabelProvider(new ColumnLabelProvider() {
            @Override
            public String getText(Object element) {
                return null;
            }

            @Override
            public Image getImage(Object element) {
                if (((Person) element).isMarried()) {
                    return checkedImage;
                } else {
                    return uncheckedImage;
                }
            }
        });

    }

    private TableViewerColumn createTableViewerColumn(String title, int bound,
            final int colNumber) {
        final TableViewerColumn viewerColumn = new TableViewerColumn(viewer,
                SWT.NONE);
        final TableColumn column = viewerColumn.getColumn();
        column.setText(title);
        column.setWidth(bound);
        column.setResizable(true);
        column.setMoveable(true);
        column.addSelectionListener(getSelectionAdapter(column, colNumber));
        return viewerColumn;
    }

    private SelectionAdapter getSelectionAdapter(final TableColumn column,
            final int index) {
        SelectionAdapter selectionAdapter = new SelectionAdapter() {
            @Override
            public void widgetSelected(SelectionEvent e) {
                comparator.setColumn(index);
                int dir = comparator.getDirection();
                viewer.getTable().setSortDirection(dir);
                viewer.getTable().setSortColumn(column);
                viewer.refresh();
            }
        };
        return selectionAdapter;
    }

    /**
     * Passing the focus request to the viewer's control.
     */
    public void setFocus() {
        viewer.getControl().setFocus();
    }
}
If you run the example and click on a column header, the table should be sorted according to the content of this column. A sort direction will appear at the top of the column.
6. Tutorial: Editing the table content
Create the following new classes in the new de.vogella.jface.tableviewer.edit package.
package de.vogella.jface.tableviewer.edit;

import org.eclipse.jface.viewers.CellEditor;
import org.eclipse.jface.viewers.EditingSupport;
import org.eclipse.jface.viewers.TableViewer;
import org.eclipse.jface.viewers.TextCellEditor;

import com.vogella.eclipse.viewer.Person;

public class FirstNameEditingSupport extends EditingSupport {

    private final TableViewer viewer;
    private final CellEditor editor;

    public FirstNameEditingSupport(TableViewer viewer) {
        super(viewer);
        this.viewer = viewer;
        this.editor = new TextCellEditor(viewer.getTable());
    }

    @Override
    protected CellEditor getCellEditor(Object element) {
        return editor;
    }

    @Override
    protected boolean canEdit(Object element) {
        return true;
    }

    @Override
    protected Object getValue(Object element) {
        return ((Person) element).getFirstName();
    }

    @Override
    protected void setValue(Object element, Object userInputValue) {
        ((Person) element).setFirstName(String.valueOf(userInputValue));
        viewer.update(element, null);
    }
}
package de.vogella.jface.tableviewer.edit;
import org.eclipse.jface.viewers.TableViewer;
import de.vogella.jface.tableviewer.model.Person;
public class LastNameEditingSupport extends FirstNameEditingSupport {
private final TableViewer viewer;
public LastNameEditingSupport(TableViewer viewer) {
super(viewer);
this.viewer = viewer;
}
@Override
protected Object getValue(Object element) {
return ((Person) element).getLastName();
}
@Override
protected void setValue(Object element, Object value) {
((Person) element).setLastName(String.valueOf(value));
viewer.update(element, null);
}
}package de.vogella.jface.tableviewer.edit;
import org.eclipse.jface.viewers.CellEditor;
import org.eclipse.jface.viewers.ComboBoxCellEditor;
import org.eclipse.jface.viewers.EditingSupport;
import org.eclipse.jface.viewers.TableViewer;
import de.vogella.jface.tableviewer.model.Person;
public class GenderEditingSupport extends EditingSupport {
private final TableViewer viewer;
public GenderEditingSupport(TableViewer viewer) {
super(viewer);
this.viewer = viewer;
}
@Override
protected CellEditor getCellEditor(Object element) {
String[] gender = new String[2];
gender[0] = "male";
gender[1] = "female";
return new ComboBoxCellEditor(viewer.getTable(), gender);
}
@Override
protected boolean canEdit(Object element) {
return true;
}
@Override
protected Object getValue(Object element) {
Person person = (Person) element;
if (person.getGender().equals("male")) {
return 0;
}
return 1;
}
@Override
protected void setValue(Object element, Object value) {
Person pers = (Person) element;
if (((Integer) value) == 0) {
pers.setGender("male");
} else {
pers.setGender("female");
}
viewer.update(element, null);
}
}package de.vogella.jface.tableviewer.edit;
import org.eclipse.jface.viewers.CellEditor;
import org.eclipse.jface.viewers.CheckboxCellEditor;
import org.eclipse.jface.viewers.EditingSupport;
import org.eclipse.jface.viewers.TableViewer;
import org.eclipse.swt.SWT;
import de.vogella.jface.tableviewer.model.Person;
public class MarriedEditingSupport extends EditingSupport {
private final TableViewer viewer;
public MarriedEditingSupport(TableViewer viewer) {
super(viewer);
this.viewer = viewer;
}
@Override
protected CellEditor getCellEditor(Object element) {
return new CheckboxCellEditor(null, SWT.CHECK | SWT.READ_ONLY);
}
@Override
protected boolean canEdit(Object element) {
return true;
}
@Override
protected Object getValue(Object element) {
Person person = (Person) element;
return person.isMarried();
}
@Override
protected void setValue(Object element, Object value) {
Person pers = (Person) element;
pers.setMarried((Boolean) value);
viewer.update(element, null);
}
}Now assign EditorSupport objects to your TableColumnViewers in your View class.
Replace the existing method createColumns() with the following one and adjust your imports.
    // This will create the columns for the table
    private void createColumns(final Composite parent, final TableViewer viewer) {
        String[] titles = { "First name", "Last name", "Gender", "Married" };
        int[] bounds = { 100, 100, 100, 100 };

        // First column is for the first name
        TableViewerColumn col = createTableViewerColumn(titles[0], bounds[0], 0);
        col.setLabelProvider(new CellLabelProvider() {
            @Override
            public void update(ViewerCell cell) {
                cell.setText(((Person) cell.getElement()).getFirstName());
            }
        });
        col.setEditingSupport(new FirstNameEditingSupport(viewer));

        // Second column is for the last name
        col = createTableViewerColumn(titles[1], bounds[1], 1);
        col.setLabelProvider(new CellLabelProvider() {
            @Override
            public void update(ViewerCell cell) {
                cell.setText(((Person) cell.getElement()).getLastName());
            }
        });
        col.setEditingSupport(new LastNameEditingSupport(viewer));

        // now the gender
        col = createTableViewerColumn(titles[2], bounds[2], 2);
        col.setLabelProvider(new ColumnLabelProvider() {
            @Override
            public String getText(Object element) {
                Person p = (Person) element;
                return p.getGender();
            }
        });
        col.setEditingSupport(new GenderEditingSupport(viewer));

        // now the status married
        col = createTableViewerColumn(titles[3], bounds[3], 3);
        col.setLabelProvider(new ColumnLabelProvider() {
            @Override
            public String getText(Object element) {
                return null;
            }

            @Override
            public Image getImage(Object element) {
                if (((Person) element).isMarried()) {
                    return CHECKED;
                } else {
                    return UNCHECKED;
                }
            }
        });
        col.setEditingSupport(new MarriedEditingSupport(viewer));

    }
Run your application. You should now be able to modify the content of the JFace table.
7. Tutorial: Using a Filter
The following adds a filter to the table based on the Search Text widget.
The user can enter a search pattern in this text field, and data that matches the entered pattern will be displayed.
Create the following new class.
package de.vogella.jface.tableviewer.filter;

import org.eclipse.jface.viewers.Viewer;
import org.eclipse.jface.viewers.ViewerFilter;

import de.vogella.jface.tableviewer.model.Person;

public class PersonFilter extends ViewerFilter {

    private String searchString;

    public void setSearchText(String s) {
        // ensure that the value can be used for matching
        this.searchString = ".*" + s + ".*";
    }

    @Override
    public boolean select(Viewer viewer,
            Object parentElement,
            Object element) {
        if (searchString == null || searchString.length() == 0) {
            return true;
        }
        Person p = (Person) element;
        if (p.getFirstName().matches(searchString)) {
            return true;
        }
        if (p.getLastName().matches(searchString)) {
            return true;
        }
        return false;
    }
}
Add to your search text field a keyListener that updates the filter and the viewer.
You need to define a new private PersonFilter filter; field and change the createPartControl() method.
    private PersonFilter filter;
    //// .... more fields

    public void createPartControl(Composite parent) {
        GridLayout layout = new GridLayout(2, false);
        parent.setLayout(layout);
        Label searchLabel = new Label(parent, SWT.NONE);
        searchLabel.setText("Search: ");
        final Text searchText = new Text(parent, SWT.BORDER | SWT.SEARCH);
        searchText.setLayoutData(new GridData(GridData.GRAB_HORIZONTAL
                | GridData.HORIZONTAL_ALIGN_FILL));
        createViewer(parent);
        // Set the sorter for the table
        comparator = new MyViewerComparator();
        viewer.setComparator(comparator);

        // New to support the search
        searchText.addKeyListener(new KeyAdapter() {
            public void keyReleased(KeyEvent ke) {
                filter.setSearchText(searchText.getText());
                viewer.refresh();
            }

        });
        filter = new PersonFilter();
        viewer.addFilter(filter);
    }
Run the example, filtering should work.
8. Tutorial: Using Styled Label Providers
First, create the following helper class, which determines which occurrence of the search string appears in the column.
package de.vogella.jface.tableviewer.util;

import java.util.ArrayList;
import java.util.List;

public class SearchUtil {
    /**
     * Searches "searchTerm" in "content" and returns an array of int pairs
     * (index, length) for each occurrence. The search is case-sensitive. The
     * consecutive occurrences are merged together.`
    Examples:
     content = "123123x123"
     searchTerm = "1"
     --> [0, 1, 3, 1, 7, 1]
     content = "123123x123"
     searchTerm = "123"
     --> [0, 6, 7, 3]
    `
     *
     * @param searchTerm
     *            can be null or empty. int[0] is returned in this case!
     * @param content
     *            a not-null string (can be empty!)
     * @return an array of int pairs (index, length)
     */
    public static int[] getSearchTermOccurrences(final String searchTerm,
            final String content) {
        if (searchTerm == null || searchTerm.length() == 0) {
            return new int[0];
        }
        if (content == null) {
            throw new IllegalArgumentException("content is null");
        }
        final List<Integer> list = new ArrayList<Integer>();
        int searchTermLength = searchTerm.length();
        int index;
        int fromIndex = 0;
        int lastIndex = -1;
        int lastLength = 0;
        while (true) {
            index = content.indexOf(searchTerm, fromIndex);
            if (index == -1) {
                // no occurrence of "searchTerm" in "content" starting from
                // index "fromIndex"
                if (lastIndex != -1) {
                    // but there was a previous occurrence
                    list.add(Integer.valueOf(lastIndex));
                    list.add(Integer.valueOf(lastLength));
                }
                break;
            }
            if (lastIndex == -1) {
                // the first occurrence of "searchTerm" in "content"
                lastIndex = index;
                lastLength = searchTermLength;
            } else {
                if (lastIndex + lastLength == index) {
                    // the current occurrence is right after the previous
                    // occurrence
                    lastLength += searchTermLength;
                } else {
                    // there is at least one character between the current
                    // occurrence and the previous one
                    list.add(Integer.valueOf(lastIndex));
                    list.add(Integer.valueOf(lastLength));
                    lastIndex = index;
                    lastLength = searchTermLength;
                }
            }
            fromIndex = index + searchTermLength;
        }
        final int n = list.size();
        final int[] result = new int[n];
        for (int i = 0; i != n; i++) {
            result[i] = list.get(i);
        }
        return result;
    }

}
Change the class View to the following.
We will only use StyledCellLabelProvider for the firstName.
Most of the code changes are in method createColumns() plus a few variable definitions.
package de.vogella.jface.tableviewer;

import java.util.ArrayList;
import java.util.List;

import org.eclipse.jface.resource.ImageDescriptor;
import org.eclipse.jface.resource.JFaceResources;
import org.eclipse.jface.resource.LocalResourceManager;
import org.eclipse.jface.resource.ResourceManager;
import org.eclipse.jface.viewers.ArrayContentProvider;
import org.eclipse.jface.viewers.CellLabelProvider;
import org.eclipse.jface.viewers.ColumnLabelProvider;
import org.eclipse.jface.viewers.StyledCellLabelProvider;
import org.eclipse.jface.viewers.TableViewer;
import org.eclipse.jface.viewers.TableViewerColumn;
import org.eclipse.jface.viewers.ViewerCell;
import org.eclipse.swt.SWT;
import org.eclipse.swt.custom.StyleRange;
import org.eclipse.swt.events.KeyAdapter;
import org.eclipse.swt.events.KeyEvent;
import org.eclipse.swt.events.SelectionAdapter;
import org.eclipse.swt.events.SelectionEvent;
import org.eclipse.swt.graphics.Color;
import org.eclipse.swt.graphics.Image;
import org.eclipse.swt.layout.GridData;
import org.eclipse.swt.layout.GridLayout;
import org.eclipse.swt.widgets.Composite;
import org.eclipse.swt.widgets.Display;
import org.eclipse.swt.widgets.Label;
import org.eclipse.swt.widgets.Table;
import org.eclipse.swt.widgets.TableColumn;
import org.eclipse.swt.widgets.Text;
import org.eclipse.ui.part.ViewPart;

import de.vogella.jface.tableviewer.edit.FirstNameEditingSupport;
import de.vogella.jface.tableviewer.edit.GenderEditingSupport;
import de.vogella.jface.tableviewer.edit.LastNameEditingSupport;
import de.vogella.jface.tableviewer.edit.MarriedEditingSupport;
import de.vogella.jface.tableviewer.filter.PersonFilter;
import de.vogella.jface.tableviewer.model.ModelProvider;
import de.vogella.jface.tableviewer.model.Person;
import de.vogella.jface.tableviewer.sorter.MyViewerComparator;
import de.vogella.jface.tableviewer.util.SearchUtil;

public class View extends ViewPart {
    public static final String ID = "de.vogella.jface.tableviewer.view";
    private MyViewerComparator comparator;

    private TableViewer viewer;
    private PersonFilter filter;
    private ResourceManager resourceManager;
    // We use icons
    private Image checkedImage;
    private Image uncheckedImage;
    private Text searchText;
    private static Color colorYellow = Display.getCurrent().getSystemColor(
            SWT.COLOR_YELLOW);

    public void createPartControl(Composite parent) {
        // Create resource manager for automatic disposal of images
        resourceManager = new LocalResourceManager(JFaceResources.getResources(), parent);

        // Load images using resource manager
        checkedImage = resourceManager.createImage(Activator.getImageDescriptor("icons/checked.svg"));
        uncheckedImage = resourceManager.createImage(Activator.getImageDescriptor("icons/unchecked.svg"));

        GridLayout layout = new GridLayout(2, false);
        parent.setLayout(layout);
        Label searchLabel = new Label(parent, SWT.NONE);
        searchLabel.setText("Search: ");
        searchText = new Text(parent, SWT.BORDER | SWT.SEARCH);
        searchText.setLayoutData(new GridData(GridData.GRAB_HORIZONTAL
                | GridData.HORIZONTAL_ALIGN_FILL));
        createViewer(parent);
        // Set the sorter for the table
        comparator = new MyViewerComparator();
        viewer.setComparator(comparator);

        // New to support the search
        searchText.addKeyListener(new KeyAdapter() {
            public void keyReleased(KeyEvent ke) {
                filter.setSearchText(searchText.getText());
                viewer.refresh();
            }

        });
        filter = new PersonFilter();
        viewer.addFilter(filter);
    }

    private void createViewer(Composite parent) {
        viewer = new TableViewer(parent, SWT.MULTI | SWT.H_SCROLL
                | SWT.V_SCROLL | SWT.FULL_SELECTION | SWT.BORDER);
        createColumns(parent, viewer);
        final Table table = viewer.getTable();
        table.setHeaderVisible(true);
        table.setLinesVisible(true);

        viewer.setContentProvider(new ArrayContentProvider());
        // Get the content for the viewer, setInput will call getElements in the
        // contentProvider
        viewer.setInput(ModelProvider.INSTANCE.getPersons());
        // make the selection available to other views
        getSite().setSelectionProvider(viewer);

        // Layout the viewer
        GridData gridData = new GridData();
        gridData.verticalAlignment = GridData.FILL;
        gridData.horizontalSpan = 2;
        gridData.grabExcessHorizontalSpace = true;
        gridData.grabExcessVerticalSpace = true;
        gridData.horizontalAlignment = GridData.FILL;
        viewer.getControl().setLayoutData(gridData);
    }

    public TableViewer getViewer() {
        return viewer;
    }

    // This will create the columns for the table
    private void createColumns(final Composite parent, final TableViewer viewer) {
        String[] titles = { "First name", "Last name", "Gender", "Married" };
        int[] bounds = { 100, 100, 100, 100 };

        // First column is for the first name
        TableViewerColumn col = createTableViewerColumn(titles[0], bounds[0], 0);
        col.setLabelProvider(new StyledCellLabelProvider() {
            @Override
            public void update(ViewerCell cell) {
                String search = searchText.getText();
                Person person = (Person) cell.getElement();
                String cellText = person.getFirstName();
                cell.setText(cellText);
                if (search != null && search.length() > 0) {
                    int intRangesCorrectSize[] = SearchUtil
                            .getSearchTermOccurrences(search, cellText);
                    List<StyleRange> styleRange = new ArrayList<StyleRange>();
                    for (int i = 0; i < intRangesCorrectSize.length / 2; i++) {
                        int start = intRangesCorrectSize[i];
                        int length = intRangesCorrectSize[++i];
                        StyleRange myStyledRange = new StyleRange(start,
                                length, null, colorYellow);

                        styleRange.add(myStyledRange);
                    }
                    cell.setStyleRanges(styleRange
                            .toArray(new StyleRange[styleRange.size()]));
                } else {
                    cell.setStyleRanges(null);
                }

                super.update(cell);

            }
        });
        col.setEditingSupport(new FirstNameEditingSupport(viewer));

        // Second column is for the last name
        col = createTableViewerColumn(titles[1], bounds[1], 1);
        col.setLabelProvider(new CellLabelProvider() {
            @Override
            public void update(ViewerCell cell) {
                cell.setText(((Person) cell.getElement()).getLastName());
            }
        });
        col.setEditingSupport(new LastNameEditingSupport(viewer));

        // now the gender
        col = createTableViewerColumn(titles[2], bounds[2], 2);
        col.setLabelProvider(new ColumnLabelProvider() {
            @Override
            public String getText(Object element) {
                Person p = (Person) element;
                return p.getGender();
            }
        });
        col.setEditingSupport(new GenderEditingSupport(viewer));

        // now the status married
        col = createTableViewerColumn(titles[3], bounds[3], 3);
        col.setLabelProvider(new ColumnLabelProvider() {
            @Override
            public String getText(Object element) {
                return null;
            }

            @Override
            public Image getImage(Object element) {
                if (((Person) element).isMarried()) {
                    return checkedImage;
                } else {
                    return uncheckedImage;
                }
            }
        });
        col.setEditingSupport(new MarriedEditingSupport(viewer));

    }

    private TableViewerColumn createTableViewerColumn(String title, int bound,
            final int colNumber) {
        final TableViewerColumn viewerColumn = new TableViewerColumn(viewer,
                SWT.NONE);
        final TableColumn column = viewerColumn.getColumn();
        column.setText(title);
        column.setWidth(bound);
        column.setResizable(true);
        column.setMoveable(true);
        column.addSelectionListener(getSelectionAdapter(column, colNumber));
        return viewerColumn;
    }

    private SelectionAdapter getSelectionAdapter(final TableColumn column,
            final int index) {
        SelectionAdapter selectionAdapter = new SelectionAdapter() {
            @Override
            public void widgetSelected(SelectionEvent e) {
                comparator.setColumn(index);
                int dir = comparator.getDirection();
                viewer.getTable().setSortDirection(dir);
                viewer.refresh();
            }
        };
        return selectionAdapter;
    }

    /**
     * Passing the focus request to the viewer's control.
     */
    public void setFocus() {
        viewer.getControl().setFocus();
    }
}
Run the example. If you search, now the selected content should get highlighted.
9. Commands Prerequisite
If you are not familiar with Eclipse Commands, please have a look at the following tutorial: Eclipse Commands Tutorial
10. Commands
10.1. Add objects to the table
This chapter shows how to add persons to the TableViewer.
You need to make the Viewer selection available.
In addition, provide a public method to refresh its data so that other components can trigger the refresh process.
public void createPartControl(Composite parent) {
    //.... existing coding
    // make selection available via the SelectionProvider
    getSite().setSelectionProvider(viewer);
}

//Used to update the viewer from outsite
public void refresh() {
    viewer.refresh();
}
Create a Dialog to enter the data for the additional person.
Create the de.vogella.jface.tableviewer.dialogs package and the following AddPersonDialog class.
package de.vogella.jface.tableviewer.dialogs;

import org.eclipse.jface.dialogs.IMessageProvider;
import org.eclipse.jface.dialogs.TitleAreaDialog;
import org.eclipse.jface.resource.JFaceResources;
import org.eclipse.swt.SWT;
import org.eclipse.swt.events.SelectionAdapter;
import org.eclipse.swt.events.SelectionEvent;
import org.eclipse.swt.layout.GridData;
import org.eclipse.swt.layout.GridLayout;
import org.eclipse.swt.widgets.Button;
import org.eclipse.swt.widgets.Combo;
import org.eclipse.swt.widgets.Composite;
import org.eclipse.swt.widgets.Control;
import org.eclipse.swt.widgets.Label;
import org.eclipse.swt.widgets.Shell;
import org.eclipse.swt.widgets.Text;

import de.vogella.jface.tableviewer.model.Person;

public class AddPersonDialog extends TitleAreaDialog {

    private Text text1;
    private Text text2;
    private Person person;
    private Button button1;
    private Combo combo1;

    public Person getPerson() {
        return person;
    }

    public AddPersonDialog(Shell parentShell) {
        super(parentShell);
    }

    @Override
    protected Control createContents(Composite parent) {
        Control contents = super.createContents(parent);
        setTitle("Add a new Person");
        setMessage("Please enter the data of the new person",
                IMessageProvider.INFORMATION);
        return contents;
    }

    @Override
    protected Control createDialogArea(Composite parent) {
        GridLayout layout = new GridLayout();
        layout.numColumns = 2;
        parent.setLayout(layout);
        Label label1 = new Label(parent, SWT.NONE);
        label1.setText("First Name");
        text1 = new Text(parent, SWT.BORDER);
        Label label2 = new Label(parent, SWT.NONE);
        label2.setText("Last Name");
        text2 = new Text(parent, SWT.BORDER);
        Label label3 = new Label(parent, SWT.NONE);
        label3.setText("Gender");
        GridData gd = new GridData(GridData.HORIZONTAL_ALIGN_END);
        gd.horizontalSpan = 2;
        combo1 = new Combo(parent, SWT.READ_ONLY);
        combo1.add("male");
        combo1.add("female");
        button1 = new Button(parent, SWT.CHECK);
        button1.setText("Is married?");
        button1.setLayoutData(gd);
        return parent;

    }

    @Override
    protected void createButtonsForButtonBar(Composite parent) {
        ((GridLayout) parent.getLayout()).numColumns++;

        Button button = new Button(parent, SWT.PUSH);
        button.setText("OK");
        button.setFont(JFaceResources.getDialogFont());
        button.addSelectionListener(new SelectionAdapter() {
            public void widgetSelected(SelectionEvent e) {
                if (text1.getText().length() != 0
                        && text2.getText().length() != 0
                        && combo1.getItem(combo1.getSelectionIndex()).length() != 0) {
                    person = new Person(text1.getText(), text2.getText(),
                            combo1.getItem(combo1.getSelectionIndex()), button1
                                    .getSelection());
                    close();

                } else {
                    setErrorMessage("Please enter all data");
                }
            }
        });
    }
}
Create a new part called ChangeView to your application and add it to your perspective.
This part contains a Button that allows starting the Dialog, adds the new Person to the data and refreshes the Viewer.
package de.vogella.jface.tableviewer;

import org.eclipse.swt.SWT;
import org.eclipse.swt.events.SelectionAdapter;
import org.eclipse.swt.events.SelectionEvent;
import org.eclipse.swt.layout.GridLayout;
import org.eclipse.swt.widgets.Button;
import org.eclipse.swt.widgets.Composite;
import org.eclipse.ui.part.ViewPart;

import de.vogella.jface.tableviewer.dialogs.AddPersonDialog;
import de.vogella.jface.tableviewer.model.ModelProvider;

public class ChangeView extends ViewPart {
    public static final String ID = "de.vogella.jface.tableviewer.changeview";
    private Button btnNewButton;

    @Override
    public void createPartControl(Composite parent) {
        parent.setLayout(new GridLayout(1, false));

        btnNewButton = new Button(parent, SWT.PUSH);
        btnNewButton.addSelectionListener(new SelectionAdapter() {
            @Override
            public void widgetSelected(SelectionEvent e) {

                ModelProvider persons = ModelProvider.INSTANCE;
                AddPersonDialog dialog = new AddPersonDialog(getViewSite()
                        .getShell());
                dialog.open();
                if (dialog.getPerson() != null) {
                    persons.getPersons().add(dialog.getPerson());
                    View part = (View) getViewSite().getPage()
                            .findView(View.ID);
                    // Updating the display in the view
                    part.refresh();
                }
            }
        });
        btnNewButton.setText("Add");

        Button btnDelete = new Button(parent, SWT.PUSH);
        btnDelete.setText("Delete");

    }

    @Override
    public void setFocus() {
        btnNewButton.setFocus();
    }
}
When you finished this successfully, you are able to add new persons to your TableViewer via clicking on the Button.
10.2. Delete objects from your table
We will implement functionality to delete the currently selected persons from the list.
Create the command de.vogella.jface.tableviewer.commands.DeletePerson with the default handler de.vogella.jface.tableviewer.commands.DeletePerson.
Add the command to your menu.
Implement the de.vogella.jface.tableviewer.commands.DeletePerson.
package de.vogella.jface.tableviewer.commands;

import java.util.Iterator;
import java.util.List;

import org.eclipse.core.commands.AbstractHandler;
import org.eclipse.core.commands.ExecutionEvent;
import org.eclipse.core.commands.ExecutionException;
import org.eclipse.jface.viewers.ISelection;
import org.eclipse.jface.viewers.IStructuredSelection;
import org.eclipse.ui.IWorkbenchPage;
import org.eclipse.ui.IWorkbenchWindow;
import org.eclipse.ui.handlers.HandlerUtil;

import de.vogella.jface.tableviewer.View;
import de.vogella.jface.tableviewer.model.ModelProvider;
import de.vogella.jface.tableviewer.model.Person;

public class DeletePerson extends AbstractHandler {
    @SuppressWarnings("unchecked")
    @Override
    public Object execute(ExecutionEvent event) throws ExecutionException {
        IWorkbenchWindow window = HandlerUtil.getActiveWorkbenchWindow(event);
        IWorkbenchPage page = window.getActivePage();
        View view = (View) page.findView(View.ID);
        ISelection selection = view.getSite().getSelectionProvider()
                .getSelection();

        if (selection != null && selection instanceof IStructuredSelection) {
            List<Person> persons = ModelProvider.INSTANCE.getPersons();
            IStructuredSelection sel = (IStructuredSelection) selection;

            for (Iterator<Person> iterator = sel.iterator(); iterator.hasNext();) {
                Person person = iterator.next();
                persons.remove(person);
            }
            view.getViewer().refresh();
        }
        return null;
    }
}
Please try to delete entries of the table by selecting entries and executing Delete Action.
10.3. Copy data to the system clipboard
This chapter shows how to copy the table data to the system clipboard via a command.
Create the command de.vogella.jface.tableviewer.commands.CopyPersonClipboard with the default handler de.vogella.jface.tableviewer.commands.CopyPersonClipboard.
Add the command to the menu.
package de.vogella.jface.tableviewer.commands;

import java.util.ArrayList;
import java.util.Iterator;
import java.util.List;

import org.eclipse.core.commands.AbstractHandler;
import org.eclipse.core.commands.ExecutionEvent;
import org.eclipse.core.commands.ExecutionException;
import org.eclipse.jface.viewers.ISelection;
import org.eclipse.jface.viewers.IStructuredSelection;
import org.eclipse.swt.dnd.Clipboard;
import org.eclipse.swt.dnd.TextTransfer;
import org.eclipse.swt.dnd.Transfer;
import org.eclipse.swt.widgets.Display;
import org.eclipse.ui.IViewPart;
import org.eclipse.ui.IWorkbenchPage;
import org.eclipse.ui.IWorkbenchWindow;
import org.eclipse.ui.PlatformUI;

import de.vogella.jface.tableviewer.View;
import de.vogella.jface.tableviewer.model.Person;

public class CopyPersonClipboard extends AbstractHandler {

    @Override
    public Object execute(ExecutionEvent event) throws ExecutionException {

        IWorkbenchWindow window = PlatformUI.getWorkbench()
                .getActiveWorkbenchWindow();
        IWorkbenchPage page = window.getActivePage();
        IViewPart view = page.findView(View.ID);
        Clipboard cb = new Clipboard(Display.getDefault());
        ISelection selection = view.getSite().getSelectionProvider()
                .getSelection();
        List<Person> personList = new ArrayList<Person>();
        if (selection != null && selection instanceof IStructuredSelection) {
            IStructuredSelection sel = (IStructuredSelection) selection;
            for (Iterator<Person> iterator = sel.iterator(); iterator.hasNext();) {
                Person person = iterator.next();
                personList.add(person);
            }
        }
        StringBuilder sb = new StringBuilder();
        for (Person person : personList) {
            sb.append(personToString(person));
        }
        TextTransfer textTransfer = TextTransfer.getInstance();
        cb.setContents(new Object[] { sb.toString() },
                new Transfer[] { textTransfer });

        return null;
    }

    private String personToString(Person person) {
        return person.getFirstName() + "\t" + person.getLastName() + "\t"
                + person.getGender() + "\t" + person.isMarried()
                + System.getProperty("line.separator");
    }

}
Run your application, select a few persons, run your command and paste the result in a text editor, e.g., notepad.
11. Learn more and get support
This tutorial continues on Eclipse RCP online training or Eclipse IDE extensions with lots of video material, additional exercises and much more content.
12. Download
Google Fonts icons - Download suitable icons for the JFace LabelProvider, saving them as checked.svg and unchecked.svg in the icons folder.
13. JFace Resources
13.1. vogella Java example code
If you need more assistance we offer Online Training and Onsite training as well as consulting