Using drag and drop in Android. This tutorial describes how to use drag and drop in Android. It is based on Eclipse 4.4 (Luna), Java 1.7 and Android 5.0.
1. Android drag and drop
1.1. Using drag and drop in Android
As of Android 4.0 drag and drop of view onto other views or view groups is supported.
1.2. Allowing a view to be dragged
To use dragging a view you register a
OnTouchListener
or a
LongClickListener
on the
view that can be dragged.
The
startDrag
method of the
View
start a drag operation. In this method you also specify the data
which is passed to the drop target via an instance of
ClipData.
You also pass to the
startDrag
method an instance of
DragShadowBuilder.
This object specifies the picture used for the drag operation. For
example you can
pass in the
view
directly that shows an image of the
view during the drag
operation.
The setup of this drag operation in a touch listener is demonstrated in the following example.
// Assign the touch listener to your view which you want to move
findViewById(R.id.myimage1).setOnTouchListener(new MyTouchListener());

// This defines your touch listener
private final class MyTouchListener implements OnTouchListener {
    public boolean onTouch(View view, MotionEvent motionEvent) {
        if (motionEvent.getAction() == MotionEvent.ACTION_DOWN) {
            ClipData data = ClipData.newPlainText("", "");
            DragShadowBuilder shadowBuilder = new View.DragShadowBuilder(
                view);
            view.startDrag(data, shadowBuilder, view, 0);
            view.setVisibility(View.INVISIBLE);
            return true;
        } else {
        return false;
        }
    }
}
1.3. Defining drop target
The views that can
be drop targets get an instance of
OnDragListener
assigned. In this drop listener you receive call backs in case of
predefined drag and drop related events.
* DragEvent.ACTION_DRAG_STARTED
* DragEvent.ACTION_DRAG_ENTERED
* DragEvent.ACTION_DRAG_EXITED
* DragEvent.ACTION_DROP
* DragEvent.ACTION_DRAG_ENDED
A view with OnDragListener that is used as a drop zone, gets a OnDragListener assigned via the setOnDragListener.
findViewById(R.id.bottomright).setOnDragListener(new MyDragListener());

class MyDragListener implements OnDragListener {
    Drawable enterShape = getResources().getDrawable(
            R.drawable.shape_droptarget);
    Drawable normalShape = getResources().getDrawable(R.drawable.shape);

    @Override
    public boolean onDrag(View v, DragEvent event) {
        int action = event.getAction();
        switch (event.getAction()) {
        case DragEvent.ACTION_DRAG_STARTED:
        // do nothing
            break;
        case DragEvent.ACTION_DRAG_ENTERED:
            v.setBackgroundDrawable(enterShape);
            break;
        case DragEvent.ACTION_DRAG_EXITED:
            v.setBackgroundDrawable(normalShape);
            break;
        case DragEvent.ACTION_DROP:
            // Dropped, reassign View to ViewGroup
            View view = (View) event.getLocalState();
            ViewGroup owner = (ViewGroup) view.getParent();
            owner.removeView(view);
            LinearLayout container = (LinearLayout) v;
            container.addView(view);
            view.setVisibility(View.VISIBLE);
            break;
        case DragEvent.ACTION_DRAG_ENDED:
            v.setBackgroundDrawable(normalShape);
            default:
            break;
        }
        return true;
    }
}
2. Exercise: Drag and drop
In this exercise, you create several view groups that allow to drag views between them.
2.1. Create project
Create a new Android project called com.vogella.android.draganddrop with an activity called DragActivity.
2.2. Create XML Drawables
In this exercise, you are using XML drawables.
In this part you create several XML drawables in the res/drawable folder.
Create the following shape.xml file in this folder.
<?xml version="1.0" encoding="UTF-8"?>
<shape xmlns:android="http://schemas.android.com/apk/res/android"
    android:shape="rectangle" >

    <stroke
        android:width="2dp"
        android:color="#FFFFFFFF" />

    <gradient
        android:angle="225"
        android:endColor="#DD2ECCFA"
        android:startColor="#DD000000" />

    <corners
        android:bottomLeftRadius="7dp"
        android:bottomRightRadius="7dp"
        android:topLeftRadius="7dp"
        android:topRightRadius="7dp" />

</shape>
Also create the following shape_droptarget.xml file.
<?xml version="1.0" encoding="UTF-8"?>
<shape xmlns:android="http://schemas.android.com/apk/res/android"
    android:shape="rectangle" >

    <stroke
        android:width="2dp"
        android:color="#FFFF0000" />

    <gradient
        android:angle="225"
        android:endColor="#DD2ECCFA"
        android:startColor="#DD000000" />

    <corners
        android:bottomLeftRadius="7dp"
        android:bottomRightRadius="7dp"
        android:topLeftRadius="7dp"
        android:topRightRadius="7dp" />

</shape>
2.3. Activity and layout
Change the layout of your activity to the following code.
<?xml version="1.0" encoding="utf-8"?>
<GridLayout xmlns:android="http://schemas.android.com/apk/res/android"
    android:layout_width="match_parent"
    android:layout_height="match_parent"
    android:columnCount="2"
    android:columnWidth="320dp"
    android:orientation="vertical"
    android:rowCount="2"
    android:stretchMode="columnWidth" >

    <LinearLayout
        android:id="@+id/topleft"
        android:layout_width="160dp"
        android:layout_height="160dp"
        android:layout_row="0"
        android:background="@drawable/shape" >

        <ImageView
            android:id="@+id/myimage1"
            android:layout_width="wrap_content"
            android:layout_height="wrap_content"
            android:src="@drawable/ic_launcher" />
    </LinearLayout>

    <LinearLayout
        android:id="@+id/topright"
        android:layout_width="160dp"
        android:layout_height="160dp"
        android:background="@drawable/shape" >

        <ImageView
            android:id="@+id/myimage2"
            android:layout_width="wrap_content"
            android:layout_height="wrap_content"
            android:src="@drawable/ic_launcher" />
    </LinearLayout>

    <LinearLayout
        android:id="@+id/bottomleft"
        android:layout_width="160dp"
        android:layout_height="160dp"
        android:background="@drawable/shape" >

        <ImageView
            android:id="@+id/myimage3"
            android:layout_width="wrap_content"
            android:layout_height="wrap_content"
            android:src="@drawable/ic_launcher" />
    </LinearLayout>

    <LinearLayout
        android:id="@+id/bottomright"
        android:layout_width="160dp"
        android:layout_height="160dp"
        android:background="@drawable/shape" >

        <ImageView
            android:id="@+id/myimage4"
            android:layout_width="wrap_content"
            android:layout_height="wrap_content"
            android:src="@drawable/ic_launcher" />
    </LinearLayout>

</GridLayout>
Change your activity class to the following code.
package com.vogella.android.draganddrop;
import android.app.Activity;
import android.content.ClipData;
import android.graphics.drawable.Drawable;
import android.os.Bundle;
import android.view.DragEvent;
import android.view.MotionEvent;
import android.view.View;
import android.view.View.DragShadowBuilder;
import android.view.View.OnDragListener;
import android.view.View.OnTouchListener;
import android.view.ViewGroup;
import android.widget.LinearLayout;
public class DragActivity extends Activity {
/** Called when the activity is first created. */
@Override
public void onCreate(Bundle savedInstanceState) {
super.onCreate(savedInstanceState);
setContentView(R.layout.main);
findViewById(R.id.myimage1).setOnTouchListener(new MyTouchListener());
findViewById(R.id.myimage2).setOnTouchListener(new MyTouchListener());
findViewById(R.id.myimage3).setOnTouchListener(new MyTouchListener());
findViewById(R.id.myimage4).setOnTouchListener(new MyTouchListener());
findViewById(R.id.topleft).setOnDragListener(new MyDragListener());
findViewById(R.id.topright).setOnDragListener(new MyDragListener());
findViewById(R.id.bottomleft).setOnDragListener(new MyDragListener());
findViewById(R.id.bottomright).setOnDragListener(new MyDragListener());
}
private final class MyTouchListener implements OnTouchListener {
public boolean onTouch(View view, MotionEvent motionEvent) {
if (motionEvent.getAction() == MotionEvent.ACTION_DOWN) {
ClipData data = ClipData.newPlainText("", "");
DragShadowBuilder shadowBuilder = new View.DragShadowBuilder(
view);
view.startDrag(data, shadowBuilder, view, 0);
view.setVisibility(View.INVISIBLE);
return true;
} else {
return false;
}
}
}
class MyDragListener implements OnDragListener {
Drawable enterShape = getResources().getDrawable(
R.drawable.shape_droptarget);
Drawable normalShape = getResources().getDrawable(R.drawable.shape);
@Override
public boolean onDrag(View v, DragEvent event) {
int action = event.getAction();
switch (event.getAction()) {
case DragEvent.ACTION_DRAG_STARTED:
// do nothing
break;
case DragEvent.ACTION_DRAG_ENTERED:
v.setBackgroundDrawable(enterShape);
break;
case DragEvent.ACTION_DRAG_EXITED:
v.setBackgroundDrawable(normalShape);
break;
case DragEvent.ACTION_DROP:
// Dropped, reassign View to ViewGroup
View view = (View) event.getLocalState();
ViewGroup owner = (ViewGroup) view.getParent();
owner.removeView(view);
LinearLayout container = (LinearLayout) v;
container.addView(view);
view.setVisibility(View.VISIBLE);
break;
case DragEvent.ACTION_DRAG_ENDED:
v.setBackgroundDrawable(normalShape);
default:
break;
}
return true;
}
}
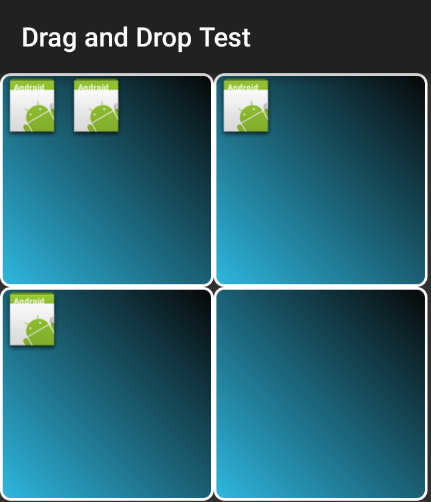
}If you start this
activity
you should be able to drag the
ImageViews
to another container.
3. Links and literature
3.1. Android Resources
https://www.vogella.com/tutorials/Android/article.html- Android Development Tutorial]
3.2. vogella Java example code
If you need more assistance we offer Online Training and Onsite training as well as consulting