Using Broadcast receivers in Android. This tutorial describes how to create and consume broadcast receivers in Android.
1. Broadcast receiver
1.1. Definition
A broadcast receiver (receiver) is an Android component that allows you to register for system or application events. All registered receivers for an event are notified by the Android runtime once this event happens.
For example, applications can register for the ACTION_BOOT_COMPLETED system event which is fired once the Android system has completed the boot process.
1.2. Implementation
A receiver can be registered via the AndroidManifest.xml file.
Alternatively, to this static registration, you can also register a receiver dynamically via the Context.registerReceiver() method.
The implementing class for a receiver extends the BroadcastReceiver class.
If the event for which the broadcast receiver has registered happens, the onReceive() method of the receiver is called by the Android system.
1.3. Life cycle of a broadcast receiver
After the onReceive() of the receiver class has finished, the Android system is allowed to recycle the receiver.
1.4. Asynchronous processing
Before API level 11, you could not perform any asynchronous operation in the onReceive() method, because once the onReceive() method had been finished, the Android system was allowed to recycle that component.
If you have potentially long-running operations, you should trigger a service instead.
Since Android API 11 you can call the goAsync() method.
This method returns an object of the PendingResult type.
The Android system considers the receiver as alive until you call the PendingResult.finish() on this object.
With this option you can trigger asynchronous processing in a receiver.
As soon as that thread has completed, its task calls finish() to indicate to the Android system that this component can be recycled.
1.5. Restrictions for defining broadcast receiver
As of Android 3.1 the Android system excludes all receiver from receiving intents by default if the corresponding application has never been started by the user or if the user explicitly stopped the application via the Android menu (in ).
This is an additional security feature as the user can be sure that only the applications he started will receive broadcast intents.
| This does not mean the user has to start the application again after a reboot. The Android system remembers that the user already started it. Only one start is required without a forced stop by the user. |
1.6. Send the broadcast to your application for testing
You can use the following command from the adb command line tool. The class name and package names that are targeted via the command line tool need to be as defined in the manifest. You should send the intent you generated to your specific component, for example if you send a general ACTION_BOOT_COMPLETED broadcast, this will trigger a lot of things in an Android system.
# trigger a broadcast and deliver it to a component
adb shell am activity/service/broadcast -a ACTION -c CATEGORY -n NAME

# for example (this goes into one line)

adb shell am broadcast -a
android.intent.action.BOOT_COMPLETED -c android.intent.category.HOME -n
package_name/class_name
1.7. Pending Intent
A pending intent is a token that you give to another application. For example, the notification manager, alarm manager or other 3rd party applications). This allows the other application to restore the permissions of your application to execute a predefined piece of code.
To perform a broadcast via a pending intent, get a PendingIntent via the getBroadcast() method of the PendingIntent class.
To perform an activity via a pending intent, you receive the activity via PendingIntent.getActivity().
2. System broadcasts
Several system events are defined as final static fields in the Intent class.
Other Android system classes also define events, e.g., the TelephonyManager defines events for the change of the phone state.
The following table lists a few important system events.
| Event | Description |
|---|---|
Intent.ACTION_BOOT_COMPLETED |
Boot completed. Requires the |
Intent.ACTION_POWER_CONNECTED |
Power got connected to the device. |
Intent.ACTION_POWER_DISCONNECTED |
Power got disconnected to the device. |
Intent.ACTION_BATTERY_LOW |
Triggered on low battery. Typically used to reduce activities in your app which consume power. |
Intent.ACTION_BATTERY_OKAY |
Battery status good again. |
3. Automatically starting Services from a Receivers
A common requirement is to automatically start a service after a system reboot, i.e., for synchronizing data.
For this you can register a receiver for the android.intent.action.BOOT_COMPLETED system event.
This requires the android.permission.RECEIVE_BOOT_COMPLETED permission.
The following example demonstrates the registration for the BOOT_COMPLETED event in the Android manifest file.
<?xml version="1.0" encoding="utf-8"?>
<manifest xmlns:android="http://schemas.android.com/apk/res/android"
    package="de.vogella.android.ownservice.local"
    android:versionCode="1"
    android:versionName="1.0" >

    <uses-sdk android:minSdkVersion="10" />

    <uses-permission android:name="android.permission.RECEIVE_BOOT_COMPLETED" />

    <application
        android:icon="@drawable/icon"
        android:label="@string/app_name" >
        <activity
            android:name=".ServiceConsumerActivity"
            android:label="@string/app_name" >
            <intent-filter>
                <action android:name="android.intent.action.MAIN" />

                <category android:name="android.intent.category.LAUNCHER" />
            </intent-filter>
        </activity>

        <receiver android:name="MyScheduleReceiver" >
            <intent-filter>
                <action android:name="android.intent.action.BOOT_COMPLETED" />
            </intent-filter>
        </receiver>
        <receiver android:name="MyStartServiceReceiver" >
        </receiver>
    </application>

</manifest>
The receive would start the service as demonstrated in the following example code.
import android.content.BroadcastReceiver;
import android.content.Context;
import android.content.Intent;

public class MyReceiver extends BroadcastReceiver {

    @Override
    public void onReceive(Context context, Intent intent) {
        // assumes WordService is a registered service
        Intent intent = new Intent(context, WordService.class);
        context.startService(intent);
    }
}
If your application is installed on the SD card, then it is not available after the android.intent.action.BOOT_COMPLETED event.
In this case register it for the android.intent.action.ACTION_EXTERNAL_APPLICATIONS_AVAILABLE event.
|
Remember that as of Android API level 11 the user needs to have started the application at least once before your application can receive android.intent.action.BOOT_COMPLETED events.
|
4. Exercise: Register a receiver for incoming phone calls
4.1. Target
In this exercise, you define a broadcast receiver which listens to telephone state changes. If the phone receives a phone call, then our receiver will be notified and log a message.
4.2. Create project
Create a new project called de.vogella.android.receiver.phone.
Also create an activity.
TIP:Remember that your receiver is only called if the user started it once. This requires an activity.
4.3. Implement receiver for the phone event
Create the MyPhoneReceiver class.
package de.vogella.android.receiver.phone;

import android.content.BroadcastReceiver;
import android.content.Context;
import android.content.Intent;
import android.os.Bundle;
import android.telephony.TelephonyManager;
import android.util.Log;

public class MyPhoneReceiver extends BroadcastReceiver {

    @Override
    public void onReceive(Context context, Intent intent) {
        Bundle extras = intent.getExtras();
        if (extras != null) {
            String state = extras.getString(TelephonyManager.EXTRA_STATE);
            Log.w("MY_DEBUG_TAG", state);
            if (state.equals(TelephonyManager.EXTRA_STATE_RINGING)) {
                String phoneNumber = extras
                        .getString(TelephonyManager.EXTRA_INCOMING_NUMBER);
                Log.w("MY_DEBUG_TAG", phoneNumber);
            }
        }
    }
}
4.4. Request permission
Add the android.permission.READ_PHONE_STATE permission to your manifest file that allows you to listen to state changes in your receiver.
Also Register your receiver in your manifest file.
The resulting manifest should be similar to the following listing.
<?xml version="1.0" encoding="utf-8"?>
<manifest xmlns:android="http://schemas.android.com/apk/res/android"
    package="de.vogella.android.receiver.phone"
    android:versionCode="1"
    android:versionName="1.0" >

     <uses-sdk android:minSdkVersion="15" />

    <uses-permission android:name="android.permission.READ_PHONE_STATE" >
    </uses-permission>

    <application
        android:icon="@drawable/icon"
        android:label="@string/app_name" >
           <activity
            android:name=".MainActivity"
            android:label="@string/title_activity_main" >
            <intent-filter>
                <action android:name="android.intent.action.MAIN" />

                <category android:name="android.intent.category.LAUNCHER" />
            </intent-filter>
        </activity>

        <receiver android:name="MyPhoneReceiver" >
            <intent-filter>
                <action android:name="android.intent.action.PHONE_STATE" >
                </action>
            </intent-filter>
        </receiver>
    </application>


</manifest>
4.5. Validate implementations
Install your application and simulate a phone call via the emulator controls.
Validate that your receiver is called and logs a message to the LogCat view.
5. Exercise: System services and receiver
5.1. Target
In this chapter we will schedule a receiver via the Android alert manager system service. Once called, it uses the Android vibrator manager and a popup message (Toast) to notify the user.
5.2. Implement project
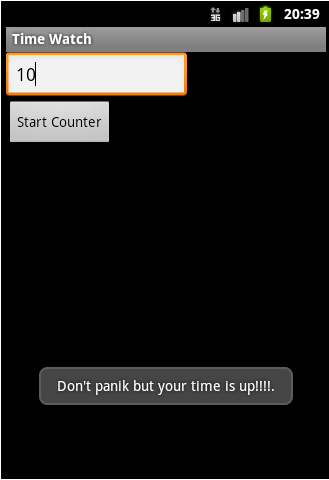
Create a new project called de.vogella.android.alarm with the activity called AlarmActivity.
Create the following layout.
<?xml version="1.0" encoding="utf-8"?>
<LinearLayout xmlns:android="http://schemas.android.com/apk/res/android"
    android:layout_width="match_parent"
    android:layout_height="match_parent"
    android:orientation="vertical" >

    <EditText
        android:id="@+id/time"
        android:layout_width="wrap_content"
        android:layout_height="wrap_content"
        android:hint="Number of seconds"
        android:inputType="numberDecimal" >
    </EditText>

    <Button
        android:id="@+id/ok"
        android:layout_width="wrap_content"
        android:layout_height="wrap_content"
        android:onClick="startAlert"
        android:text="Start Counter" >
    </Button>

</LinearLayout>
Create the following broadcast receiver class. This class will get the vibrator service.
package de.vogella.android.alarm;

import android.content.BroadcastReceiver;
import android.content.Context;
import android.content.Intent;
import android.os.Vibrator;
import android.widget.Toast;

public class MyBroadcastReceiver extends BroadcastReceiver {
    @Override
    public void onReceive(Context context, Intent intent) {
        Toast.makeText(context, "Don't panik but your time is up!!!!.",
                Toast.LENGTH_LONG).show();
        // Vibrate the mobile phone
        Vibrator vibrator = (Vibrator) context.getSystemService(Context.VIBRATOR_SERVICE);
        vibrator.vibrate(2000);
    }

}
Register this class as a broadcast receiver in AndroidManifest.xml and request authorization to vibrate the phone.
<?xml version="1.0" encoding="utf-8"?>
<manifest xmlns:android="http://schemas.android.com/apk/res/android"
    package="de.vogella.android.alarm"
    android:versionCode="1"
    android:versionName="1.0" >

    <uses-sdk android:minSdkVersion="15" />

    <uses-permission android:name="android.permission.VIBRATE" >
    </uses-permission>

    <application
        android:icon="@drawable/icon"
        android:label="@string/app_name" >
        <activity
            android:name=".AlarmActivity"
            android:label="@string/app_name" >
            <intent-filter>
                <action android:name="android.intent.action.MAIN" />

                <category android:name="android.intent.category.LAUNCHER" />
            </intent-filter>
        </activity>

        <receiver android:name="MyBroadcastReceiver" >
        </receiver>
    </application>

</manifest>
Change the code of your
AlarmActivity
class to the
following. This activity creates an
intent to start the
receiver and register this intent with the alarm manager service.
package de.vogella.android.alarm;

import android.app.Activity;
import android.app.AlarmManager;
import android.app.PendingIntent;
import android.content.Intent;
import android.os.Bundle;
import android.view.View;
import android.widget.EditText;
import android.widget.Toast;

public class AlarmActivity extends Activity {
    /** Called when the activity is first created. */
    @Override
    public void onCreate(Bundle savedInstanceState) {
        super.onCreate(savedInstanceState);
        setContentView(R.layout.main);
    }

    public void startAlert(View view) {
        EditText text = (EditText) findViewById(R.id.time);
        int i = Integer.parseInt(text.getText().toString());
        Intent intent = new Intent(this, MyBroadcastReceiver.class);
        PendingIntent pendingIntent = PendingIntent.getBroadcast(
                this.getApplicationContext(), 234324243, intent, 0);
        AlarmManager alarmManager = (AlarmManager) getSystemService(ALARM_SERVICE);
        alarmManager.set(AlarmManager.RTC_WAKEUP, System.currentTimeMillis()
                + (i * 1000), pendingIntent);
        Toast.makeText(this, "Alarm set in " + i + " seconds",
                Toast.LENGTH_LONG).show();
    }

}
5.3. Validate implementation
Run your application on the device. Set your time and start the alarm. After the defined number of seconds a Toast should be displayed. Keep in mind that the vibration alarm does not work on the Android emulator.
6. Dynamic broadcast receiver registration
6.1. Dynamically registered receiver
Receiver can be registered via the Android manifest file.
You can also register and unregister a receiver at runtime via the Context.registerReceiver() and Context.unregisterReceiver() methods.
Do not forget to unregister a dynamically registered receiver by using Context.unregisterReceiver() method.
If you forget this, the Android system reports a leaked broadcast receiver error.
For instance, if you registered a receive in onResume() methods of your activity, you should unregister it in the onPause() method.
|
6.2. Using the package manager to disable static receivers
You can use the PackageManager class to enable or disable receivers registered in your AndroidManifest.xml file.
ComponentName receiver = new ComponentName(context, myReceiver.class);
PackageManager pm = context.getPackageManager();

pm.setComponentEnabledSetting(receiver,
    PackageManager.COMPONENT_ENABLED_STATE_ENABLED,
    PackageManager.DONT_KILL_APP);
6.3. Sticky (broadcast) intents
An intent to trigger a receiver (
broadcast intent
)
is not available anymore after it was sent
and processed by the
system.
If you use the
sendStickyBroadcast(Intent)
method, the corresponding
intent
is sticky, meaning the intent
you are sending stays around after the
broadcast is complete.
The Android system uses sticky broadcast for certain system information. For example, the battery status is send as sticky intent and can get received at any time. The following example demonstrates that.
// Register for the battery changed event
IntentFilter filter = new IntentFilter(Intent.ACTION_BATTERY_CHANGED);

/ Intent is sticky so using null as receiver works fine
// return value contains the status
Intent batteryStatus = this.registerReceiver(null, filter);

// Are we charging / charged?
int status = batteryStatus.getIntExtra(BatteryManager.EXTRA_STATUS, -1);
boolean isCharging = status == BatteryManager.BATTERY_STATUS_CHARGING
    || status == BatteryManager.BATTERY_STATUS_FULL;

boolean isFull = status == BatteryManager.BATTERY_STATUS_FULL;

// How are we charging?
int chargePlug = batteryStatus.getIntExtra(BatteryManager.EXTRA_PLUGGED, -1);
boolean usbCharge = chargePlug == BatteryManager.BATTERY_PLUGGED_USB;
boolean acCharge = chargePlug == BatteryManager.BATTERY_PLUGGED_AC;
You can
retrieve that data
through the return value of
registerReceiver(BroadcastReceiver,
	IntentFilter)
`. This also works for a null
`BroadcastReceiver
.
In all other ways,
this behaves just as
sendBroadcast(Intent).
Sticky broadcast intents typically require special permissions.
7. Links and literature
7.2. vogella Java example code
If you need more assistance we offer Online Training and Onsite training as well as consulting