This tutorial explains the usage of the Eclipse IDE for creating and executing JUnit test.
2. Eclipse support for JUnit 5
2.1. Creating JUnit tests
You can write the JUnit tests manually, but Eclipse supports the creation of JUnit tests via wizards.
You can select the class that you want to test in the editor, can press Ctrl+1 and select Create new JUnit test.
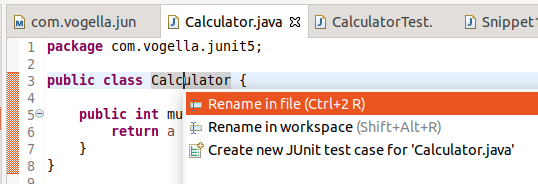
Alternatively, you can right-click on your class, select this class in the Project Explorer or Package Explorer view, right-click on it and select . Or, you can also use the JUnit wizards available under .
2.2. Running JUnit tests
The Eclipse IDE also provides support for executing your tests interactively.
To run a test, select the test class, right-click on it and select . This starts JUnit and executes all test methods in this class.
Eclipse provides the Alt+Shift+X, T shortcut to run the test in the selected class.
To run only the selected test, position the cursor on the test method name and use the shortcut.
To see the result of a JUnit test, Eclipse uses the JUnit view which shows the results of the tests. You can also select individual unit tests in this view, right-click on them and select Run to execute them again.

|
Eclipse creates run configurations for tests. You can see and modify these via the menu. |
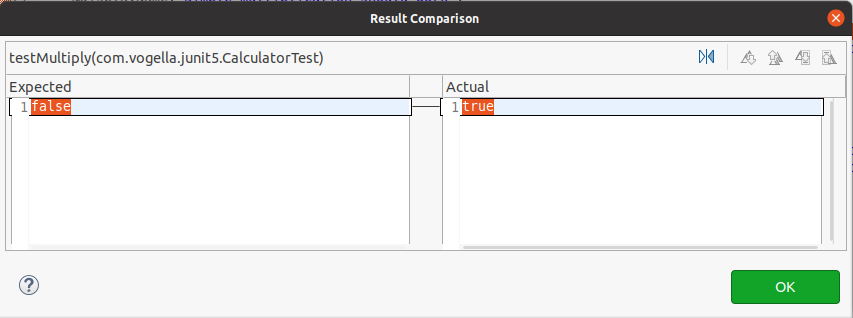
2.3. Compare results
For some assertions, you can open a dialog to compare the expected and the actual value. Right-click on the test result, and select Compare Result or double-click on the line.
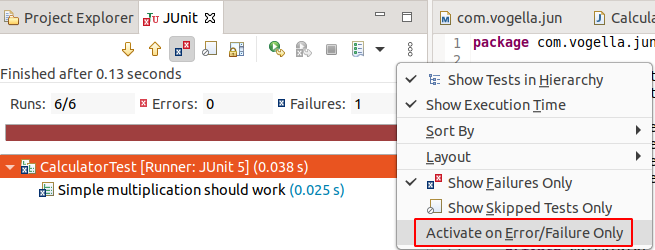
2.4. Show only failed tests
By default, this view shows all tests. You can also configure that it only shows failing tests.

You can also define that the view is only activated if you have a failing test.
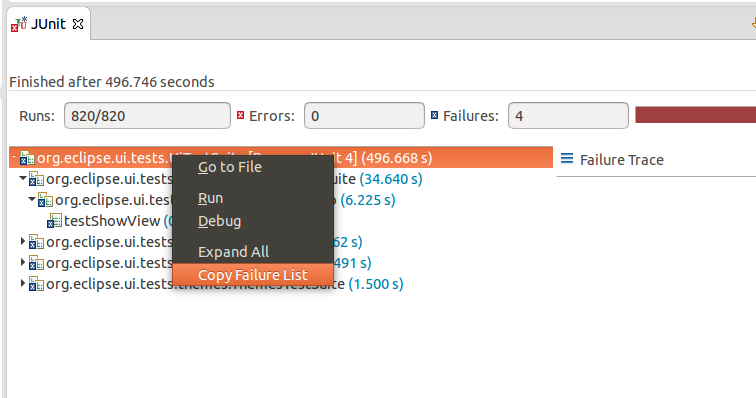
2.5. Extracting the failed tests and stack traces
To get the list of failed tests, right-click on the tests result and select Copy Failure List. This copies the failed tests and the stack traces into the clipboard.
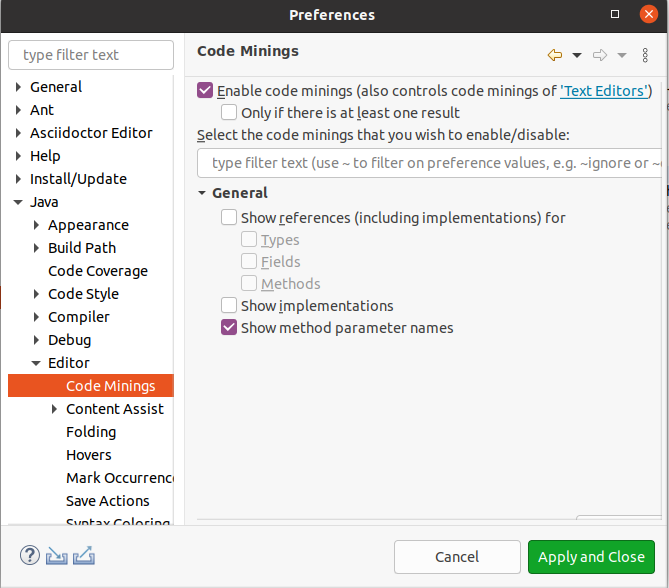
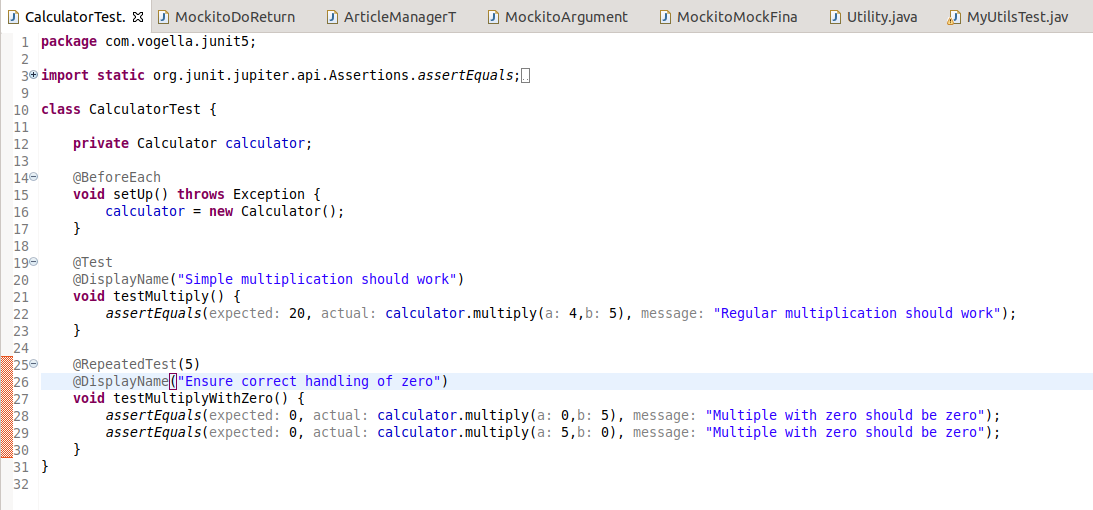
2.6. Using code mining
The Eclipse IDE supports adding additional information to text editors to enrich the editor content without modifying the original source. This can be especially useful for unit tests, as you can activate the method parameters.
You can activate that via .
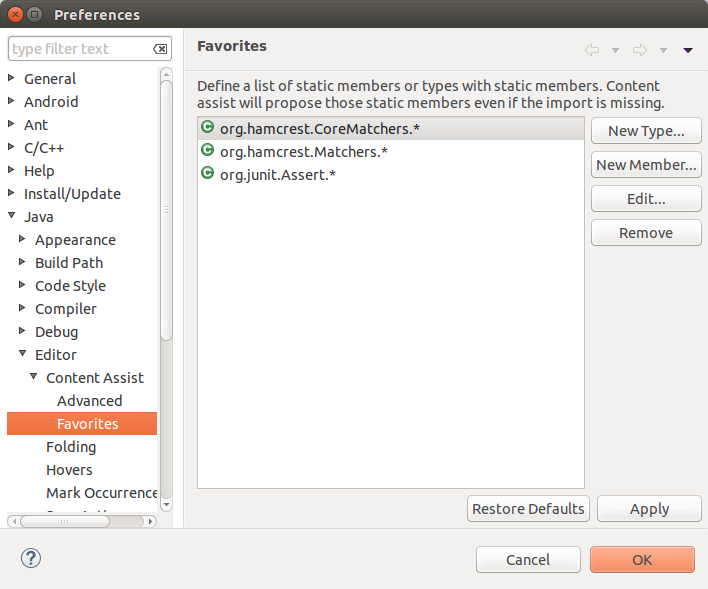
2.7. Setting Eclipse up for using JUnits static imports
The Eclipse IDE cannot always create the corresponding static import statements automatically.
You can configure the Eclipse IDE to use code completion to insert typical JUnit method calls and to add the static import automatically. For this open the Preferences via and select .
Use the New Type button to add the following entries to it:
-
org.junit.Assert -
org.hamcrest.CoreMatchers -
org.hamcrest.Matchers
This makes, for example, the assertTrue, assertFalse and assertEquals methods directly available in the Content Assists.
You can now use Content Assists (shortcut: Ctrl+Space) to add the method and the import.
2.8. Wizard for creating test suites
You can create a test suite via Eclipse. For this, select the test classes which should be included in suite in the Package Explorer view, right-click on them and select .
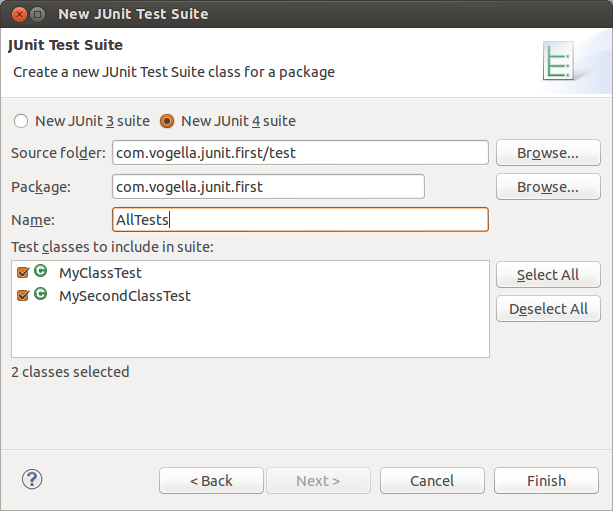
|
Unfortunately, JUnit 5 does not yet support test suites, hence the creation is limited to old JUnit 3 or JUnit 4 test suites. |
2.9. JUnit Plug-in Test
JUnit Plug-in tests are used to write unit tests for your plug-ins. These tests are executed by a special test runner that launches another Eclipse instance in a separate VM. The test methods are executed within that instance.
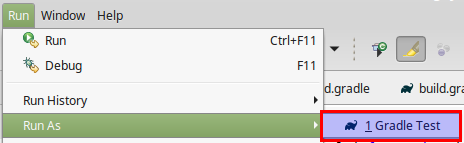
2.10. Using Gradle
If you are using Eclipse it is best to install the Buildship tooling.
Then you can start your tests via .
The result of the test execution will be displayed in the Console view.
 "Gradle Test"" loading="lazy">
3. JUnit Resources
3.1. vogella Java example code
If you need more assistance we offer Online Training and Onsite training as well as consulting