This tutorial describes the usage of the open-source Checkstyle tooling. It describes the usage with Maven, Gradle and the Eclipse IDE.
1. What is Checkstyle?
Checkstyle is an open-source tool that checks code against a configurable set of rules. It allows you to define your own set of rules and check your code against it. These rules can be used in your IDE or via Maven and Gradle.
2. Installation
2.1. Gradle
To use checkstyle in Gradle you have add the plug-in to your build.gradle and provide a config\checkstyle\checkstyle.xml checkstyle configuration file.
plugins {
    // Apply the java-library plug-in for API and implementation separation.
    id 'java-library'
    id 'checkstyle' (1)
}
A detailed example is given in the checkstyle with Gradle exercise.
2.2. Eclipse IDE
If you have the Eclipse marketplace installed, you can install the tooling via the marketplace for Checkstyle Marketplace entry Or you can install into via menu entry by using the following update site: https://checkstyle.org/eclipse-cs-update-site
3. Configuration of the Eclipse IDE to use checkstyle
You can configure you checkstyle settings in the Eclipse IDE via .
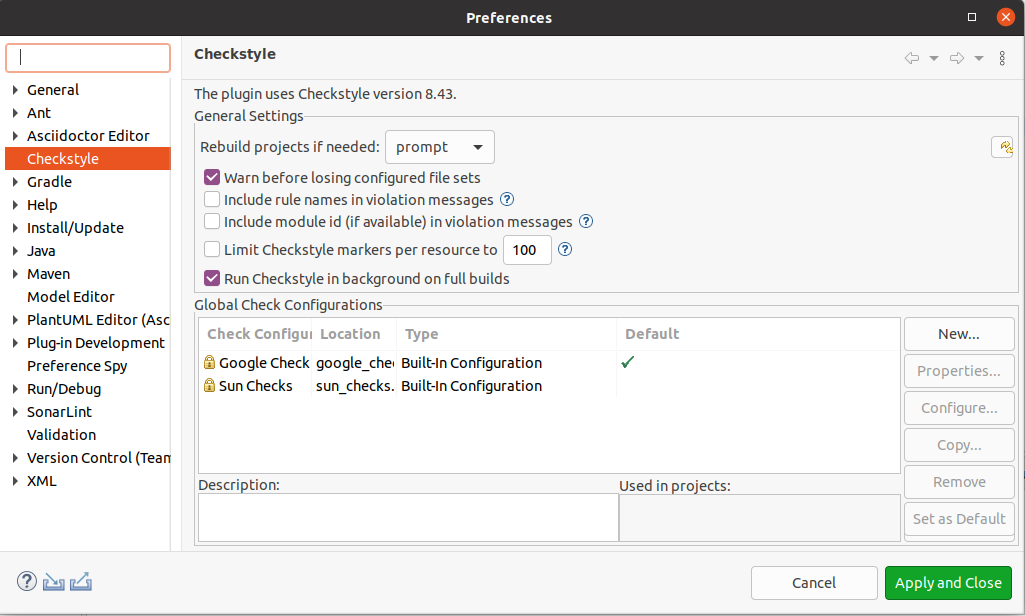
Currently checkstyle provides two default checks, the Sun-style check, and the Google-style check.
3.1. Configuration
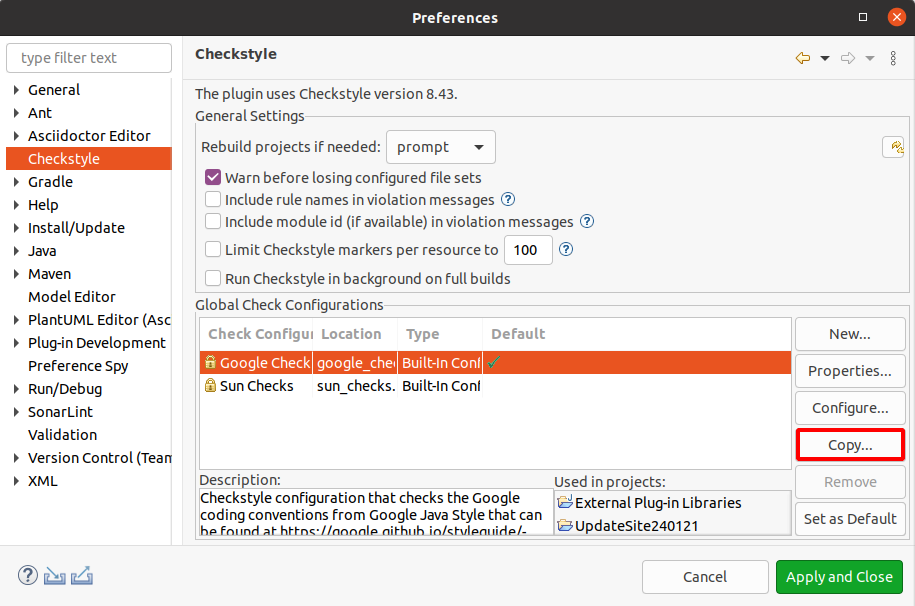
You can turn off certain checks. If you change settings from the standard profile you should always make a copy of the existing profile.
To customize your check, first make a copy of the checks
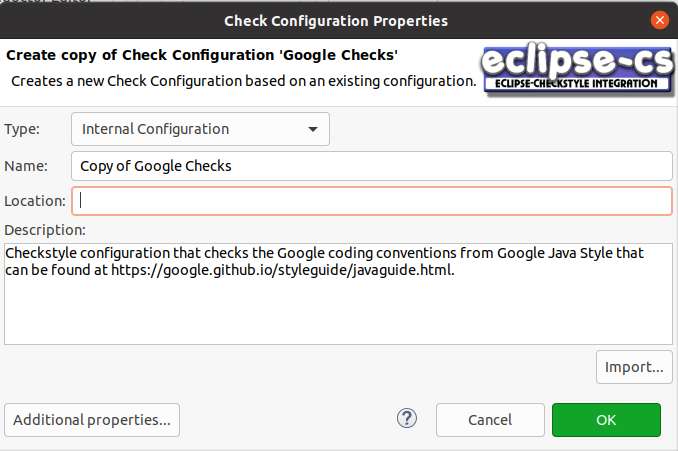
Select your new configuration and press Configure. For example, deactivate the checks for Javadoc Comments.
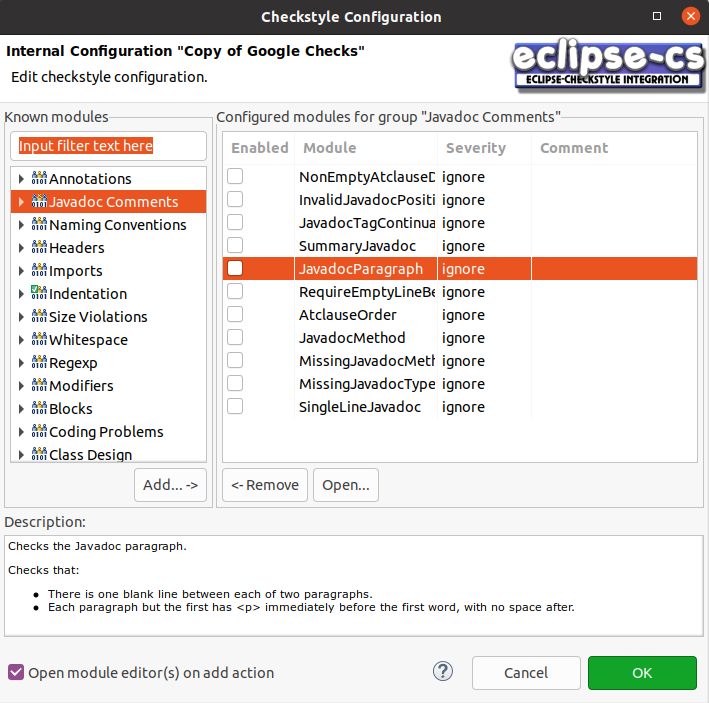
Make this new setting your default one.
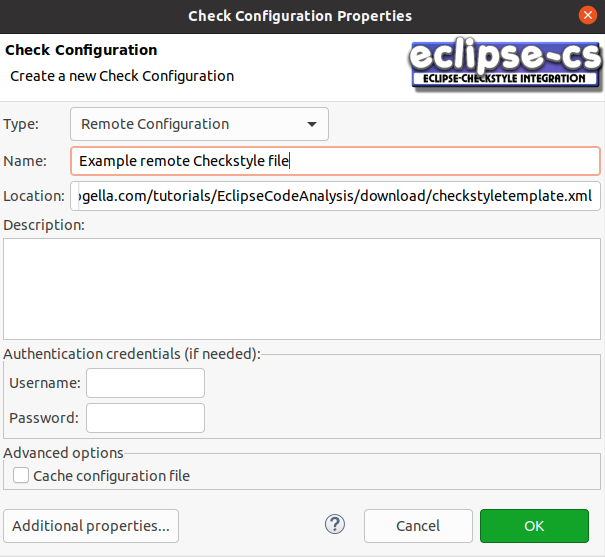
3.2. Use remote rules to use the same Checkstyle rules in the team
For teams it is a good practice to follow the same coding style rules. The Eclipse Checkstyle plug-in allows this by providing a remote site for the Checkstyle settings.
Press new in the settings. Select "Remote Configuration". Give the rule set a description and then type in the URL you want to use for the settings.
Make this new setting your default one.
4. Using Checkstyle in the Eclipse IDE
4.1. Run Checkstyle checks for a project
Right-click on your project and select .
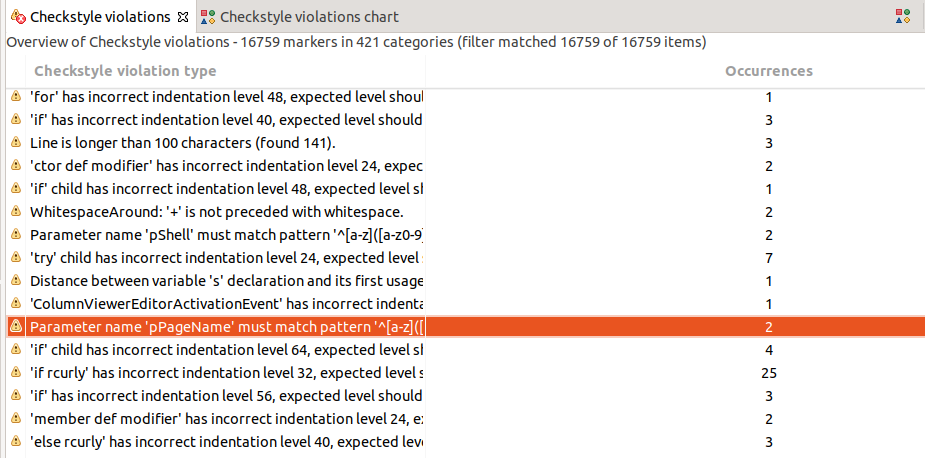
Afterwards, open the checkstyle views to see the reported issues via menu entry.
You can open the Checkstyle violations view to see the details or the Checkstyle violations chart to get a graphical overview of the issues.
In the Checkstyle violations view double-click on a violation to jump to the individual issues. Double-click on an individual issue to jump to it. Use the btn:Back[] button to navigate back.


4.2. Include Checkstyle checks in the Eclipse build
You can also run Checkstyle during a full build.
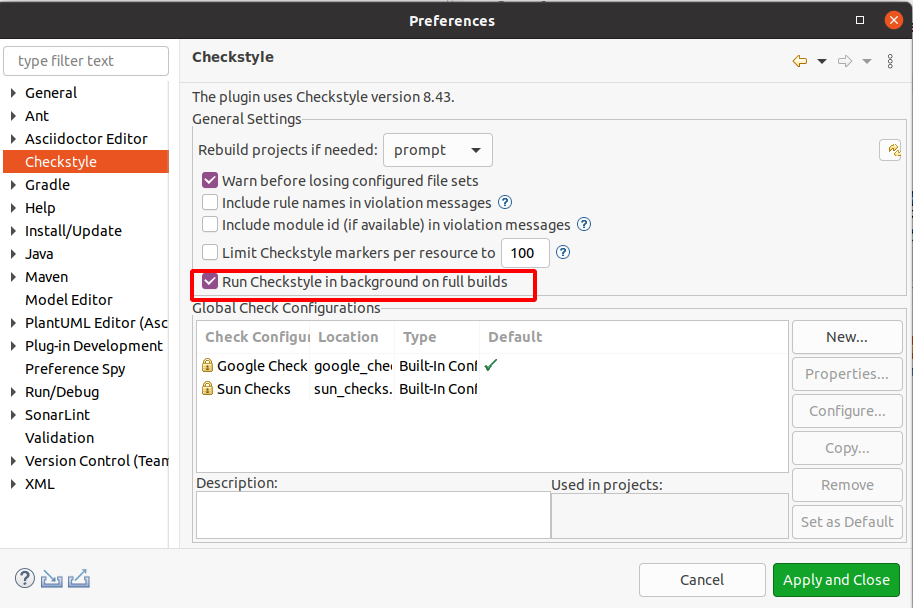
You also need to activate Checkstyle for the relevant projects via a right-click on your project and select .
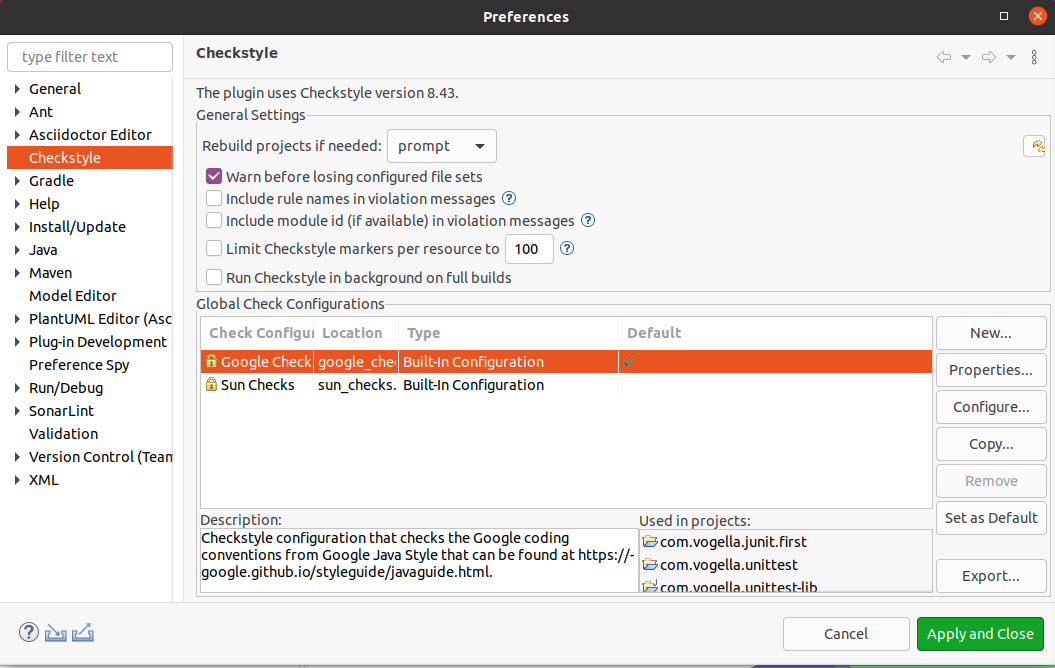
4.3. Exporting your rule set via the IDE
You can also export yoru rules via the Eclipse IDE. This allows you to share them with your team. Use the btn:Export[] in the for this.
5. Checkstyle Maven Plugin
Checkstyle can also be run during a Maven build. The maven-checkstyle-plugin can generate reports about Checkstyle violations or can also be a part of the build and cause a build failure when the rules defined in the checkstyle.xml are violated.
<build>
    <plugins>
        <plugin>
            <groupId>org.apache.maven.plugins</groupId>
            <artifactId>maven-checkstyle-plugin</artifactId>
            <version>2.17</version>
            <executions>
                <execution>
                    <id>validate</id>
                    <phase>validate</phase>
                    <configuration>
                        <configLocation>checkstyle.xml</configLocation>
                        <encoding>UTF-8</encoding>
                        <consoleOutput>true</consoleOutput>
                        <failsOnError>true</failsOnError>
                        <linkXRef>false</linkXRef>
                    </configuration>
                    <goals>
                        <goal>check</goal>
                    </goals>
                </execution>
            </executions>
        </plugin>
    </plugins>
</build>
More information on its usage can be found here: Maven Checkstyle plug-in usage
6. Exercise: Use the Checkstyle Maven Plugin
6.1. Target
The target of this exercise is to check code being build with maven and let the build fail in case rules are violated.
6.2. Prerequisites
For a introduction to maven please refer to the Apache Maven tutorial.
6.3. Create a maven project
Create a quick start maven project in an IDE or by using the command line like this:
mvn archetype:generate -DgroupId=com.vogella.build.maven.java \
-DartifactId=com.vogella.build.maven.java  \
-DarchetypeArtifactId=maven-archetype-quickstart \
-DinteractiveMode=false
6.4. Apply the Checkstyle Plugin
To activate the maven-checkstyle-plugin it has to be applied to the generated pom.xml.
<build>
    <plugins>
        <plugin>
            <groupId>org.apache.maven.plugins</groupId>
            <artifactId>maven-checkstyle-plugin</artifactId>
            <version>2.17</version>
            <executions>
                <execution>
                    <id>validate</id>
                    <phase>validate</phase>
                    <configuration>
                        <encoding>UTF-8</encoding>
                        <consoleOutput>true</consoleOutput>
                        <failsOnError>true</failsOnError>
                        <linkXRef>false</linkXRef>
                    </configuration>
                    <goals>
                        <goal>check</goal>
                    </goals>
                </execution>
            </executions>
        </plugin>
    </plugins>
</build>
This configuration uses the sun_checks.xml Checkstyle rules by default.
To specify custom Checkstyle rules a configLocation needs to be specified.
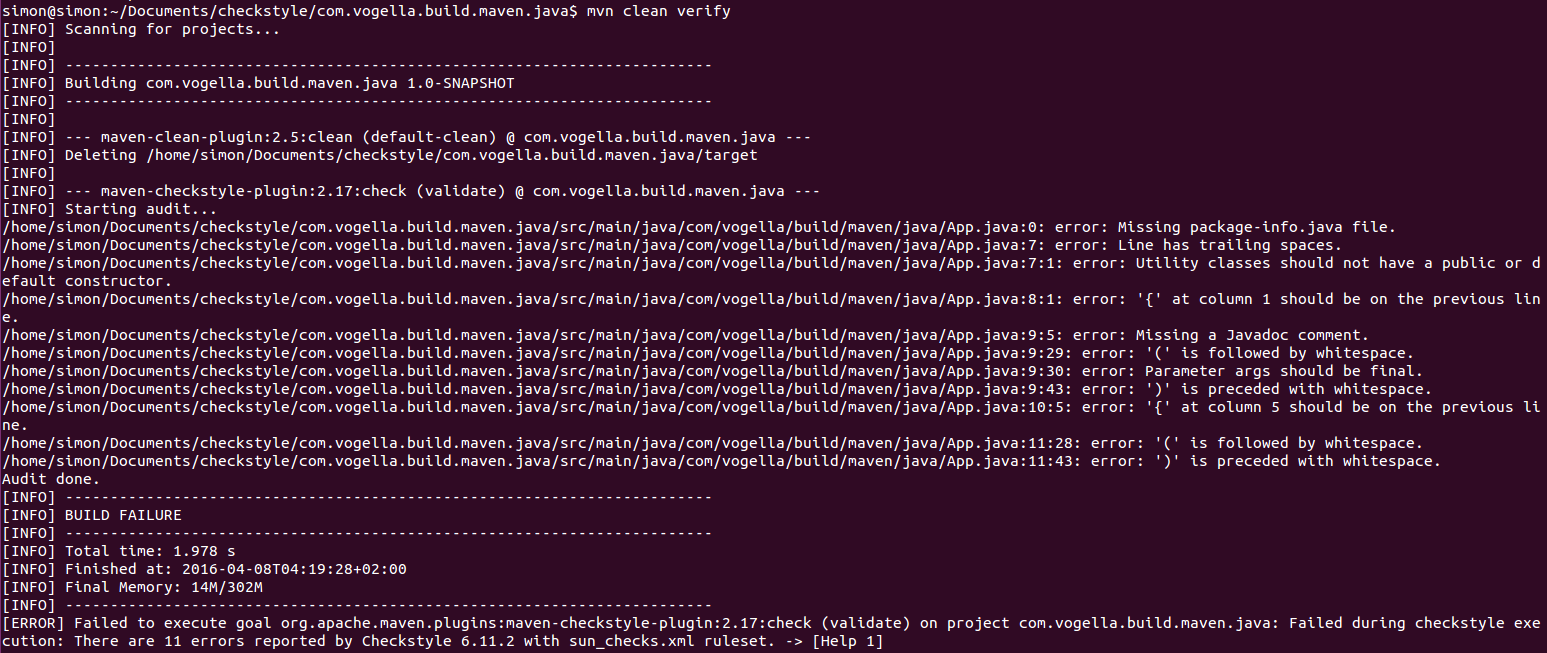
6.5. Validate
Run mvn clean verify to see all Checkstyle validation failures of the generated project.
7. Exercise: How to add Checkstyle to a Gradle build
7.1. Check check file
Gradle expects the configuration of your rules by default in root folder.
-
config
-
checkstyle
-
checkstyle.xml
-
suppressions.xml
-
-
Create the following checkfile in the root folder of your project.
<?xml version="1.0"?>
<!DOCTYPE module PUBLIC "-//Checkstyle//DTD Checkstyle Configuration 1.3//EN" "https://checkstyle.org/dtds/configuration_1_3.dtd">

<module name="Checker">
  <property name="charset" value="UTF-8" />

  <property name="severity" value="warning" />

  <property name="fileExtensions" value="java, properties, xml" />
  <!-- Excludes all 'module-info.java' files              -->
  <!-- See https://checkstyle.org/config_filefilters.html -->
  <module name="BeforeExecutionExclusionFileFilter">
    <property name="fileNamePattern" value="module\-info\.java$" />
  </module>
  <!-- https://checkstyle.org/config_filters.html#SuppressionFilter -->
  <module name="SuppressionFilter">
    <property name="file" value="${org.checkstyle.google.suppressionfilter.config}" default="checkstyle-suppressions.xml" />
    <property name="optional" value="true" />
  </module>

  <!-- Checks for whitespace                               -->
  <!-- See https://checkstyle.org/config_whitespace.html -->
  <module name="FileTabCharacter">
    <property name="eachLine" value="true" />
  </module>

</module>
Now add the checkstyle plug-in to your build.gradle
checkstyle {
    configFile = file("${rootDir}/config/checkstyle/checkstyle.xml") (1)
}
checkstyleMain {
    source ='src/main/java'
}
checkstyleTest {
    source ='src/test/java'
}| 1 | Assume that the file is in the root folder, this is the default and this is only added to demonstrate you how you can configure it |
7.2. Run the build
Run the gradle build task, this includes the checkstyle check or run only the checkStyleMain command to run the checkstyle checks.
7.3. Configure the build to fail in case of checkstyle violoations
To fail the build in case you have violations in checkstyle set the severity to error in your checkstyle.xml file.
<?xml version="1.0"?>
<!DOCTYPE module PUBLIC "-//Checkstyle//DTD Checkstyle Configuration 1.3//EN" "https://checkstyle.org/dtds/configuration_1_3.dtd">

<module name="Checker">
  <property name="charset" value="UTF-8" />

  <property name="severity" value="error" />

    <!-- your rules -->
</module>
8. Conclusion
Integrating Checkstyle in your IDE and command line workflow with Maven or Gradle is simple and it allows you improve the quality of code over time and reach a common code style.
The implementation of all these examples and code snippets can be found over on GitHub. The Maven examples relevant for this tutorial are located in Checkstyle with Maven and the Gradle examples are located in Checkstyle with Gradle.
If you need more assistance we offer Online Training and Onsite training as well as consulting