This tutorial describes how to use Android Studio for Android development. It focuses on the usage of the IDE and not on the Android development in general.
1. Introduction to Android Studio
1.1. What is Android Studio?
Android Studio is currently the IDE promoted by Google for Android development. It is based on IntelliJ and adds Android development capabilities.
|
Why is my favorite development tool not supported?
Unfortunately, Google does not provide real options for Android developments. The team is focusing on stabilizing Android Studio since a few years and it seems that they lack the capacity to support other tools like Visual Studio Code or Eclipse. |
1.2. The Android Studio toolbar
The Android Studio toolbar contains several entries that are specific for Android development

| Number | Action |
|---|---|
1 |
AVD Manager |
2 |
Sync Project with Gradle Files |
3 |
Project Structure / Settings |
4 |
Android SDK manager |
1.3. Storage of the Android project
Android Studio stores the projects by default in the home folder of the user under AndroidStudioProjects.
The main directory contains configuration files for Android Studio and the Gradle build files. The application relevant files are contained in the app folder. The most interesting files are contained in the src folder. This structure is depicted in the following screenshot.
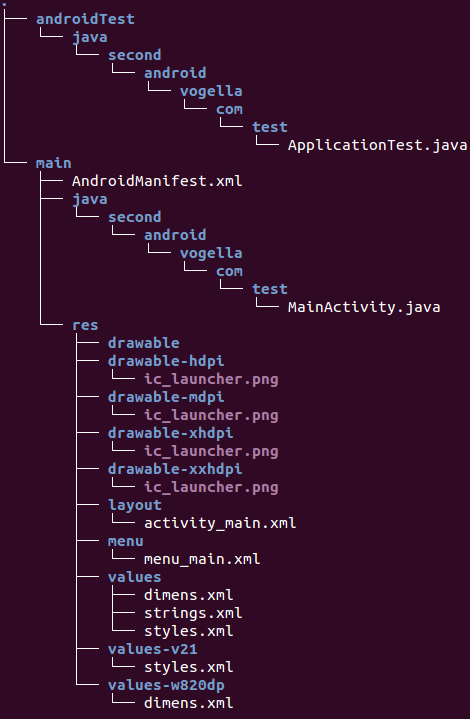
|
Android Studio puts a virtual view on these files, e.g., it groups the resource files under a common node. This view is not identical with the file structure. |
1.4. Opening new projects / switching between projects
Android Studio displays different projects in a different window. You can select to open an existing project. This opens a new window with this project.
Alternative, you can close the current project via and create a new one or open an existing project.
1.5. Clean build / synchronizing the project with Gradle
The build functionality in Android Studio sometimes fails to recognize that a resource has changed. If you want to trigger manually a full rebuild, select to perform a complete build of all input.
Changes in the Gradle build file, require manual intervention. To synchronize your project with Gradle, use or press the corresponding hyperlink in the tooltip of the Gradle build file editor.
1.6. Updating settings for Android Studio
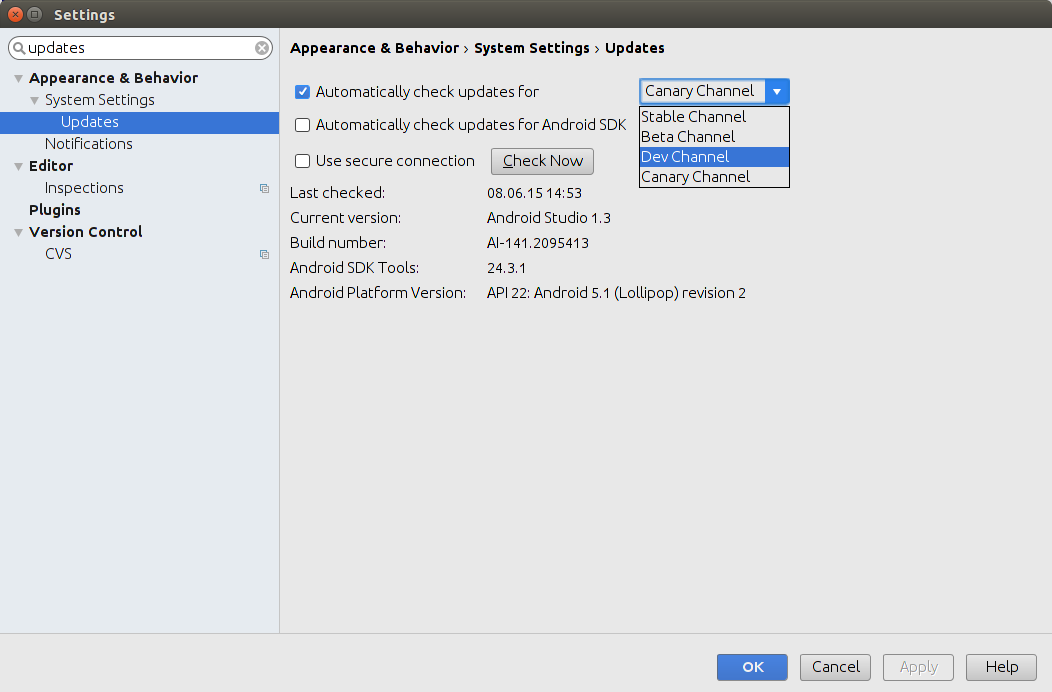
Android Studio is provided in different flavors. The user can select if he want to use a stable version or test out recent features.
-
Canary channel: Canary builds are the bleeding edge, released about weekly. While these builds do get tested, they are still subject to bugs, as we want people to see what is new as soon as possible. This is not recommended for production.
-
Dev channel: Dev builds are hand-picked older canary builds that survived the test of time. It should be updated roughly bi-weekly or monthly.
-
Beta channel: If a new beta milestone for the next version of Android Studio is reached, this channel gets an update. When the version is stable, the beta channel contains the stable version until the next version’s beta.
-
Stable channel: Contains the most recent stable version of Android Studio.
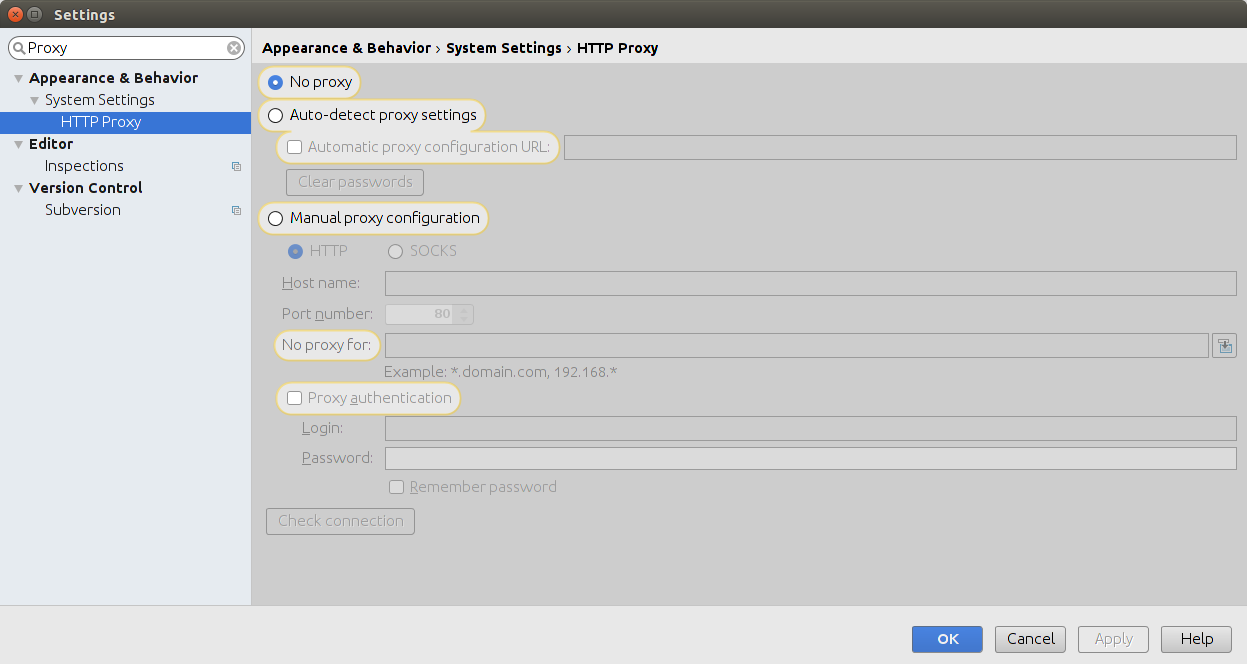
1.7. Using a proxy with Android Studio
You can use Android Studio and Gradle behind a proxy. For this you have to enter it via . Android Studio updates also the setting for Gradle to use this proxy.
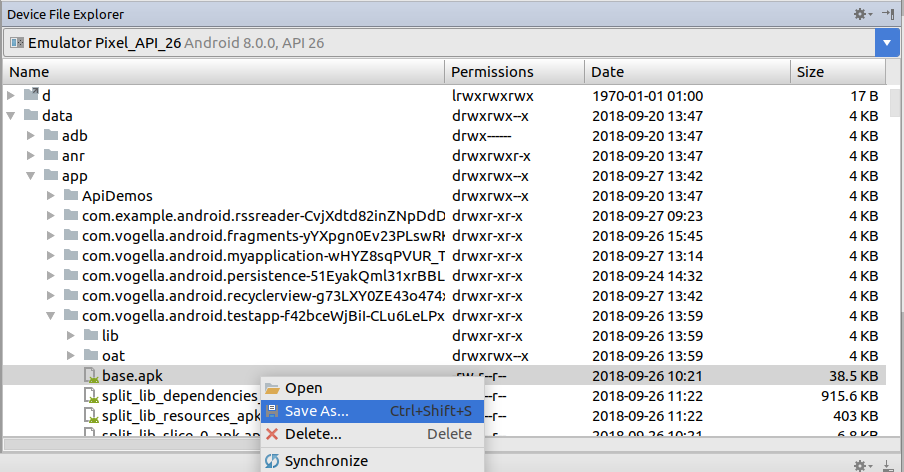
1.8. Device File Explorer
Android Studio allows to open the Device File Explorer via the menu. This starts a view that allows to explore the file system on your Android device. Note that the file system access on physical devices is usually restricted.
You can also use the explorer to upload or download files to and from the device.
1.9. Emulator
You can resize the emulator interactively via the corners of the emulator window.
2. Using Android Studio efficiently
2.1. Keyboard shortcuts
The following is a list of useful shortcuts for Android Studio.
| Shortcut | Mac | Description |
|---|---|---|
Ctrl+Space |
Content assists in the code editor |
|
Alt+Enter |
Quick fix proposing suggestions for compilation errors or code improvements |
|
Shift+F6 |
Start the rename refactoring |
|
Ctrl+Alt+L |
Option+Command+L |
Format the source code |
Shift+F10 |
Run the current program |
|
Ctrl+F |
Inline search in the current editor |
|
Ctrl+N |
Open File |
|
Ctrl+Shift+F |
Text search over the whole project |
|
Shift+Shift |
Search everywhere. Does not search in source files |
|
Ctrl+P |
Show the possible parameters of a method or an constructor. |
|
Shift+Alt+↑ or Shift+Alt+↓ |
Moves selected line(s) up or down. |
|
Ctrl+Y |
Command+Backspace |
Delete line at carret |
Ctrl+Alt+F (or Choose Refactor |
Introduce Field on the main menu) |
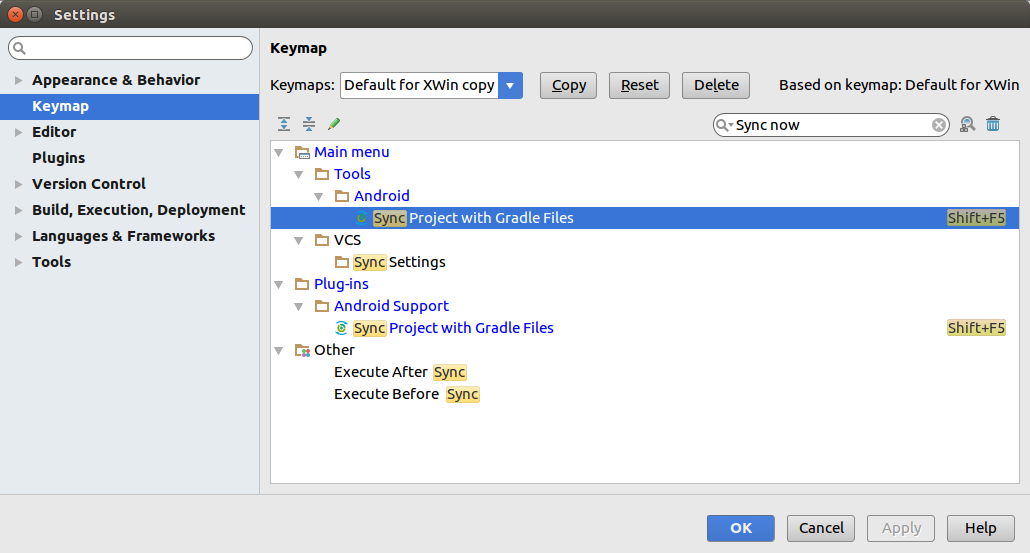
2.2. Add shortcut for synchronizing your Gradle file
The Gradle operation Sync now is a frequent task, I suggest to assign a shortcut to it. For this, select and use the right-click to assign a shortcut to Sync now.
3. Using Android Studio
|
Android Studio menus entries are dynamic calculated based on your current selection. Unfortunately, this feature seems currently a bit buggy. If you do not see a certain menu entry, try selecting the app entry again. |
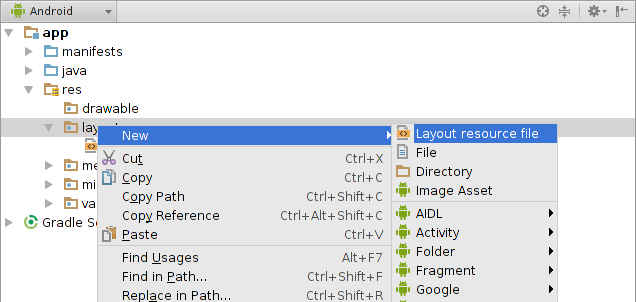
3.1. Creating a new layout file
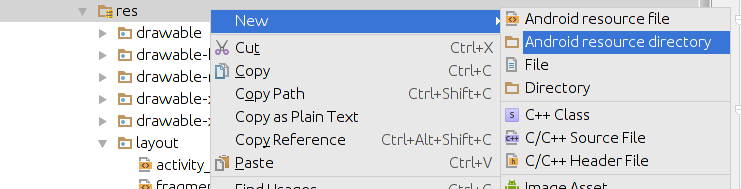
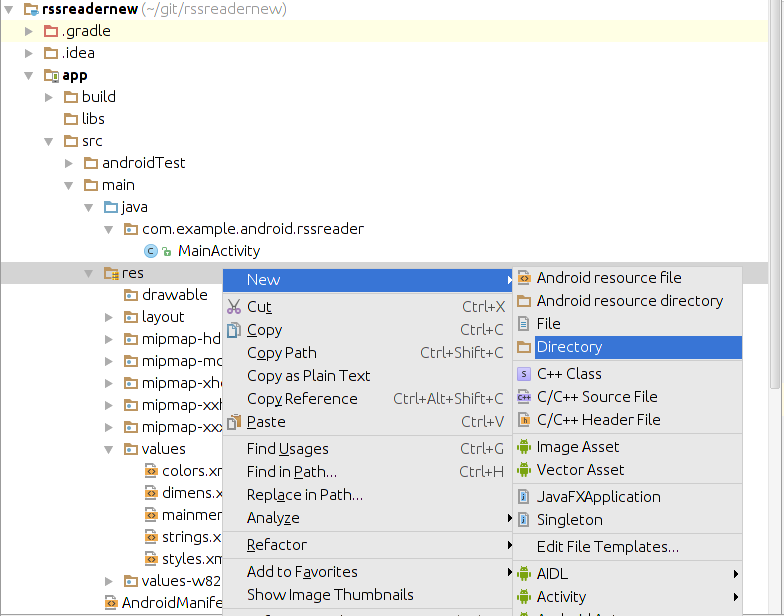
To create a new layout file, select your app folder, right-click on it and select . Choose the Layout option to create a layout file.
|
The availability of the menu entries and the resulting dialog depends on the selected folder. If the entry is not available or the resulting dialog is incorrect, ensure you select the 'app' folder. |
The easiest way to create a new resource file, e.g., a layout file, is the context menu on the corresponding folder. To create a new folder, see Creating a new resource folder. This is demonstrates for the creation of a new layout file in the following screenshot.
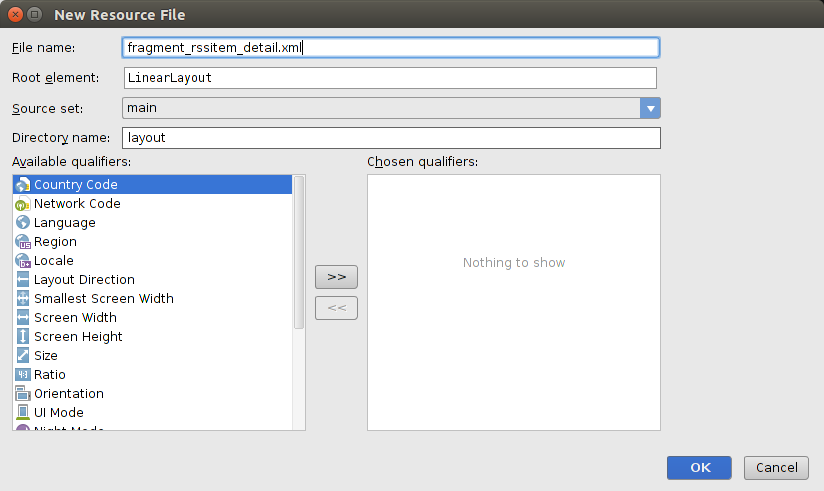
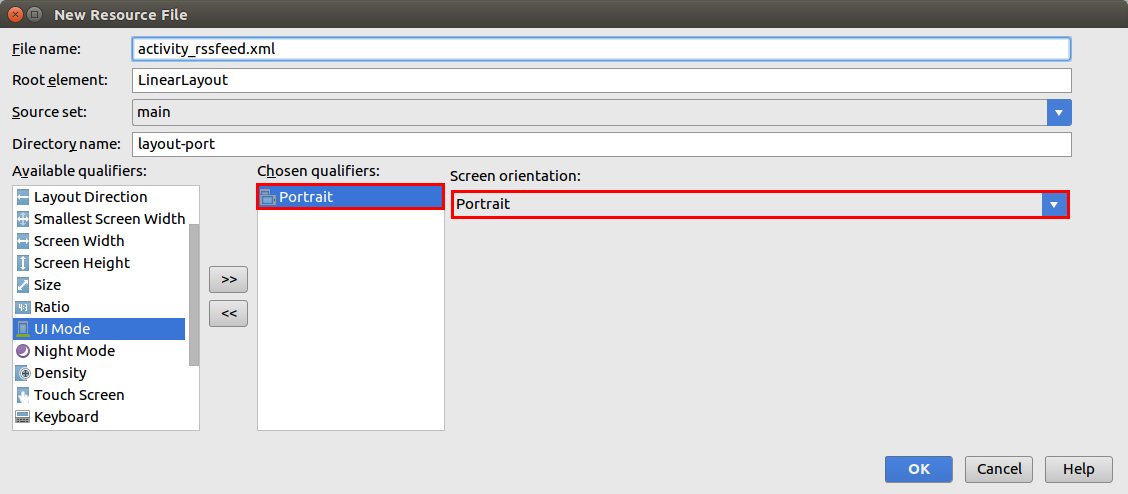
| If you want to create a new layout file for a certain qualifier, you can select it in the creation dialog. |
3.2. Creating a new resource file
Similar to the above described creation of layout file, you can create other resources, by changing the selection in the displayed dialog.
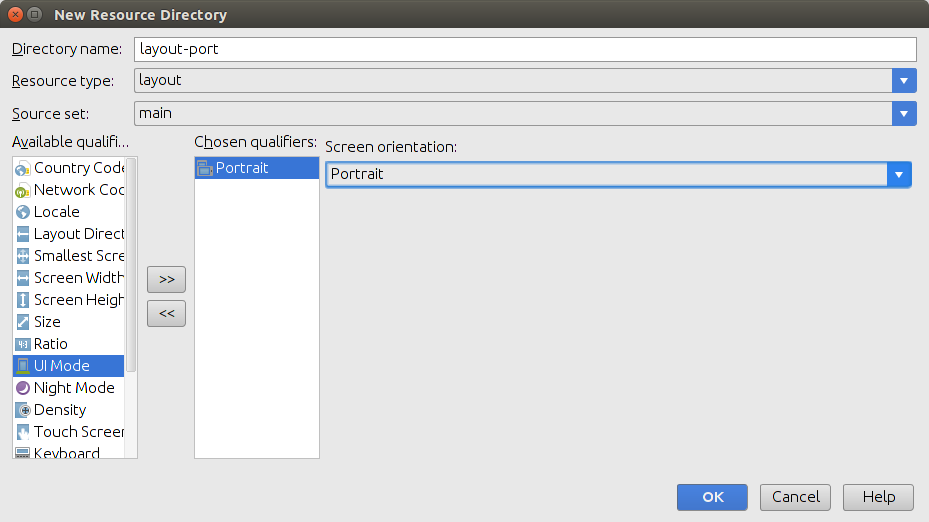
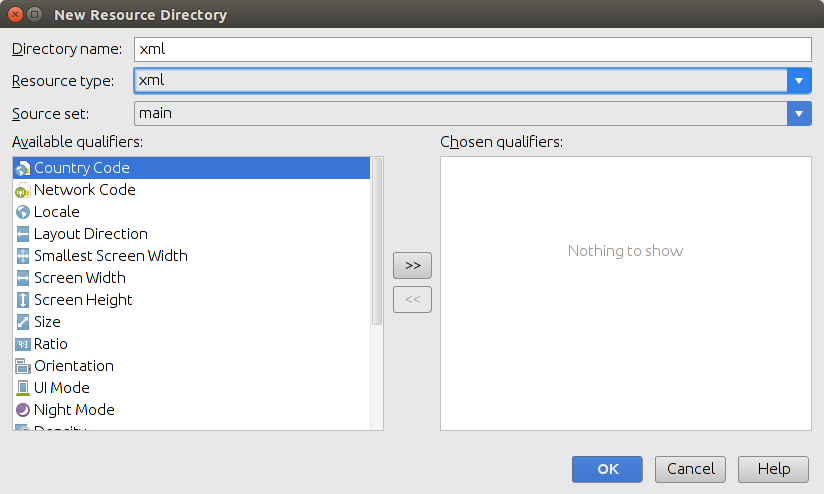
3.3. Creating a new resource folder
If a resource folder is missing, you have to create it. This is demonstrated by the following screenshots for the creation of the _layout-port_folder.
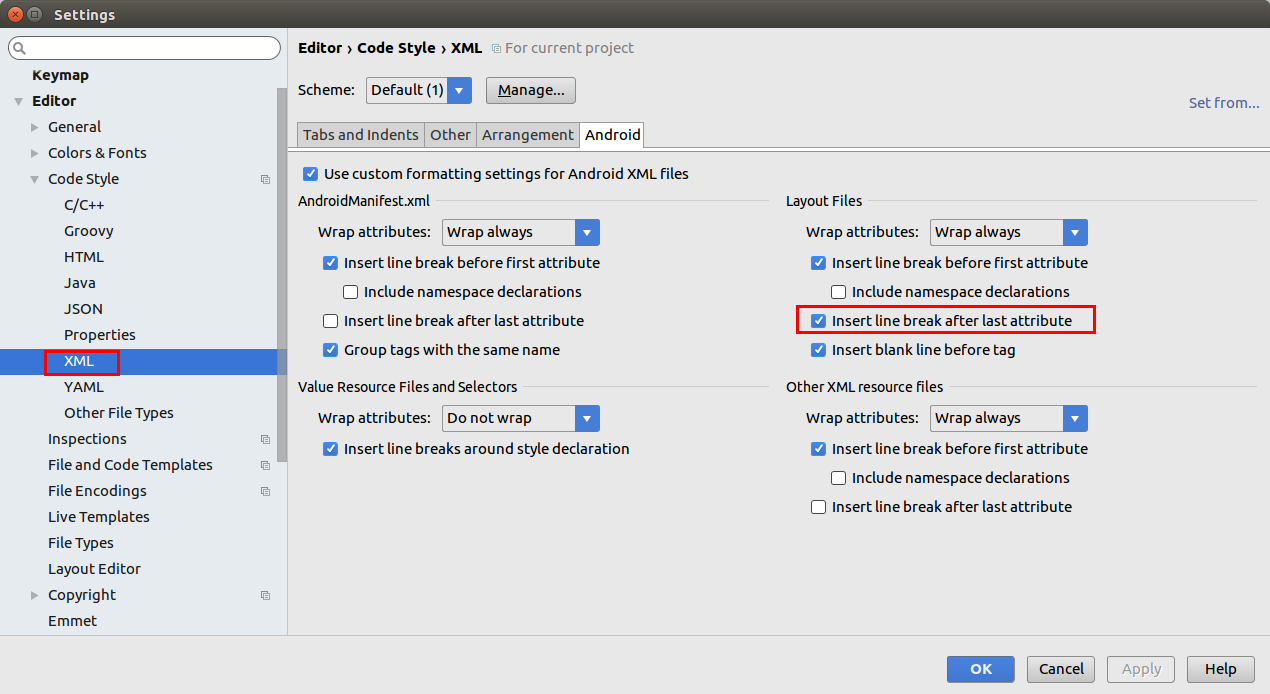
3.4. Working on layout files
Android Studio offers a visual and a text editor for editing your layout files. The easiest way to add new widgets to an existing layout file is to find these elements in the Palette and drag and drop them into your layout. In the visual design mode you can remove a view by right-clicking it and by selecting the Delete entry for the context menu.
Android Studio replaces placeholder values with the real values. This makes it sometimes harder to compare files. Double-click on the value in this case to see the placeholder value.
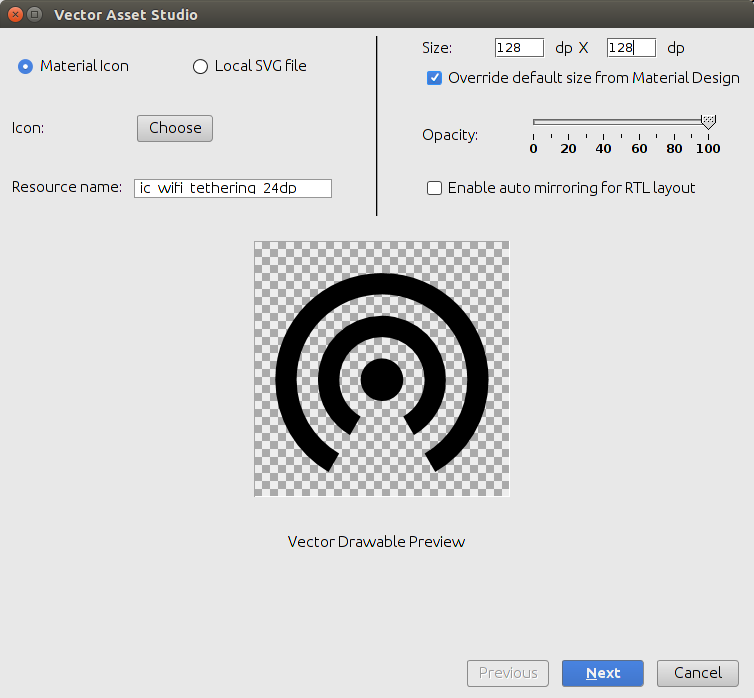
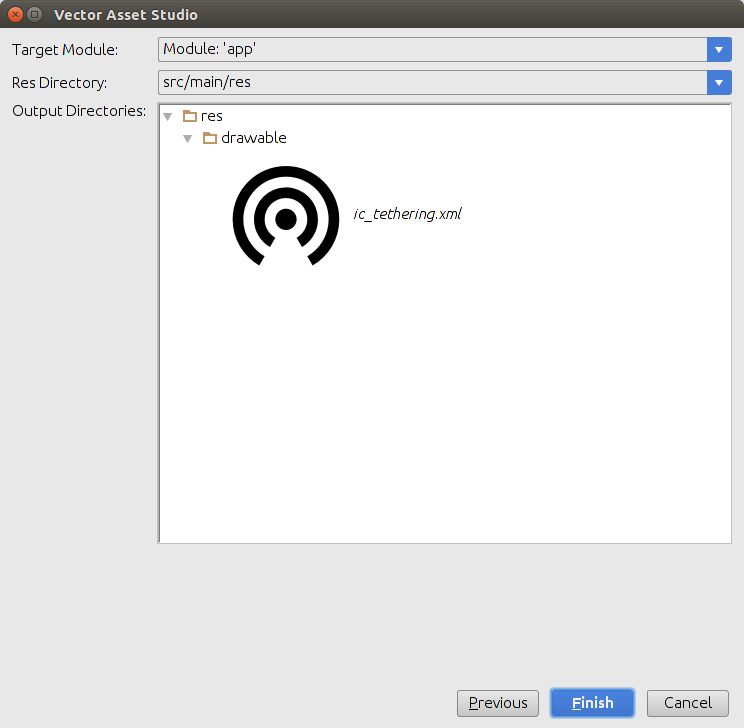
3.5. Add images to your project
From the menu of Android Studio, select to create a new vector drawable. The creation process is demonstrated for the ic_tethering icon.
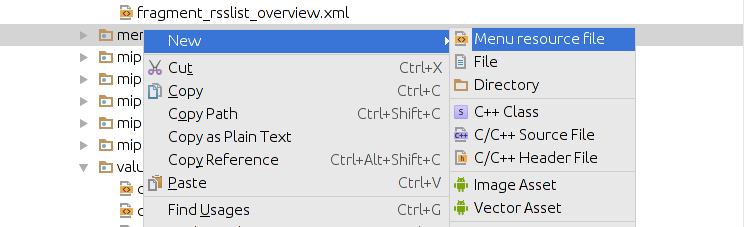
3.6. Add a new menu resource
If not yet present, create a new directory called menu.
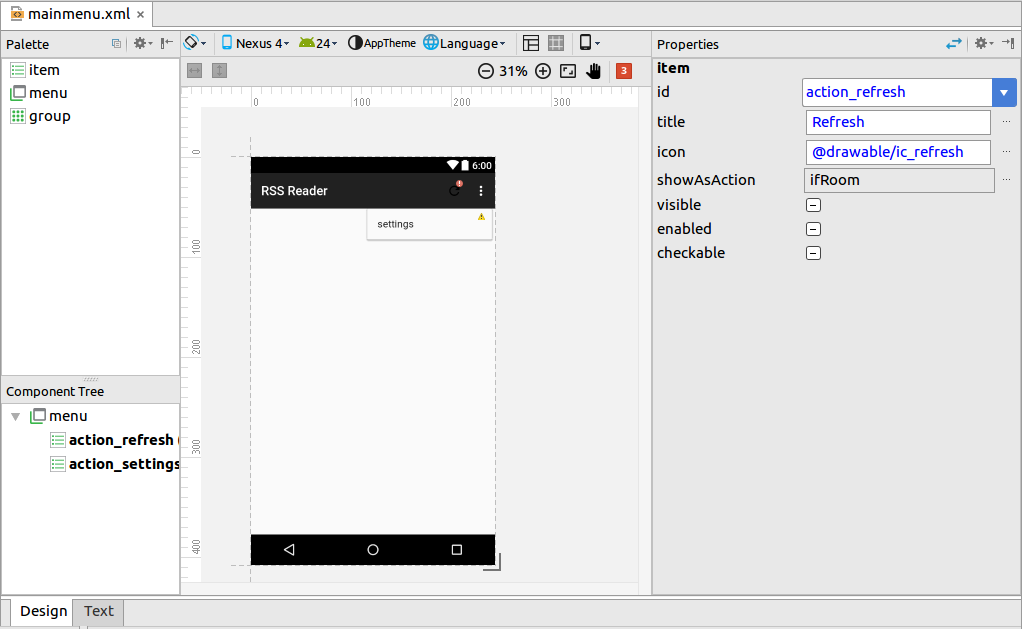
Create a new XML resource called mainmenu.xml for your menu.
Afterwards, you can manually edit the generated file via the Text tab or use the Design tab to edit it via drag and drag.
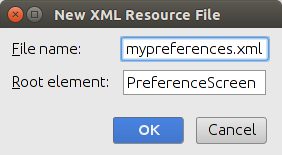
3.7. Create preference file
If you project does not have an /app/res/xml folder create one.

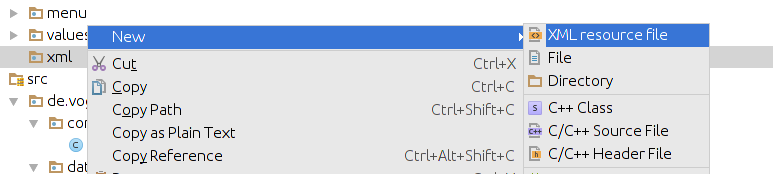
You can now create an Android XML resource in the xml folder.
3.8. See the log statements of your Android application
Use the Android view (Shortcut: Alt+6) to see the log statements in Android Studio.
4. Java programming tasks
4.1. Generating Getter/setting, toString, etc.
Select the menu entry to generate getter, setter, constructors, etc.
4.2. Rename a resource
To rename a resource, e.g., a Java file, select from the context menu of the corresponding resource or use the Shift+F6 shortcut.
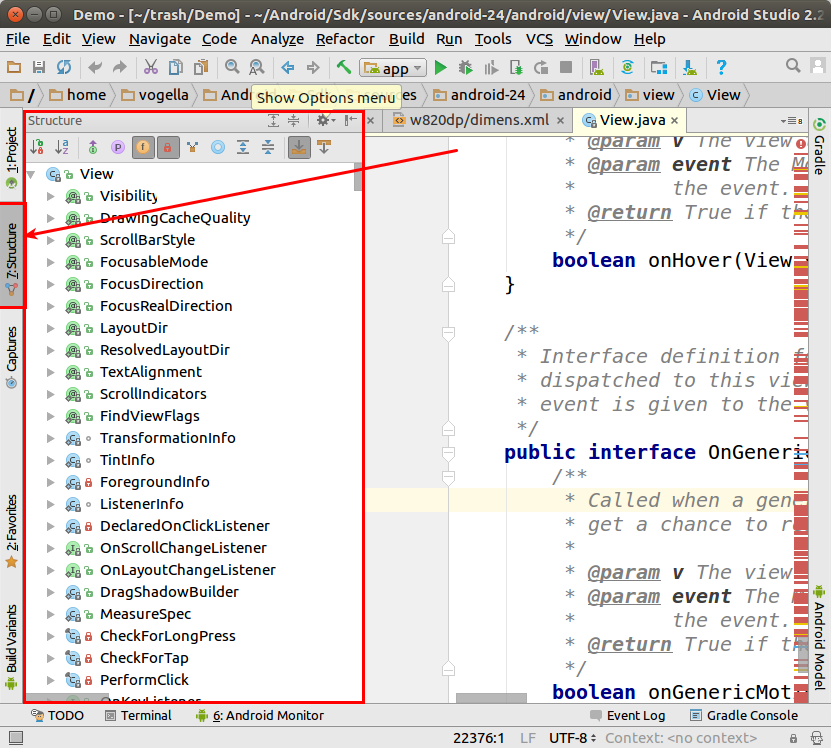
4.3. Structure overview of a class / interface (similar to Outline view in Eclipse)
To see the structure of a class or an interface you can use the Structure view (kbd:Alt+7[]). This gives you an overview of the selected element, similar to the Outline view in Eclipse.
4.4. Using Java 8 in Android applications
As of Android Studio 2.4 you can use Java 8 features, with some restrictions. As of Android Gingebread (API 9) and above you can use:
-
Lambda expressions
-
java.util.function
As of Android 24 you can use:
-
Default and static interface methods
-
Repeatable annotations
-
Streams
-
Reflection APIs
To enable Java 8 in your project use the following settings.
android {
 ...
  compileOptions {
    sourceCompatibility JavaVersion.VERSION_1_8
    targetCompatibility JavaVersion.VERSION_1_8
  }
}
4.5. Using live template in your Java code
Android studio provides templates for typical task in Java and Android. The following list contains a few of the most useful:
-
Toast - Creates a Toast
-
fbc - findViewById with cast
-
const - Defines a constant *
Use to see the full list.
5. Working with Git
5.1. Cloning a Git repository
Select to clone a Git repository.
5.2. Cloning a repository from GitHub
Select to clone a GitHub repository.
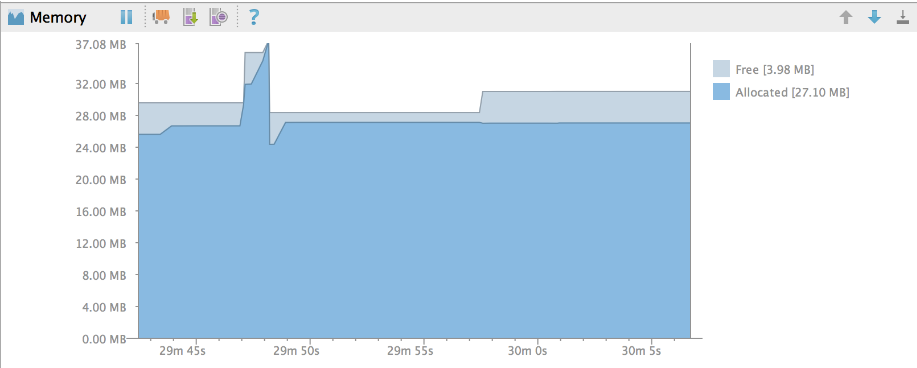
6. Memory monitor
To see the memory consumption of your app, you need to run it. Open the Android Monitor. Click the Monitors tab and display the Memory Monitor. Enable the Memory Monitor by clicking the Pause icon to deselect it.
7. Using Gradle with the IntelliJ IDE
7.1. IntelliJ IDE and Gradle support
In its default configuration IntelliJ has good Gradle support.
7.2. Gradle projects view
To activate the Gradle projects view, select .
This enables a toolbar on the right, click on it to expand the Gradle projects view.
7.3. Executing Gradle tasks
Double-click on a task Gradle projects view to run it.
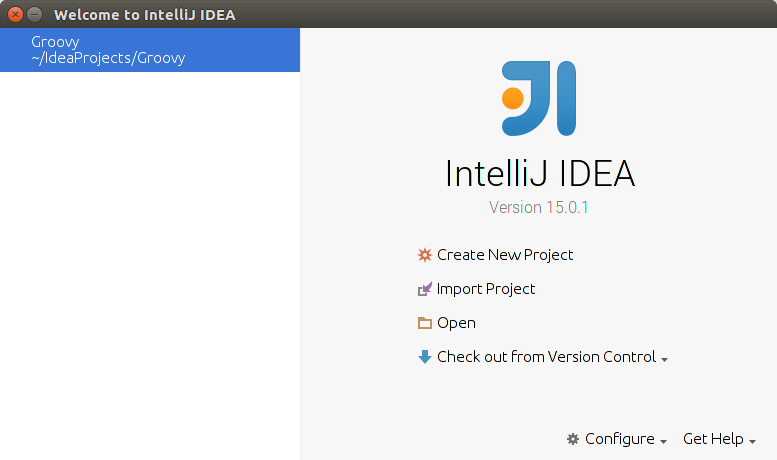
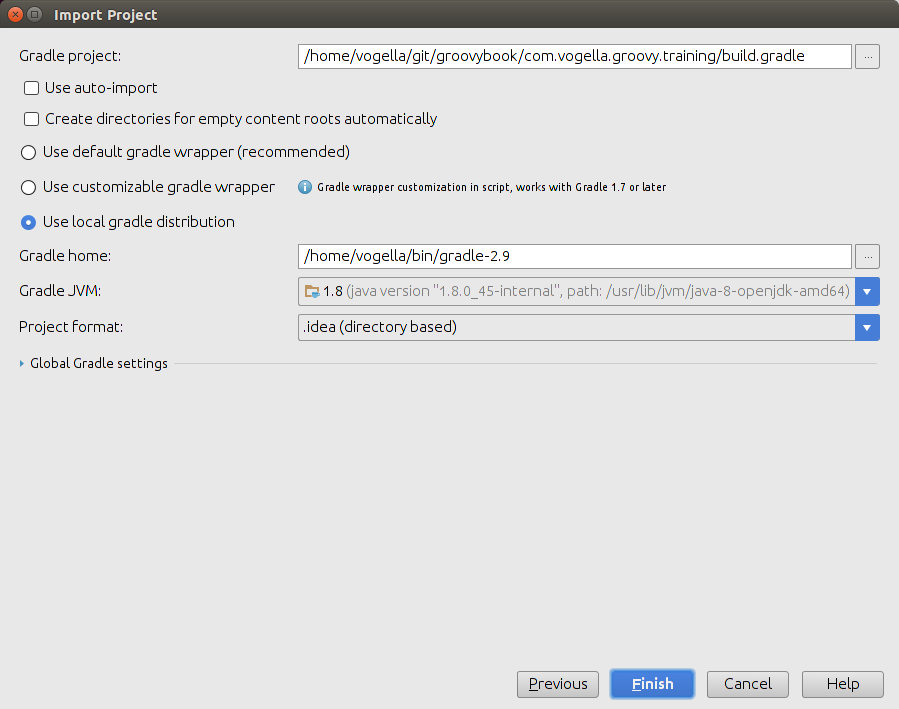
7.4. Import an existing Gradle project into Intellij
Close a potentially existing projects via and select the Import Project entry. Afterwards, follow the steps as demonstrated by the following screenshots.

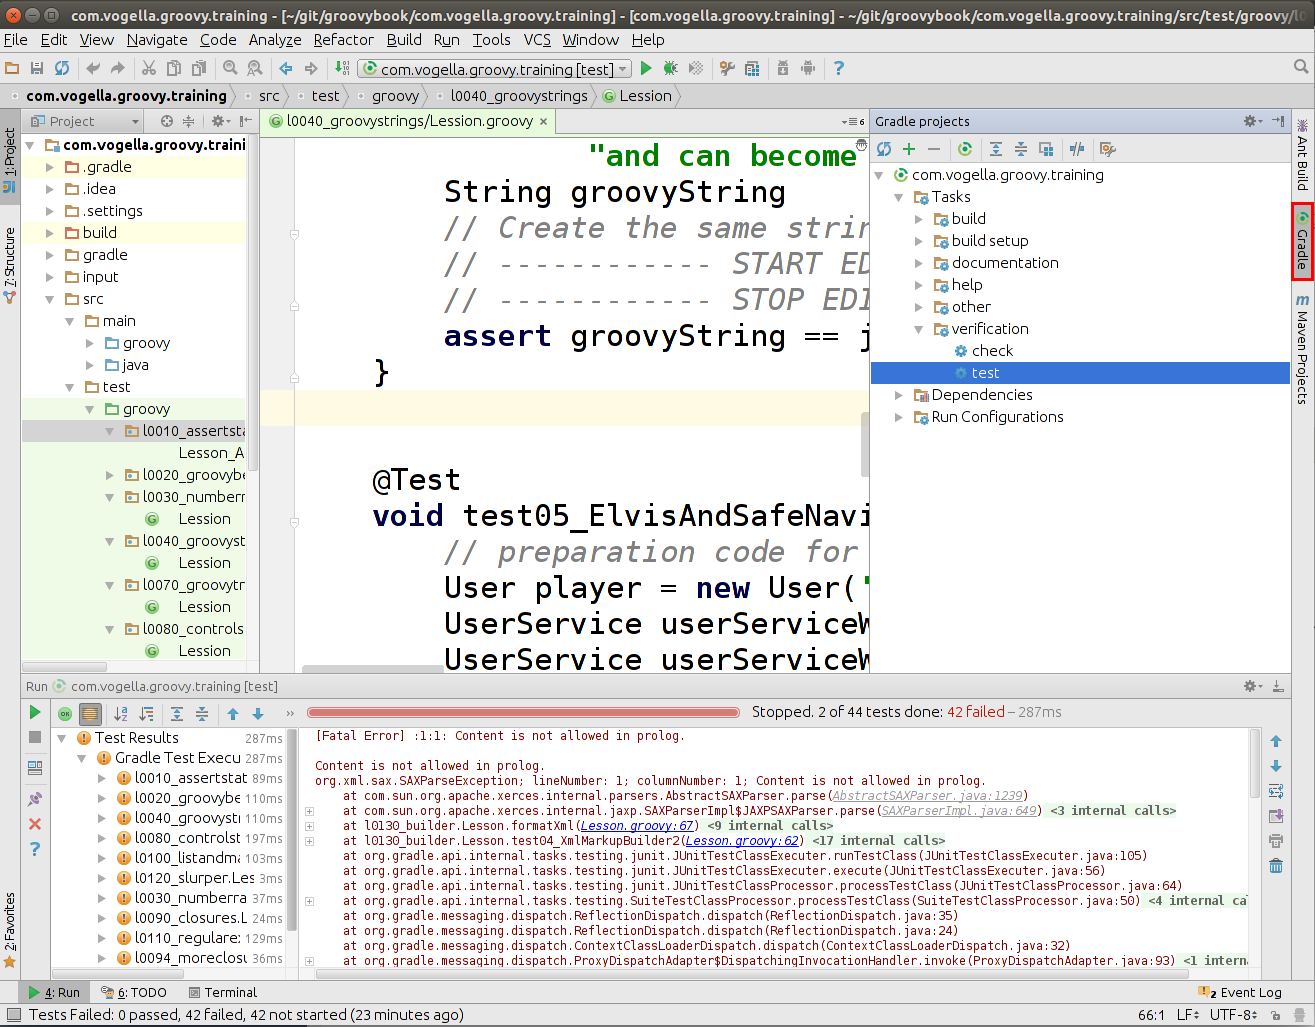
7.5. See all executed tests in IntelliJ
Click on the highlighted button to see all tests in IntelliJ, not only the failing tests.

8. Migrating from Eclipse
8.1. Importing Eclipse Android projects into Android Studio
To migrate existing Android projects into Android Studio you can follow these steps:
-
In Android Studio, close any projects currently open. This opens the Welcome screen. Select Import Non-Android Studio project.
-
Browse to the project folder and click OK.
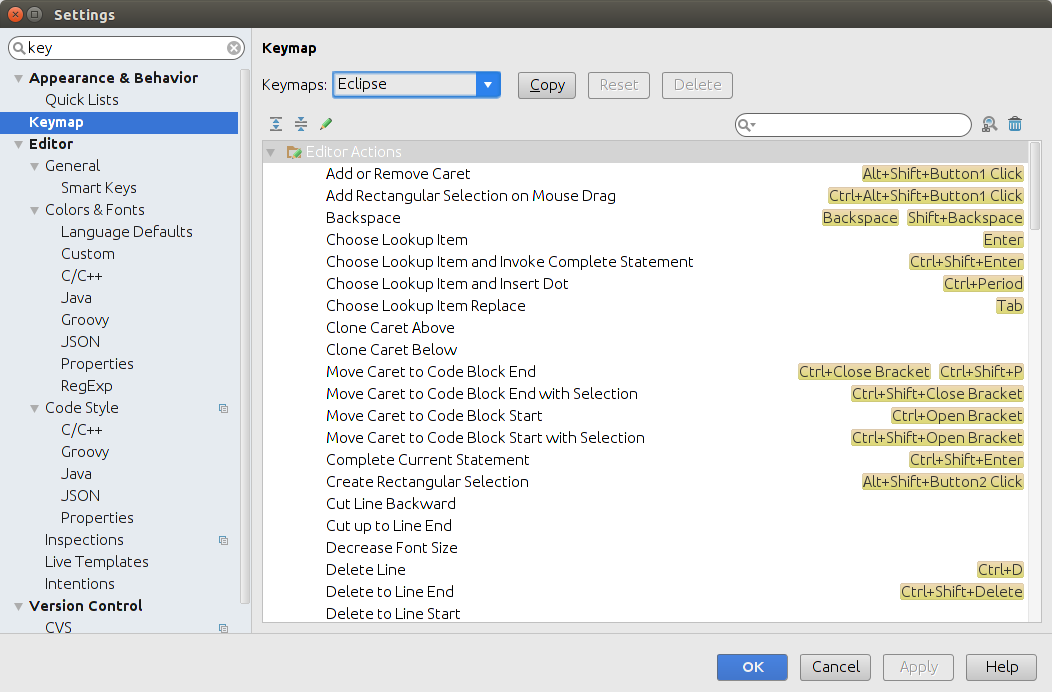
8.2. Changing the key binding to use Eclipse bindings
Select and change the Android Studio key bindings to the key indings of the Eclipse IDE. This might help you to get started faster the Android Studio, if you are already familiar with the Eclipse IDE.
9. Using Android Studio Tipps
9.1. vogella Java example code
If you need more assistance we offer Online Training and Onsite training as well as consulting