This tutorial describes how to create Android applications with Kotlin. It is based on the latest and greatest Android and Android Studio release.
1. Android and Kotlin
At the Google I/O 2017 Google announced that the programming language Kotlin is now officially supported for Android app development using Android Studio.
This section describes how to setup and use Kotlin to develop Android applications.
2. Exercise: Getting started with Android Studio and Kotlin
After configuration, you can start using Kotlin right away in your existing Android project (no conversion is needed) as Kotlin can call Java code and vice versa. This exercise shows how to configure Android Studio for Android app development with Kotlin.
2.1. Using Kotlin with Android Studio < 3.0
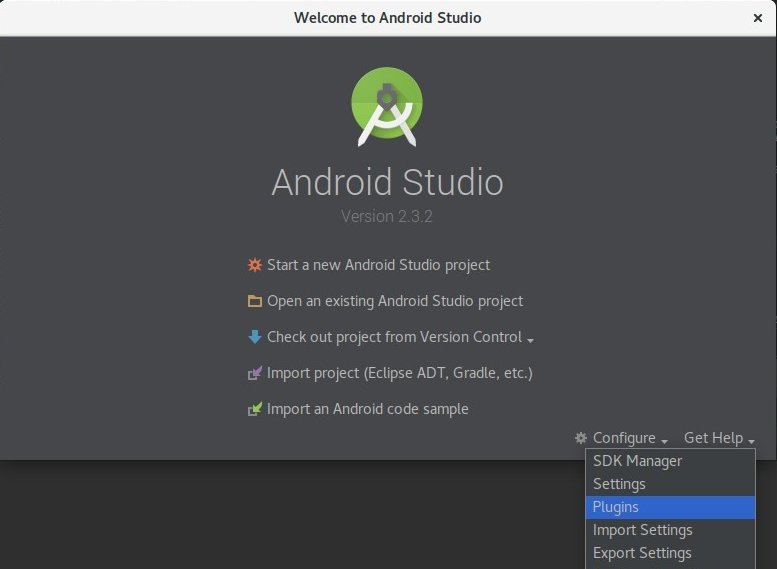
To use Kotlin in Android Studio prior to version 3.0 you have to manually install the Kotlin plugin. To do so, start Android Studio and open Plugins from the Configure menu.
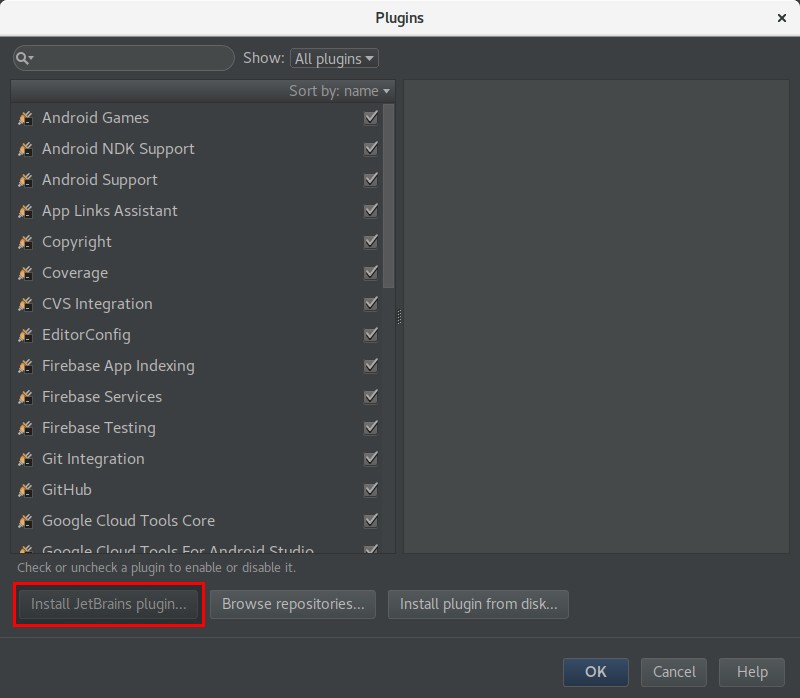
Now, press the Install JetBrains plugin… button.
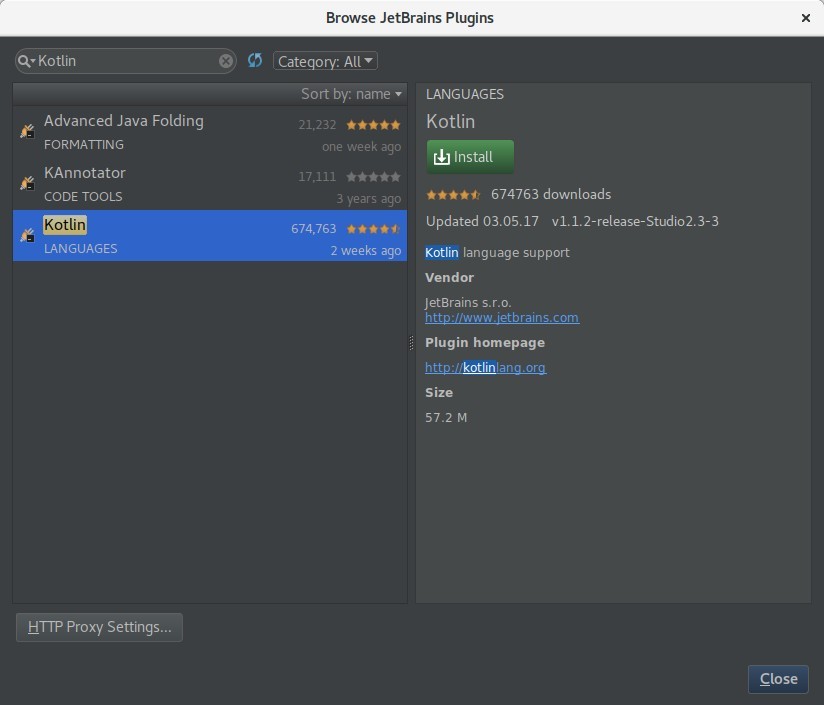
In the opened dialog, search for Kotlin, select the corresponding plugin and press Install.
After the installation is finished, restart Android Studio and you are ready to use Kotlin.
2.1.1. Create new project
It is not possible to create a new Android project using Kotlin from the start in Android Studio < 3.0. If you want to create a new project with Kotlin, first follow this tutorial to create a new Android Java project. Then, follow this part of the tutorial to add support for Kotlin and convert existing files.
2.2. Using Kotlin with Android Studio >= 3.0
Starting from Android Studio 3.0 the Kotlin plugin is already installed. No additional setup is required.
2.2.1. Create new project
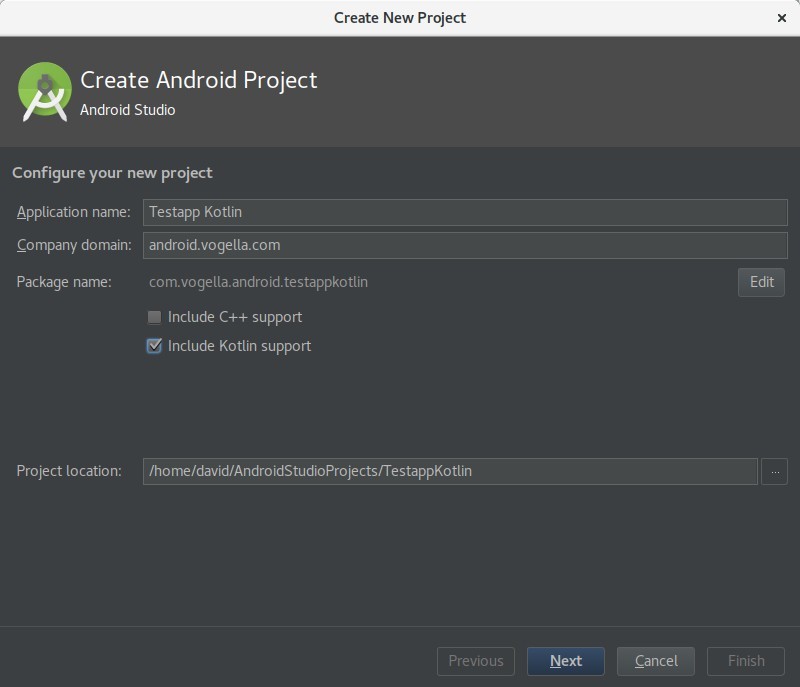
To create a new Android project with Kotlin support enabled, simply check the Include Kotlin support checkbox in the new project wizard.
2.3. Add Kotlin support to existing Android Java project
To configure Kotlin in your project choose from the menu. This modifies the project and module build.gradle files. The following shows a sample project build.gradle file.
buildscript {
    ext.kotlin_version = '1.1.2-4'
    repositories {
        jcenter()
    }
    dependencies {
        classpath 'com.android.tools.build:gradle:2.3.2'
        classpath "org.jetbrains.kotlin:kotlin-gradle-plugin:$kotlin_version"
    }
}

allprojects {
    repositories {
        jcenter()
    }
}

task clean(type: Delete) {
    delete rootProject.buildDir
}
With the help of the module build.gradle file the kotlin-android plugin is applied and the corresponding dependency is imported. The following shows an abridged module build.gradle file.
apply plugin: 'com.android.application'
apply plugin: 'kotlin-android'
[...]
dependencies {
compile fileTree(dir: 'libs', include: ['*.jar'])
compile "org.jetbrains.kotlin:kotlin-stdlib-jre7:$kotlin_version"
// your other dependencies
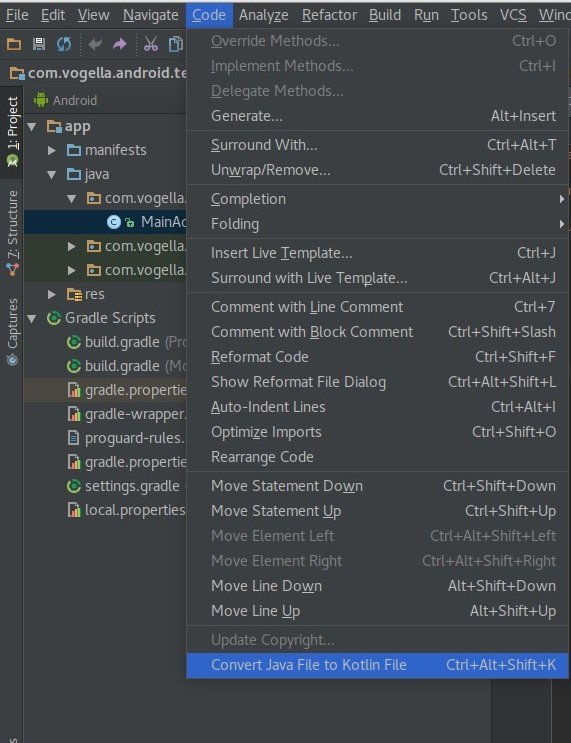
}The Kotlin plugin also brings support for converting existing Java files to Kotlin files. To do so, simply select the desired Java file and choose from the menu.
Remember that you do not have to convert all your existing Java files to Kotlin as Kotlin can call Java code and vice versa. If you have not already configured Kotlin for your project, Android Studio now prompts you to configure it.
2.4. Create a new Kotlin file
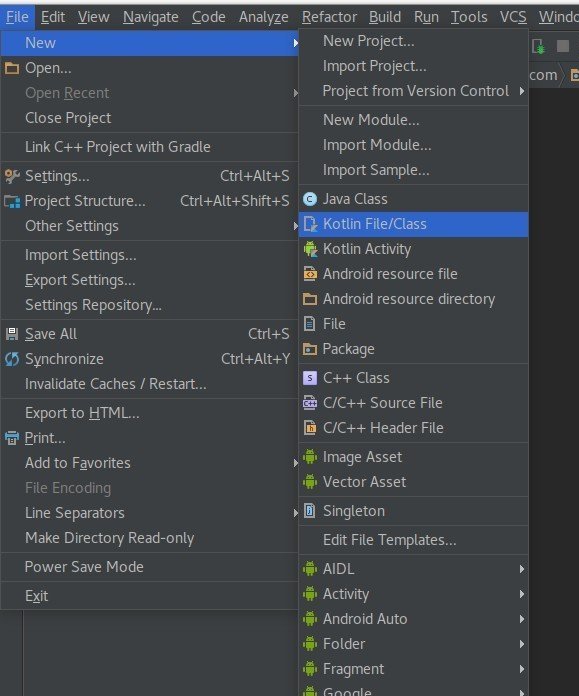
To create a new Kotlin file instead of a Java file, simply choose from the menu.
3. Android online resources
3.4. vogella Java example code
If you need more assistance we offer Online Training and Onsite training as well as consulting