Android and Google Maps. This tutorial describes the usage of Google Maps in your Android application. It is based on Eclipse 4.4, Java 1.7 and Android 4.4.
1. Android Basics
The following assumes that you have already basic knowledge in Android development. Please check the Android development tutorial for the basics.
2. Google Maps
2.1. MapsView
Google provides via Google play a library for using Google Maps in your application. The following description is based on the Google Maps Android API v2 that provides significant improvements to the older API version.
The library provides the
com.google.android.gms.maps.MapFragment
class and the
MapView
class for displaying the map component.
You need to add additional information to your AndroidManifest.xml file to use Google Maps.
<?xml version="1.0" encoding="utf-8"?>
<manifest xmlns:android="http://schemas.android.com/apk/res/android"
    package="com.vogella.android.maps">

    <!--
         The ACCESS_COARSE/FINE_LOCATION permissions are not required to use
         Google Maps Android API v2, but you must specify either coarse or fine
         location permissions for the 'MyLocation' functionality.
    -->
    <uses-permission android:name="android.permission.ACCESS_FINE_LOCATION" />

    <application
        android:allowBackup="true"
        android:icon="@mipmap/ic_launcher"
        android:label="@string/app_name"
        android:supportsRtl="true"
        android:theme="@style/AppTheme">

        <!--
             The API key for Google Maps-based APIs is defined as a string resource.
             (See the file "res/values/google_maps_api.xml").
             Note that the API key is linked to the encryption key used to sign the APK.
             You need a different API key for each encryption key, including the release key that is used to
             sign the APK for publishing.
             You can define the keys for the debug and release targets in src/debug/ and src/release/.
        -->
        <meta-data
            android:name="com.google.android.geo.API_KEY"
            android:value="@string/google_maps_key" />

        <activity
            android:name=".MapsActivity"
            android:label="@string/title_activity_maps">
            <intent-filter>
                <action android:name="android.intent.action.MAIN" />

                <category android:name="android.intent.category.LAUNCHER" />
            </intent-filter>
        </activity>
    </application>

</manifest>
2.2. MapFragment
The
MapFragment
class
extends the
Fragment
class and provides the
lifecycle management and the services for
displaying a
GoogleMap
widget.
GoogleMap
is the class which shows the map. The
MapFragment
has the
getMap()
method to access this class.
the
LatLng
class can be used to interact with the
GoogleView
class.
2.3. Markers
You can create markers on the map via the
Marker
class. This class can be highly customized.
The following code shows an example.
public class MainActivity extends Activity {
    static final LatLng HAMBURG = new LatLng(53.558, 9.927);
    static final LatLng KIEL = new LatLng(53.551, 9.993);
    private GoogleMap map;

    @Override
    protected void onCreate(Bundle savedInstanceState) {
        super.onCreate(savedInstanceState);
        setContentView(R.layout.activity_main);
        map = ((MapFragment) getFragmentManager().findFragmentById(R.id.map))
                .getMap();

        if (map!=null){
            Marker hamburg = map.addMarker(new MarkerOptions().position(HAMBURG)
                    .title("Hamburg"));
            Marker kiel = map.addMarker(new MarkerOptions()
                    .position(KIEL)
                    .title("Kiel")
                    .snippet("Kiel is cool")
                    .icon(BitmapDescriptorFactory
                            .fromResource(R.drawable.ic_launcher)));
        }

    }
On the
GoogleMap
you can register a listener for the
markers in your map via the
setOnMarkerClickListener(OnMarkerClickListener)
method. The
OnMarkerClickListener
class defines the
onMarkerClicked(Marker)
method which is called if a marker is clicked.
Similar to you also listen to drag events and info window clicks.
2.4. Changing the GoogleView
The
GoogleMap
can be highly customized.
The following example code is taken from the official Google webpage.
static final LatLng HAMBURG = new LatLng(53.558, 9.927);
static final LatLng KIEL = new LatLng(53.551, 9.993);

private GoogleMap map;
... // Obtain the map from a MapFragment or MapView.

//Move the camera instantly to hamburg with a zoom of 15.
map.moveCamera(CameraUpdateFactory.newLatLngZoom(HAMBURG, 15));

// Zoom in, animating the camera.
map.animateCamera(CameraUpdateFactory.zoomTo(10), 2000, null);
2.5. Android emulator and Google Maps
Ensure you create an Google API based emulator. This emulator can also be used to test Google map and other Google Play Service integration.
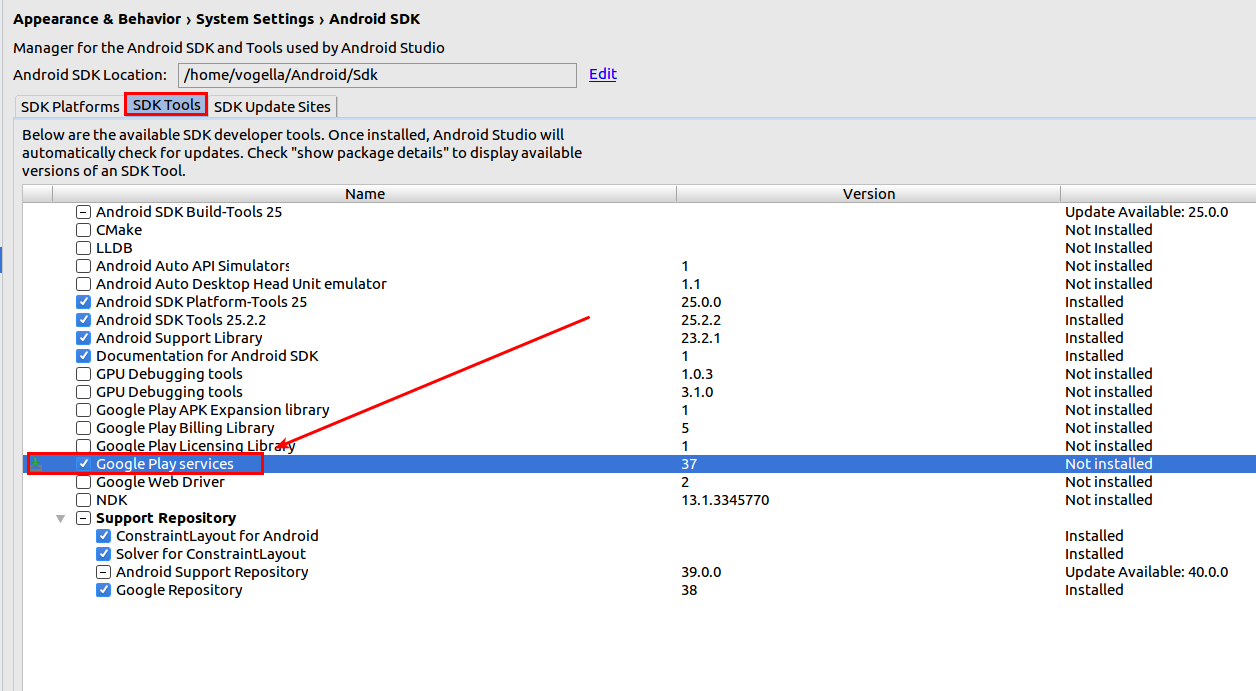
3. Install Google Play services
3.1. Download the Google Play services
Open the Android SDK Manager and install the Google Play services.
Now you can add a dependency to your app/build.gradle file.
compile 'com.google.android.gms:play-services:9.8.0'4. Getting the Google Map key
4.1. Google console
To use Google Maps you need to create a valid Google Maps API key. The key is free, you can use it with any of your applications that call the Maps API. This key supports an unlimited number of users.
You get this key via the Google APIs Console. You have to provide your application signature key and the application package name.
This is based on the key with which you sign your Android application during deployment. During development the Android build system, automatically creates and uses a debug key.
4.2. Creating the SHA-1 for your signature key
The debug key for signing your application can be found in the userhome/.android/debug.keystore file.
To create the SHA-1 for your debug keystore you use the keytool command from your JDK installation.
keytool -list -v -alias androiddebugkey \
-keystore <path_to_debug_keystore>debug.keystore \
-storepass android -keypass android
Copy the SHA-1 output, as you need this later.
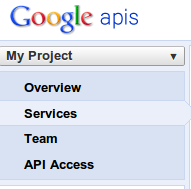
4.3. Register with the Google APIs Console
You have to register in the Google APIs Console that you want to use Google Maps for Android.
Select here the Services entry.
Activate the Google Maps Android API v2.

4.4. Create key for your application
You need later to register your application using its package in this console together with the SHA-1 fingerprint of your signature key.
For this you select the entry and click on the API Access entry.
Afterwards, click on the Create new Android key… entry.
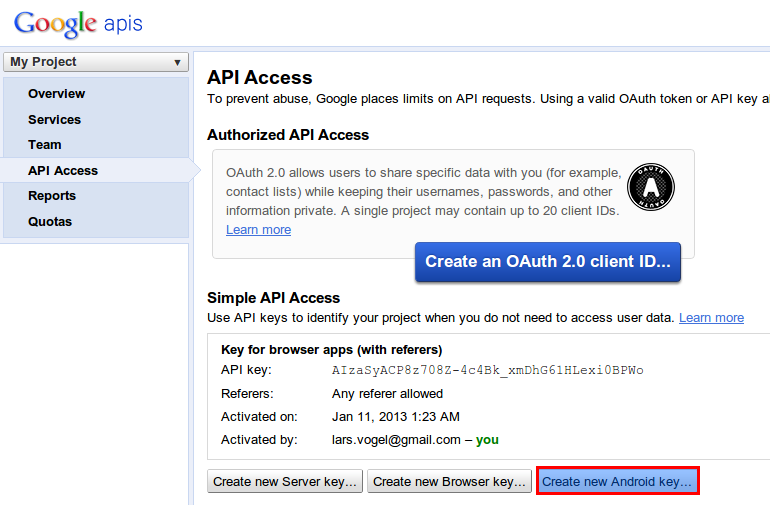
Enter your SHA-1 fingerprint and the package of your application separated by a semicolon.
For example, in the following screenshot the com.vogella.android.locationapi.maps package is used.

The procedure is described in detail in Getting a Google Maps key.
5. Tutorial: Google Maps
In this exercise, you create an Android application which shows a GoogleMap via a fragment.
5.1. Install Google Play Services
Ensure you installed the Google Play Service.
5.2. Create Project
Create a new Android project called com.vogella.android.maps and use the Google Maps Activity template.
5.3. Validate generated manifest
Check the manifest file for the added permissions by this template.
<?xml version="1.0" encoding="utf-8"?>
<manifest xmlns:android="http://schemas.android.com/apk/res/android"
    package="com.vogella.android.maps">

    <!--
         The ACCESS_COARSE/FINE_LOCATION permissions are not required to use
         Google Maps Android API v2, but you must specify either coarse or fine
         location permissions for the 'MyLocation' functionality.
    -->
    <uses-permission android:name="android.permission.ACCESS_FINE_LOCATION" />

    <application
        android:allowBackup="true"
        android:icon="@mipmap/ic_launcher"
        android:label="@string/app_name"
        android:supportsRtl="true"
        android:theme="@style/AppTheme">

        <!--
             The API key for Google Maps-based APIs is defined as a string resource.
             (See the file "res/values/google_maps_api.xml").
             Note that the API key is linked to the encryption key used to sign the APK.
             You need a different API key for each encryption key, including the release key that is used to
             sign the APK for publishing.
             You can define the keys for the debug and release targets in src/debug/ and src/release/.
        -->
        <meta-data
            android:name="com.google.android.geo.API_KEY"
            android:value="@string/google_maps_key" />

        <activity
            android:name=".MapsActivity"
            android:label="@string/title_activity_maps">
            <intent-filter>
                <action android:name="android.intent.action.MAIN" />

                <category android:name="android.intent.category.LAUNCHER" />
            </intent-filter>
        </activity>
    </application>

</manifest>
The template generated a file called google_maps_api.xml.
This file contains instruction how to get a Google Maps API key.
Get a valid API key for your application and enter this key in the google_maps_api.xml file.
5.4. Adjust layout file
In this example, we use the MapFragment. Change your layout file to the following code.
<fragment xmlns:android="http://schemas.android.com/apk/res/android"
    xmlns:map="http://schemas.android.com/apk/res-auto"
    xmlns:tools="http://schemas.android.com/tools"
    android:id="@+id/map"
    android:name="com.google.android.gms.maps.SupportMapFragment"
    android:layout_width="match_parent"
    android:layout_height="match_parent"
    tools:context="com.vogella.android.maps.MapsActivity"
    />
5.5. Activity
Change your activity to the following.
package com.vogella.android.maps;

import android.app.Activity;
import android.os.Bundle;
import android.view.Menu;

import com.google.android.gms.maps.CameraUpdateFactory;
import com.google.android.gms.maps.GoogleMap;
import com.google.android.gms.maps.MapFragment;
import com.google.android.gms.maps.model.BitmapDescriptorFactory;
import com.google.android.gms.maps.model.LatLng;
import com.google.android.gms.maps.model.Marker;
import com.google.android.gms.maps.model.MarkerOptions;

public class MainActivity extends Activity {
    static final LatLng HAMBURG = new LatLng(53.558, 9.927);
    static final LatLng KIEL = new LatLng(53.551, 9.993);
    private GoogleMap map;

    @Override
    protected void onCreate(Bundle savedInstanceState) {
        super.onCreate(savedInstanceState);
        setContentView(R.layout.activity_main);
        map = ((MapFragment) getFragmentManager().findFragmentById(R.id.map))
                .getMap();

    }

    @Override
    public boolean onCreateOptionsMenu(Menu menu) {
        getMenuInflater().inflate(R.menu.activity_main, menu);
        return true;
    }

}|
Currently you have to enable multidex support to run this example: |
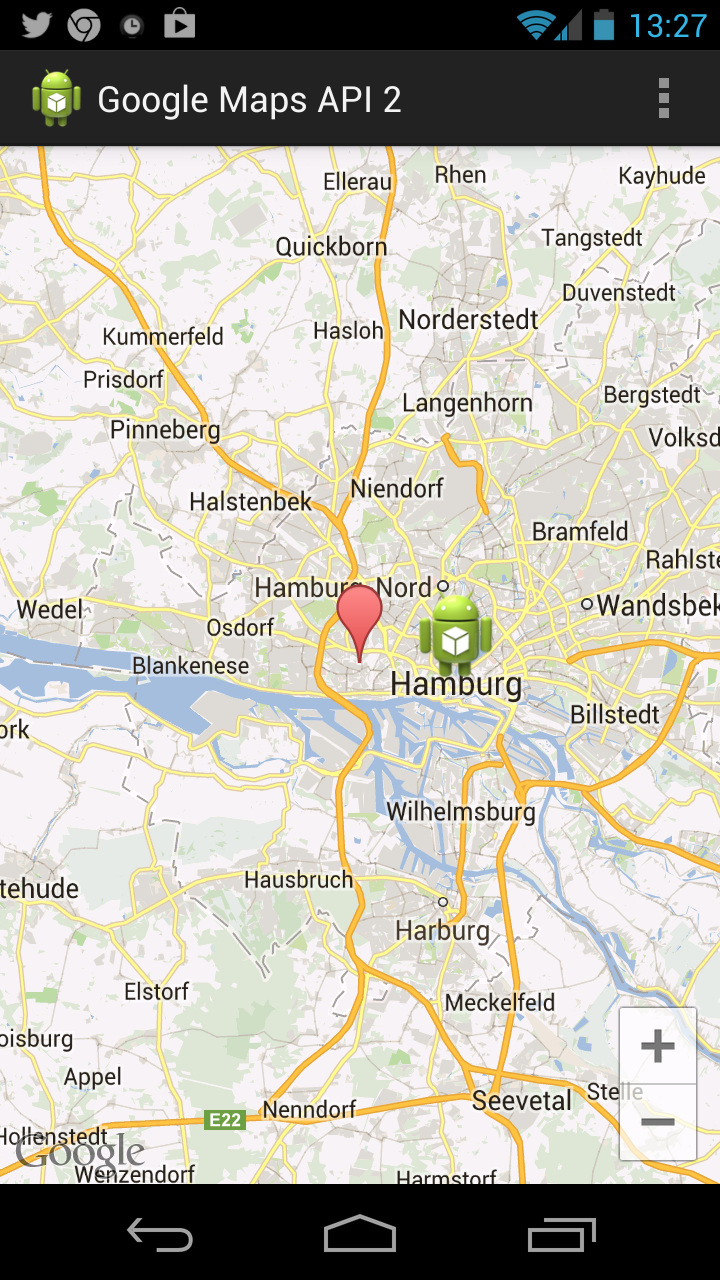
5.6. Run and Test
Run and test your application. You should be able to move on the Map and to zoom in and out.
6. Links and Literature
6.2. vogella Java example code
If you need more assistance we offer Online Training and Onsite training as well as consulting