Lars Vogel(c) 2009 - 2026 vogella GmbH :revnumber: 5.8 :revdate: 06.07.2020
Using GitHub tutorial. This tutorial explains how to use GitHub.
1. GitHub
1.1. What is GitHub?
GitHub is a popular hosting provider for Git repositories. GitHub provides additional services around these repositories. For example, it provides an issue tracker for each repository, build server integration and more.
GitHub supports cloning repositories to a new Git repository hosted at GitHub. GitHub uses the term fork or forking for creating such clones.
GitHub provides free hosting for publicly visible Git repositories. A public repository can be cloned by other people at any point in time.
If the repository should not be visible to everyone, Git allows you to create private repositories. Private repository allows you to specify the people that have access to the repository and to define their access rights.
GitHub can be found under the following URL: GitHub
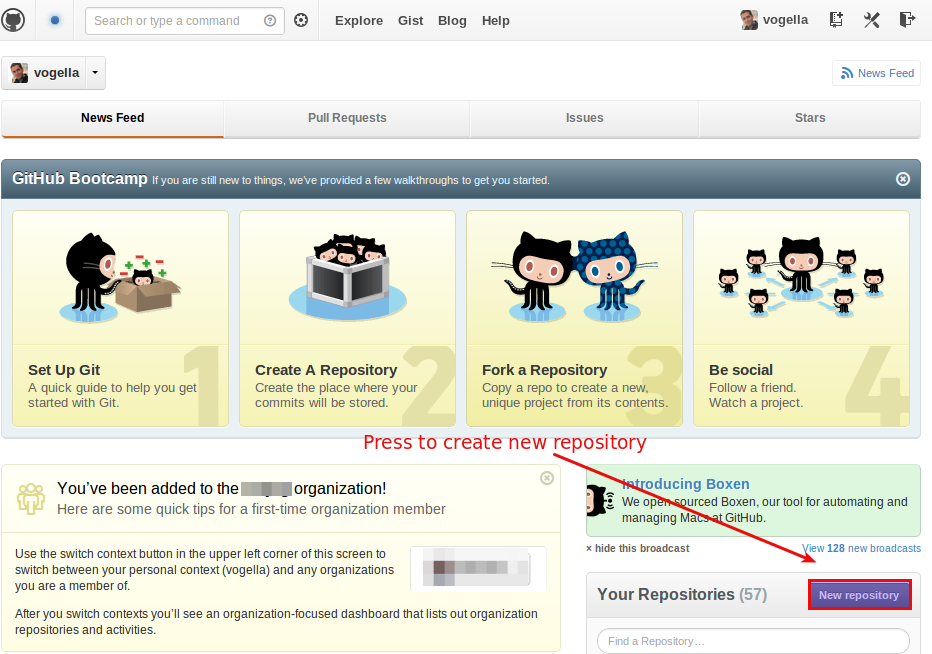
If you create an account at GitHub, you can create a repository. After creating a repository at GitHub, you will get a description of all the commands you need to execute to upload your project to GitHub. Follow the instructions below.
These instructions will be similar to the following commands.
# global setup:
#  set up git
  git config --global user.name "Your Name"
  git config --global user.email your.email@gmail.com

# next steps for a new repository
  mkdir gitbook
  cd gitbook
  git init
  touch README
  git add README
  git commit -m 'first commit'
  git remote add origin git@github.com:vogella/gitbook.git
  git push -u origin master

# alternatively for an existing Git repo
# add remote and push
  cd existing_git_repo
  git remote add origin git@github.com:vogella/gitbook.git
  git push -u origin master
GitHub allows you to use SSH based or HTTPS based authentication to access your repositories. To clone, pull or fetch from a publicly available repository no authentication is required.
1.2. Create repository in GitHub
Once you create a user at GitHub, you can create a new public repository. For example, the following screenshots demonstrate the creation of the de.vogella.git.github repository.
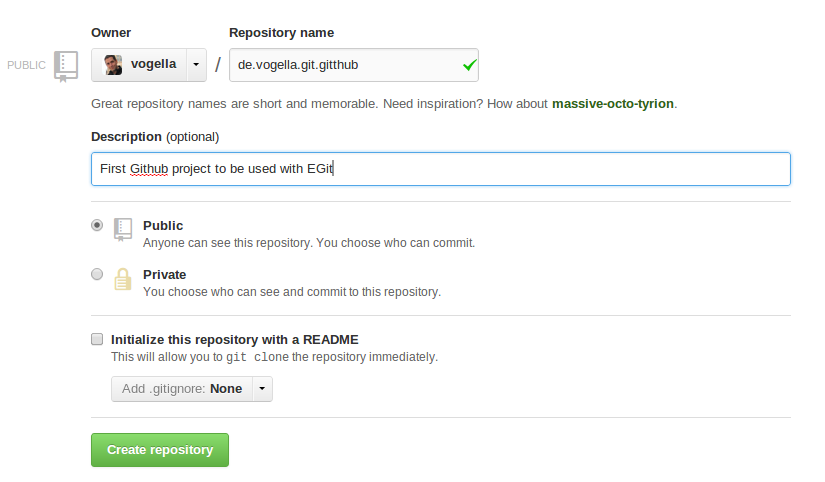
After creation of your new repository GitHub displays the information about what you have to do if you want to connect to this repository via the command line.
1.3. Merging pull request at GitHub
GitHub uses Pull requests for contributions.
The typical workflow in GitHub is to fork a repository, create changes in your fork and send a pull request to the origin repository via the GitHub webinterface.
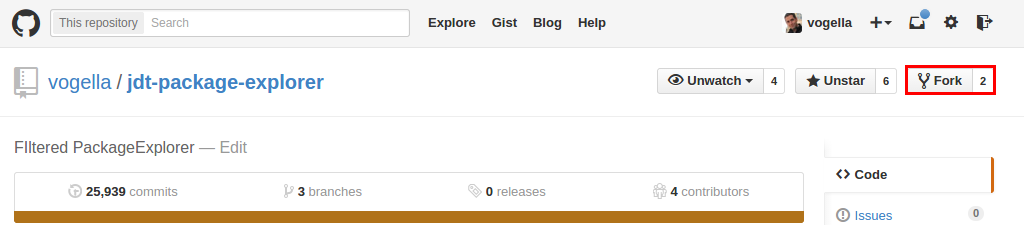
GitHub makes it easy to fork a repository via its web interface. Click the Fork button of a repository of your choice.
You can now clone this fork to your local development environment and push the changes to this fork at GitHub.
Afterwards, you can create a pull request for the repository you forked from. Your repository is the fork as highlighted in the screenshot. Press Pull Requests to see existing and create new pull requests.
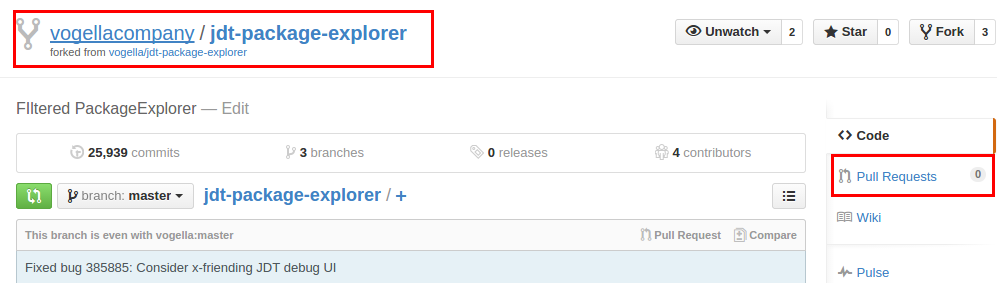
Click New pull request to create a new one.

On the next screen you can specify the direction of the pull request and the branches by selecting the Edit button.

If the owner of the repository accepts your pull request, your changes are integrated into the original repository.
1.4. Locally evaluating GitHub pull requests
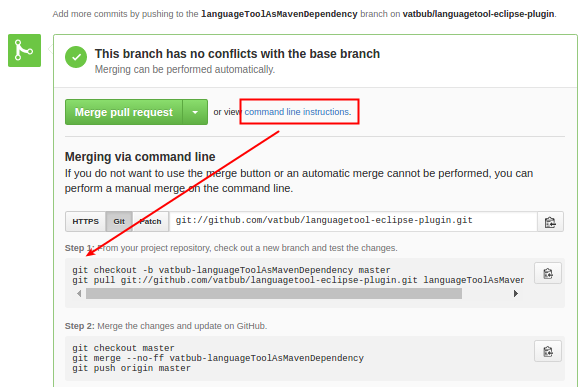
You can also pull the changes in a GitHub pull request into your local Git repository to test it. Each pulll request has a link which once clicked shows you the corresponding commands.
2. Permanent links to source code lines
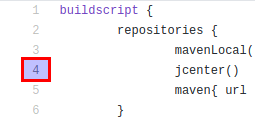
When discussing code with other people it is often helpful to link them to a particular line in the source code. If you are browsing a branch and not a particular commit on GitHub, this code may change. This might change the text at the line you are referencing. For this reason GitHub lets you copy a permanent link to your clipboard. To do this first select the line you want to reference by clicking on its line number:
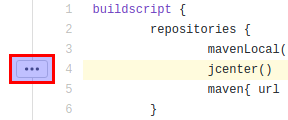
After that a new button appears left of the line number:
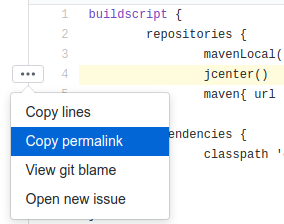
Clicking on it opens a drop down menu, from which you can select Copy permalink:
3. GitHub actions
GitHub actions allows you to perform task on commits or pull requests.
If you click on the Actions links in your repository, you can setup these actions.
GitHub actions allows you for example to run a Maven build or a Gradle build.
3.1. Example: Building an Eclipse RCP application with Maven Tycho
To verify each commit and pull request on GitHub create the following file maven.yaml in the .github/workflows directory.
# This workflow will build the Eclipse RCP application with Maven
# For more information see: https://help.github.com/actions/language-and-framework-guides/building-and-testing-java-with-maven

name: Java CI with Maven

on:
  push:
  pull_request:

jobs:
  build:

    runs-on: ubuntu-latest

    steps:
    - uses: actions/checkout@v2
    - name: Set up JDK 15
      uses: actions/setup-java@v1
      with:
        java-version: 15
    - name: Build with Maven
      run: mvn clean verify --file pom.xml
3.2. Matrix testing for multiple Java and Operating Systems
You can run and test your software on multiple platforms. For example:
name: Maven build for Java 11 and Java 16 on Ubuntu/ macOS and Windows

on:
  push:
  pull_request:

jobs:
  build:
    name: "Build (JDK-${{ matrix.java }}, ${{ matrix.os }})"
    strategy:
      fail-fast: false
      matrix:
        os: [ ubuntu-latest, macOS-latest, windows-latest ]
        java: [11, 16 ]
    runs-on: ${{ matrix.os }}
    steps:
      - name: 'Checkout'
        uses: actions/checkout@v2

      - name: 'Set up JDK'
        uses: actions/setup-java@v1
        with:
          java-version: ${{ matrix.java }}

      - name: Cache Maven Dependencies
        uses: actions/cache@v2
        with:
          path: ~/.m2/repository
          key: ${{ runner.os }}-maven-${{ hashFiles('**/pom.xml') }}
          restore-keys: |
            ${{ runner.os }}-maven-
      - name: Build and test with Maven using xvfb
        uses: GabrielBB/xvfb-action@v1
        with:
          run: |
            mvn clean verify
4. Contributing to other projects by using forks
4.1. Creating a fork on GitHub
Create a fork by navigating to a desired git repository and press the Fork button.

Then press on your user or other repository, which belongs to you.
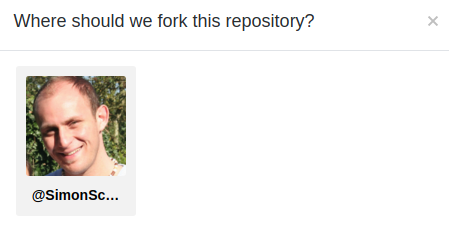
This will result in having a copy of the original repository that can be modified.

You can now work on the master repository, but in case you want to contribute back to the upstream repository a feature branch should be created.
4.2. Creating a new feature branch and a pull request
Create a new branch:
git checkout -b feature/*** name of the feature ***Make changes on the branch and then add, commit and push them.
git add .
git commit -m "Made changes to my feature/*** name of the feature *** branch"
git push origin feature/*** name of the feature ***
After the changes have been pushed a pull request can be triggered on the website.
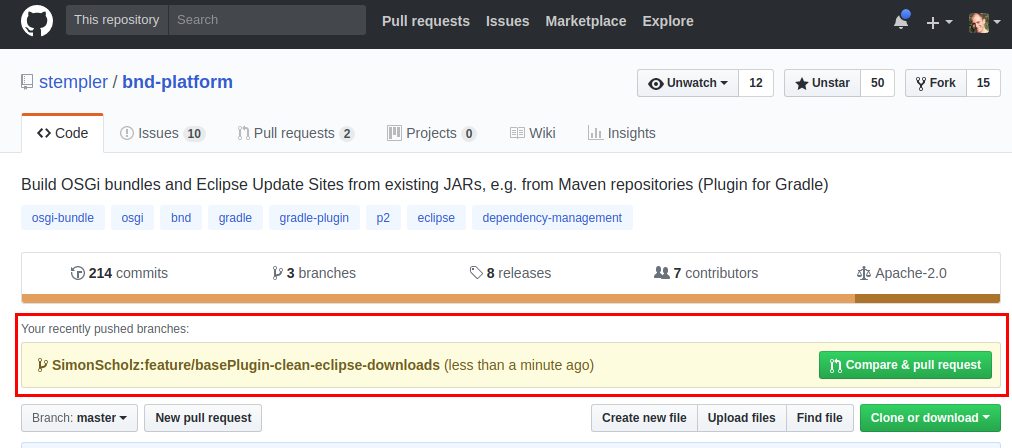
After pressing the Compare & pull request button the pull request can be described and then be proposed.

Then wait until your pull request is merged or react on the comments of the maintainer of the upstream repository.
|
Once the pull request has been merged you can savely delete it, because it is now part of the upstream master branch. GitHub provides a direct deletion feature when you navigate to the merged pull request:  |
When your pull request has been merged you should sync with the upstream master again to make new feature branches from the current master and create new pull requests.
5. Sync forks master with original master
After your pull request has been merged you would usually want to sync the fork’s master branch with the current upstream master branch again.
5.1. Add remote pointing to the original repository
To sync with the original master of the forked repository a remote should be added.
The following command shows the existing remotes:
git remote -vAdd orignal remote repository and call it upstream.
git remote add upstream https://github.com/ORIGINAL_OWNER/ORIGINAL_REPOSITORY.git

e.g.

git remote add upstream git@github.com:stempler/bnd-platform.git
When this was successful another git remote -v invocation will result in:

With the upstream being configured the origin master can be synced again.
5.2. Sync fork with the upstream master
Get latest changes from the upstream master.
git fetch upstreamCheck out the origin master in case it is not already checked out.
git checkout masterMerge the origin master with the upstream master.
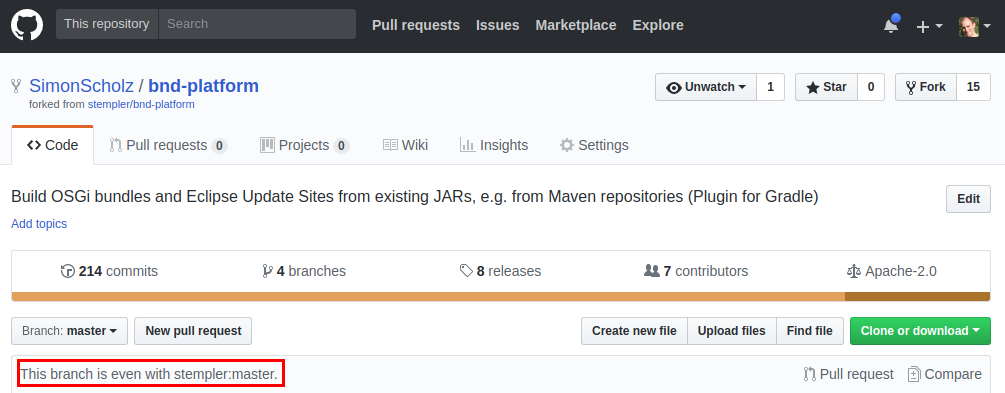
git merge upstream/masterPush the merged origin master to the github repository.
git push origin masterThis should result in the message that your master branch is even with the upstream master.
6. Closing issues with commit messages
GitHub allows you to close issues with commit messages by using special keywords. GitHub will put a link to the closing commit into the specified issue. While it is possible to use this syntax anywhere in the commit message it is preferable to put it into the commit subject. This way it is easier to see which commit closes which issue.
6.1. Closing issues in the same repository
To close an issues in the same repository you type in one of the keywords followed by a reference to the issue number. List of possible keywords:
-
close
-
closes
-
closed
-
fix
-
fixes
-
fixed
-
resolve
-
resolves
-
resolved
This is a commit message that would close issue 42 in the same repository:
Fixes #42 - Upgrade SWT dependenciesIf the issue is committed to the default branch the issue will be closed immediately. If the issue is committed to another branch then the issue will only be closed if it gets merged into the default branch. This behavior is the same for closing issues in other repositories.
6.2. Closing issues in other repositories
The syntax to close issues in other repositories is username/repository#issue_number.
So our example from before would look like this for the repository project by the user vogellacompany.
Fixes vogellacompany/project#42 - Upgrade SWT dependencies6.3. Closing multiple issues with one commit
If you want to close multiple issues with one commit just chain the messages together.
Each message follows the pattern <keyword> <issue>.
This closes #42, closes #23, and closes vogellacompany/project#427. Continuous Integration with GitHub and Jenkins via Webhooks
You can trigger a Jenkins build after each change in on your GitHub repository while using Webhooks.
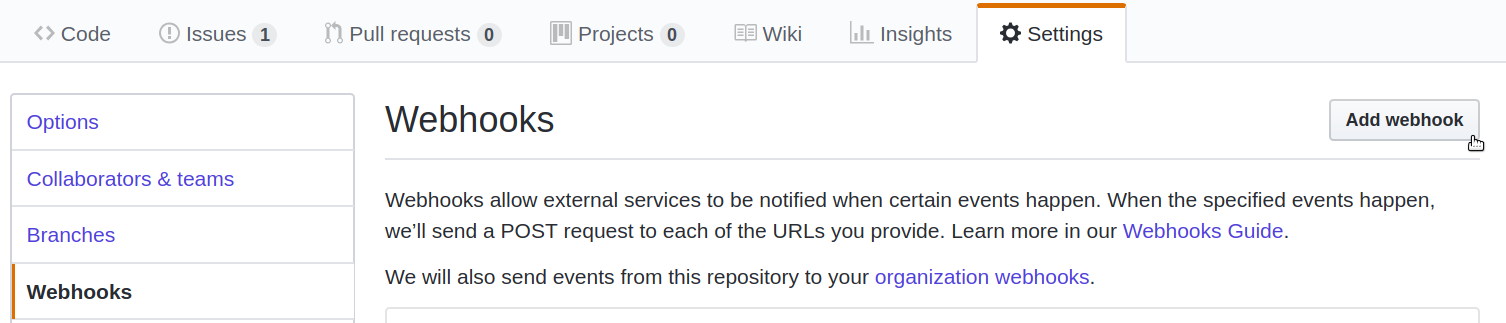
To enable this, navigate to the repository and click on .
Click on Add webhook.
The Jenkins Webhook URL or also called Payload URL follows the pattern <Jenkins url>/github-webhook/.
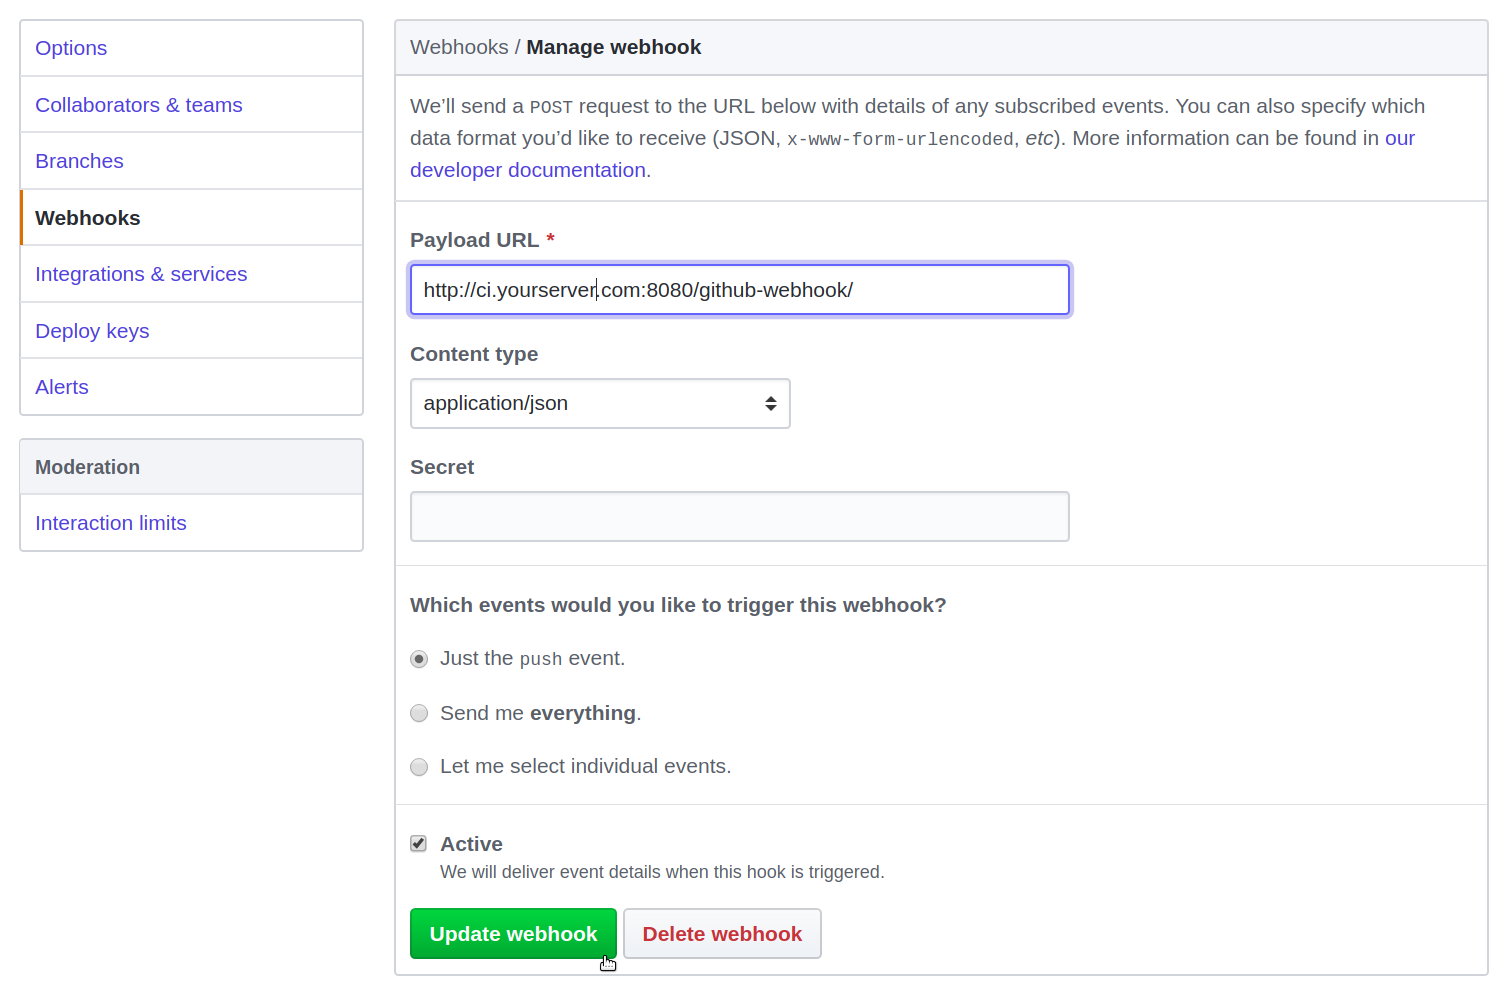
Click on Update webhook.
Now add the Jenkins GitHub Plugin to your Jenkins instance. Make sure you have your Jenkins build correctly configured for the GitHub repository. Navigate to the Configure page of your Jenkins build. Under "Build Triggers" choose the option "GitHub hook trigger for GITScm polling".
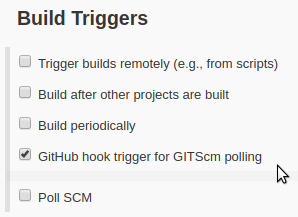
After your next commit to the repository a new Jenkins build should start automatically.
8. Using Gerrit through GerritHub
GerritHub is a service that allows you to use Gerrit for code reviews for your GitHub repositories. It works by cloning your repositories to its servers and allows you to push Gerrit changes to them. Merged Gerrit changes are synced back to GitHub. Once you have imported a repository to GerritHub it is best to stop pushing to GitHub as GerritHub only syncs in one direction. You can still push commits directly to the repository on GerritHub without starting a Gerrit change. Those commits will also be synced back to GitHub.
8.1. Authorizing GerritHub
To use the service you have to Sign in with your GitHub account. Open up https://gerrithub.io and press First time Sign In.

On the next page choose Sign In to log in with your GitHub account.

You can then choose if you want to give GerritHub access to your private or only your public repositories. GerritHub then asks for the following authorizations:
-
Read-only access to your email addresses
-
Read and write acess to your public (and possibly private) repositories
-
Read-only access to your organizations You have to accept to proceed.
After finalizing your account information you are then ready to use GerritHub. In the next step you can choose which repositories you want to import and have the possibility to import existing pull requests.
8.2. Importing a repository from GitHub
To import a repository from GitHub, first open Gerrit on GerritHub: https://review.gerrithub.io. Now choose .

Select all repositories that you want to import and click on the Next button. The next page lets you select which existing pull requests you want to import as Gerrit changes.
8.3. Importing pull requests from GitHub
It is possible to import existing pull requests from GitHub as Gerrit changes. Please be aware that changes made to the pull request after the import will not propagate to the Gerrit change. You can import the pull request again but this will create a new Gerrit change instead of updating the old Gerrit change.
To import pull requests from GitHub open Gerrit on GerritHub: https://review.gerrithub.io. Now choose .

Select all pull requests you want to import and then press the Next button.
8.4. Pushing a commit to GerritHub for code review
Once you have imported your GitHub resources into GerritHub you can use it like any other Gerrit instance. After you merged a change GerritHub will automatically try to push it back to GitHub. For information on how to use Gerrit please see our Gerrit tutorial.
8.5. Keeping the repositories in sync
If you are only using GerritHub to push changes you do not have to do anything additional.
GerritHub automatically propagates merged changes back to GitHub.
If you or someone else pushes changes directly to GitHub you have to manually sync this changes to GerritHub.
Assuming you have set GitHub as your origin remote and gerrithub as your GerritHub remote:
git pull master
git push gerrithub master
8.6. Build validation with Jenkins
It is possible to trigger a new build by every patch set that gets uploaded to Gerrit. This way you can be confident that changes submitted through Gerrit will not break your build. It is recommended to use an extra Jenkins user for Gerrit.
Create a new GitHub user for your Jenkins instance and link it with GerritHub as described in Authorizing GerritHub. Make sure to add the public ssh key of the Jenkins to this account at https://review.gerrithub.io/#/settings/ssh-keys.
Now give the Jenkins user the rights to change the Verified label.
You can do this by editing your project configuration file:
[access "refs/*"]
    <other entries...>
    read = group user/<Jenkins User Id>
[access "refs/heads/*"]
    <...>
    label-Verified = -1..+1 group user/<Jenkins User Id>
Now install the Gerrit Trigger plugin onto your Jenkins instance.
The Gerrit Trigger plugin works by listening to the Gerrit event stream.
This way the Gerrit server doesn’t have to specifically know about the Jenkins server.
It is enough to give the Jenkins user the required access rights to the Jenkins project.
If you want to check out the event stream yourself you can listen to it with this command:
ssh -p 29418 <your jenkins user>@review.gerrithub.io gerrit stream-eventsThe next step is to add GerritHub to the Gerrit Trigger configuration. Navigate to and add a new server:
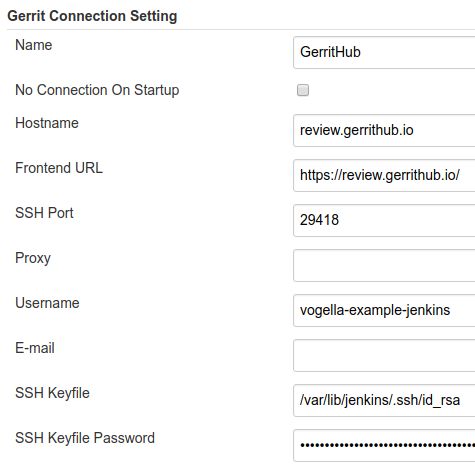
Before saving hit the Test Connection button to make sure you entered the right information.
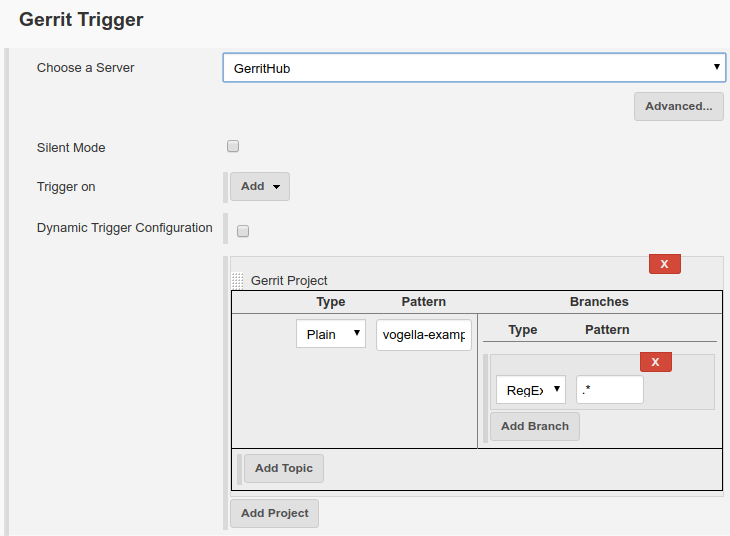
Now you can change your desired project to include a Gerrit trigger.
Open up and choose "Gerrit event" under "Build triggers".
Select the server that we created earlier from the drop down menu.
For this example we have chosen to name our project "hello_world".
We match on it by adding a project of type "Plain" and writing down the exact project name.
The project name follows the pattern <jenkins user name>/<project name>.
To match all branches on the project we choose the type "RegExp" and enter .*.
By not adding anything under "Trigger on" we let the plugin add the default triggers "Patch set created" and "Draft published".
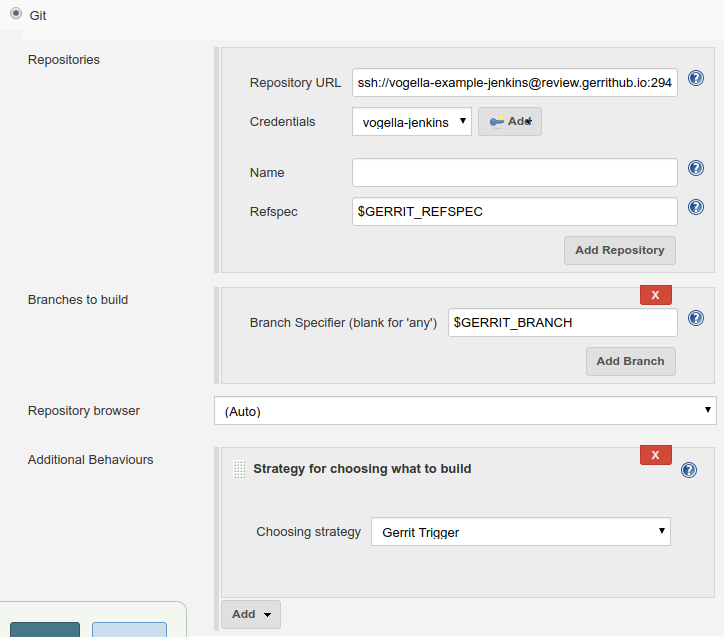
The next step is to configure the Git plugin, so the build job knows which repository to fetch and build.
As "Repository URL" we enter the GerritHub project url.
It follows the pattern ssh://<GerritHub jenkins user>@review.gerrithub.io:29418/<project owner user>/<project name>.
Press the Advanced button and enter $GERRIT_REFSPEC as "Refspec".
As branch to build enter $GERRIT_BRANCH.
Under "Additional Behaviors" add an "Strategy for choosing what to build" entry and choose "Gerrit Trigger" from the drop down menu.
As last step your should add the appropriate build step for your project.
To test your configuration create a new Gerrit change or upload a new patch set to an existing change. The Jenkins build server should give you feedback now:

9. Links and Literature
9.1. vogella Java example code
If you need more assistance we offer Online Training and Onsite training as well as consulting