This tutorial contains some notes about writing documentation with AsciiDoc and Asciidoctor.
1. Introduction to Asciidoc
1.1. What is Asciidoc and Asciidoctor
AsciiDoc is a text document format for writing notes, documentation, articles, books, ebooks, slideshows, web pages, man pages and blogs. AsciiDoc files can be translated via the Asciidoctor toolchain to many formats including HTML, PDF, EPUB, DocBook and man page. Any text editor can be used. Some websites, like GitHub, render AsciiDoc files directly into HTML.
The following listing is an example of a simple Asciidoc file.
= The First Asciidoc example: Subtitle                              (1)
Lars Vogel(c) 2016 vogella GmbH                                     (2)
Version 0.3, 17.05.2021                                             (3)
:sectnums:                                                          (4)
:toc:                                                               (5)
:toclevels: 4                                                       (6)
:toc-title: My Content                                              (7)
:experimental:                                                      (8)
:description: Example AsciiDoc document                             (9)
:keywords: AsciiDoc                                                 (10)
:imagesdir: ./img                                                   (11)

This is the optional preamble (an untitled section body). Useful for
writing simple sectionless documents consisting only of a preamble.

== First section

Some text

== Second section

More test| 1 | this is the documents title including a subtitle |
| 2 | in the line after the title you can list the author |
| 3 | this is the revision of the document |
| 4 | this attribute defines that you want numbered sections |
| 5 | a table of content will be generated |
| 6 | by default, the TOC will display only level 1 and level 2 section titles. With the toclevels attribute the level can be set differently. |
| 7 | by default, the TOC will get the title "Table of Contents", you can set a customized name with the toc-title attribute. This will apply for the html and pdf output. |
| 8 | enables experimental features, like button and menu paths |
| 9 | adds description to the HTML output |
| 10 | adds keywords to the HTML output |
| 11 | Defines the default image location Asciidoc documents typically end with the .adoc. |
|
One sentence per line rule: All AsciiDoc files must follow the one-sentence-per-line rule. Each sentence should be on its own line, ending with appropriate punctuation (., !, or ?). This rule is mandatory for all contributors and provides several benefits: * Makes text easier to search and review * Enables precise line-by-line editing and version control * Improves readability and maintains concise descriptions * Simplifies sentence restructuring in text editors * Reduces complex sentence structures and redundancy Based on AsciiDoc recommendations and our experience, this rule significantly improves the quality of generated text. |
1.2. Position of the TOC
You can define the position of the toc.
:toc:
:toc: left
:toc: right
:toc: preamble
preamble will position the toc in the main content area (some as default) but before the preable.
1.3. Install the Asciidoctor toolchain
If you want to use Asciidoctor directly you have to install its toolchain. If you are using Gradle or Maven as build systems, it is not required to install Asciidoctor separately. Both Gradle or Maven provide plug-ins to execute Asciidoctor tasks.
sudo apt-get install -y asciidoctor2. Basic document features
2.2. Subtitle
If you want to define a subtitle add a : (a colon followed by a space) after the title
= Title of the document: This is the subtitle2.3. Author
The Author can be written just after the title with or without an attribute.
The author can also include information as an Email or an URL inside angle brackets.
It is possible to have a list of authors.
Multiple authors and their emails are separated by a semicolon and a space ;.
Without attributes:
= Title of the document: This is the subtitle
Jennifer Nerlich <jn@vogella.com>
With attributes:
= Title of the document: This is the subtitle
:author: Jennifer Nerlich
:email: jn@vogella.com
Asciidoctor uses the author’s name and email to assign values to built-in attributes that can be used throughout the document’s body. These attributes include: author (firstname and lastname), firstname, lastname, middlename, initials and email.
= Title of the document: This is the subtitle
Jennifer Nerlich <jn@vogella.com>

My first name is {firstname}.
If there are multiple authors you can refere to them by using the following convention: {firstname2}, {firstname3}, etc.
2.4. Revision
The revision information is listed on the third line of the .adoc document, beneath the author information line with or without attributes. It can include the following data:
-
Revision Number: It must contain at least one numeric character. Letters or symbols preceding the numeric character will not be rendered. Unless the attribute :version-label!: is set.
-
Revision Date
-
Revision Remark
Revision number and revision date are separated by a , (comma and space).
Revison Remark is separated by a : (colon and space).
Without attributes:
= Title of the document: This is the subtitle
Jennifer Nerlich <jn@vogella.com>
v1.1, 15.05.2017: First draft
With attributes:
= Title of the document: This is the subtitle
:revnumber: v1.1
:revdate: 15.05.2017
:revremark: First draft
2.5. Text formatting
Use the following to highlight your text.
*This is bold text*

_This is cursiv text_

`This is mono text`
The result looks like the following:
This is bold text
This is cursiv text
This is mono text
2.6. Force line breaks
A + (plus) at the end of a line with a following space forces a line break.
++SPACE
2.7. Defining https links
Asciidoc determines automatically links in the content of your document, if the link starts with http:// or https://. You can also define a anchor text via [] directly after the link.
https://www.vogella.com[vogella]

https://www.vogella.com
The result looks like the following.
To include a link with white spaces or special characters as for example
https://vogella.com--sa- 23345the definition should look like this:
link:++https://vogella.com--sa- 23345++2.8. Importing files or file includes
You can import files via the include macro. This also works for source code includes. To use ----in your listing use the [listing] style before that. The following example imports a file formatted as Java source code.
include::res/source.java[]Result:
System.out.println("Hello");2.9. Using leveloffset to increase the selection number
Via the leveloffset attribute you can change the section offset, for example a = section will become == if you add the following statement:
:leveloffset: 1Use the following statement to reset the offset.
:leveloffset: 02.10. Importing files partially
It is also possible to include files partially. For this mark the part of the file to be included with a tag like the following:
//article.adoc
# tag::tagname[]
This should be included!
# end::tagname[]
This text will not be included!
and include the file with the tagname in the brackets like this:
include::article.adoc[tags=tagname]The result would be
This should be included!2.11. Importing images
You can import images with image:: for the HTML output you can add the alt text within the brackets [].
If the image is located in the img folder then the import would look like this:
image::./img/vogellacompany.jpg[vogella Company]|
If the images are located in a certain directory, e.g., This would look as follows: |
The import of an image with image:: will add the image in a new line.
If you want to add an image inline then use the macro: image:
This is just a text
image:vogellacompany.jpg[vogella Company, width=5%] to show inline images.
Result:
This is just a text
 to show inline images.
2.12. Using Conditional directives
It is possible to include or exclude text based on document attributes or based on the value of a document attribute. The attributes ifdef, ifndef and ifeval can be used to achieve this.
To include content, if the attribute exercise_solution is set use the following syntax:
ifdef::exercise_solution[]
Content is shown when test attribute is set
endif::exercise_solution[]

or

ifdef::exercise_solution[Content is shown when include attribute is set]
To include content if the attribute exercise_solution is not set, use the following syntax:
ifndef::exercise_solution[]
Content is shown when test attribute is NOT set
endif::exercise_solution[]
OR
ifndef::test[Content is shown when test attribute is NOT set]
It is also possible to use multiple attributes.
If the attribute names are separated by a , (comma) only one of the attributes need to be set to include the content.
If they are separated by a + (plus) all attributes must be set to include the content.
With the ifeval attribute it is possible to evaluate the value of attributes. If the expression is true then the content is included in the document, otherwise it is not.
:version: 1

ifeval::[{version} >= 1]
This is a good one!
endif::[]

ifeval::[{version} < 1]
Work in process
endif::[]
In this case the text This is a good one! will be shown.
2.13. Defining lists
Lists can be defined with the * operator at the beginning of a line. You can define up to 6 levels for a list. Ensure to have a space before the list element. Example:
Docker allows to package the full stack in a container:

* OS
** Windows
** Ubuntu
* JVM,
* App server
* Application with its configuration
Result:
-
OS
-
Windows
-
Ubuntu
-
-
JVM,
-
App server
-
Application with its configuration
Numbered lists start with the .
. OS
.. Windows
.. Ubuntu
. JVM,
. App server
. Application with its configuration
Result:
-
OS
-
Windows
-
Ubuntu
-
-
JVM,
-
App server
-
Application with its configuration
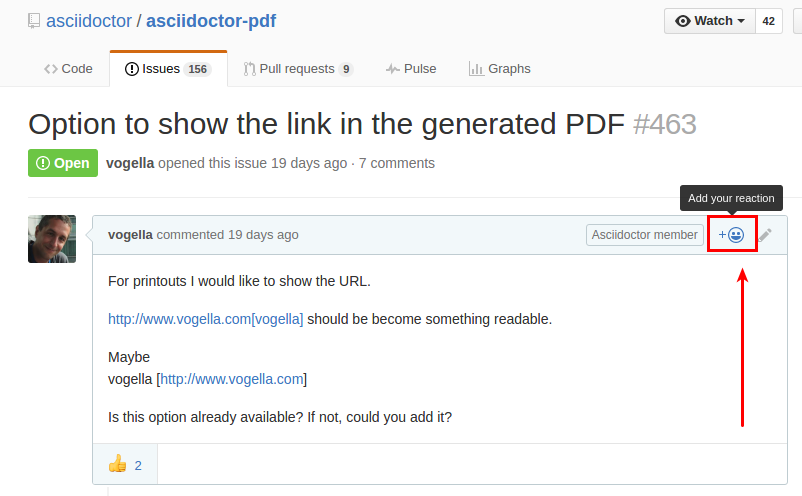
Additional paragraphs, blocks, images, source code, etc. are adjoined to a list element by putting a plus sign (+) on a line adjacent to both blocks.
* Listing1
* Listing2
+
image::vote-asciidoc-issue.png[]
Result:
-
Listing1
-
Listing2
2.14. Menus and Buttons
You can define menus and buttons. This requires the activation of an experimental feature, via the ** attribute in the header section of your document.
menu:View[Zoom > Reset]

Press the btn:[OK] button when you are finished.
The result looks like the following.
.
Press the OK button when you are finished.
2.15. Keyboard shortcuts
You can also define keyboard shortcuts with the kbd macro.
kbd:[Alt+F11] - Toggle Full Screen Mode in the Eclipse IDEThe result is the following:
Alt+F11 - Toggle Full Screen Mode in the Eclipse IDE
2.16. Images and Graphics
To reference images in your AsciiDoc with the image:: macro pointing to a relative file location.
Use brackets to define a fixed or related size.
image::vogellacompany.jpg[200,200]The result looks like the following:
You can also define a text for the image which is for example used for screenreaders or as placeholder if the image cannot be found.
image::vogellacompany.jpg[vogella Logo, 200,200]If you want to scale the image for the PDF output you can use the pdfwidth attribute.
image::vogellacompany.jpg[vogella Logo,pdfwidth=40%]|
You can also define a default image width via the PDF theming support. |
2.17. Using inline icons
You can also add the ` font` directive to the top of your document that allows you to use the icons from https://fortawesome.github.io/Font-Awesome/icons/ directory via a marco.
icon:comment[] This is a comment icon

icon:file[] And a file icon

icon:battery-full[] And a battery icon
The output looks like the following
This is a comment icon
And a file icon
And a battery icon
If you would like to use a specific set of icons use the following definition
icon:comment[set=fas] This is a comment icon from fas set2.18. Defining internal links / internal cross-reference
To define a link use
[[id,label]]-
id is the identifier you want to specify
-
label is the optional, default label that is for the cross reference if the cross reference itself doesn’t specify a caption
You can link to titles that have auto-generated IDs, but the formation of the IDs could vary based on the attributes idprefix and (for Asciidoctor) idseparator. The default is to make the title text lowercase, prefix with an underscore, and replace spaces and other punctuation with underscores. The id for the title "Let’s make a game!" would be _lets_make_a_game.
It is often better for you to specify your own id that will remain stable even if you edit the text of a title. You can do so with:
where id is the identifier you want to specify, and label is the optional, default label that may be used for the cross reference (if the cross reference itself doesn’t specify a caption).
The markup for an internal cross reference is:
<<id,caption>>-
id is an element on the page that has an identifier
-
caption is the optional text that should appear in the link
2.19. Defining cross references
You can assign meta data to a block. Here’s an example of a quote block that includes all types of metadata:
.Topic Titel                                   (1)
[[yourId]]                                     (2)
[yourstyle]                                    (3)
____
Four score and seven years ago our fathers brought forth
on this continent a new nation...

Now we are engaged in a great civil war, testing whether
that nation, or any nation so conceived and so dedicated,
can long endure.
____| 1 | title of the block |
| 2 | reference for the block |
| 3 | can be used to style the corresponding block. |
2.20. Table
You can create also tables in Asciidoc via the following syntax.
.This is the optional title of the table
|===
|Name of Column 1 |Name of Column 2

|Cell in column 1, row 1
|Cell in column 2, row 1

|Cell in column 1, row 2
|Cell in column 2, row 2
|===
The result looks like the following.
| Name of Column 1 | Name of Column 2 |
|---|---|
Cell in column 1, row 1 |
Cell in column 2, row 1 |
Cell in column 1, row 2 |
Cell in column 2, row 2 |
You can also define the relative table width.
.with relative column widths (1,3)
[cols="1,3",options="header"]
|===
| Name | Description
| Testing
| Table width
|===
Of course you can define tables with more than two columns.
.Title
|===
|Name of Column 1 |Name of Column 2 |Name of Column 3

|Cell in column 1, row 1
|Cell in column 2, row 1
|Cell in column 3, row 1

|Cell in column 1, row 2
|Cell in column 2, row 2
|Cell in column 3, row 2
|===
2.20.1. Define column widths
The [cols="1,3"] declaration directly underneath the .declaration can be used to specify the column’s width.
If the width is set then the option="header" must also be set like this: [cols="1,3",options="header"] to see
the first row of a table as a header.
.Title
[cols="1,3",options="header"]
|===
|Name of Column 1 |Name of Column 2 |Name of Column 3

|Cell in column 1, row 1
|Cell in column 2, row 1
|Cell in column 3, row 1

|Cell in column 1, row 2
|Cell in column 2, row 2
|Cell in column 3, row 2
|===
The snippet above will result in the following:
| Name of Column 1 | Name of Column 2 |
|---|---|
Cell in column 1, row 1 |
Cell in column 2, row 1 |
Cell in column 1, row 2 |
Cell in column 2, row 2 |
Alternatively, % values can be used, e.g., [cols="40%, 60%"].
To add special asciidoc elements as lists, notes, sourcecode, etc. within a table cell just add an a before the |.
Some elements like keyboard shortcuts(kbd) and buttons(btn) do not need a special definition in tables.
This would look like this:
.with asciidoc elements
|===
|Keyboard shortcut |List |Note |Button

|kbd:[Ctrl+9]
a|* Test 1
* Test 2
* Test 3
a|
[NOTE]
====
This is a good idea
====
|btn:[OK]

|===| Keyboard shortcut | List | Note | Button | ||
|---|---|---|---|---|---|
Ctrl+9 |
|
|
OK |
2.21. Code listings (Source code)
To show part of the text as source code use the following:
[source]
----

----
Use monospace text formatting to emulate how source code appears in computer terminals, simple text editors, and integrated development environments (IDEs).
Enclose the starting hypthen string with \ for this, e.g., `System.out.println("Hello");` results in System.out.println("Hello");
To enable syntax highlighting in the output, set the style on the block to source and specify the source language in the second attribute position. The possible highlighting styles are described in chapter Source code highlighting.
[source, java]
----
include::res/test.java
----
The supported languages depends on your renderer but your can for example use:
-
console - for terminal output
-
java - for Java source files
2.21.1. Callouts
It is also simple to add callouts, as demonstrated by the following snippet. You can use . to auto number the callouts.
System.out.println("Hello");  # <.>
private int a;
<.> Imports the library
Output is the following
System.out.println("Hello");  (1)
private int a;| 1 | Imports the library |
For XML the syntax is a little bit different.
<?xml version="1.0" encoding="UTF-8"?>

  <modelVersion>4.0.0</modelVersion> (1)

  <groupId>com.vogella.maven.first</groupId>
  <artifactId>com.vogella.maven.first</artifactId>
  <version>1.0-SNAPSHOT</version>

  <name>com.vogella.maven.first</name>

</project>

<1> Comment for the above
Output is the following:
<?xml version="1.0" encoding="UTF-8"?>

  <modelVersion>4.0.0</modelVersion> (1)

  <groupId>com.vogella.maven.first</groupId>
  <artifactId>com.vogella.maven.first</artifactId>
  <version>1.0-SNAPSHOT</version>

  <name>com.vogella.maven.first</name>

</project>

<1> Comment for the above| 1 | Imports the library |
Asciidoc automatically replaces tabs in source code with spaces.
You can set the amount of spaces to be set per tab with the attribute :tabsize: 2.
In this case one tab will be replaced with 2 spaces.
|
2.21.2. Source code highlighting
Syntax highlighting can be used by setting the source-highlighter attribute in the document header.
:source-highlighter: pygmentsThe valid options for html styling are coderay, highlightjs, prettify and pygments. For pfd styling coderay, rouge and pygments are available.
coderay, rouge and pygments work with an embedded css styling which will be added to the folder of the *.adoc file during the output conversion.
In this case the attribute include::../10_Include/settings.adoc[] must be set in the document header.
highlightjs and prettify use javascript.
For pygments, highlightjs, prettify there are a variaty of different styles/themes.
To use a pygment style add the following attribute to the document header:
:pygments-style: xcodeIf you dont set the pygment-style attribute, the default style will be used.
To see the list of all available pygments styles execute: pygmentize -L styles in the command line.
As for hightlightjs the styles are called themes and can be added to the docuemnt header as follows:
:highlightjs-theme: xcode2.22. Escape special signs
If you need to escape Asciidoc commands, you can use \ before the character that would normally be interpreted by Asciidoc.
To write for example | you would need to write it like this: \|.
2.23. Index
You can add primary index terms to your document via (((Yourterm))). A secondary index can be added to your document via (((Yourterm, Secondary term2))). For example:
((((Big cats)))
((((Big cats, Lions)))
2.24. Comments in Asciidoc
You can add comments to the Asciidoc markup. The comments are not added to the generated output. You can use both single and multiline comments. Single line comments start with a double slash (//). Multiline comments are enclosed in a block of four forward slashes (////).
2.25. Escape Asciidoc markup
Most AsciiDoc elements can be escaped by preceding them with a backslash character.
2.26. Custom attributes / variables
You can define custom variables and use them in your document.
For example, the following defines the variable yourvariable that can be used with {yourvariable} and Asciidoctor will replace it with the value defined after the second :.
:yourvariable: vogella2.27. Collapsible Elements
AsciiDoc supports the native <details> element to hide elements and make them available on click.
.Title
[%collapsible]
====
Normal asciidoc markup here
====
Title
Normal asciidoc markup here
3. Conversion with Asciidoctor
You will need a working Ruby installation. For our installation guide see: https://www.vogella.com/tutorials/Ruby/article.html
3.1. Asciidoctor installation
To convert your asciidoc files you need to install the Asciidoctor gem.
gem install asciidoctorIf you want to be able to create pdf-files you can use the asciidoctor-pdf gem.
gem install --pre asciidoctor-pdf3.2. Converting AsciiDoc to html5
Because Asciidoctor will default to the html5 backend you do not need to call it with any extra arguments.
asciidoctor example.adoc
# defaults to
asciidoctor -b html5 example.adoc
To see a list of all available backends you can call asciidoctor --help.
3.3. Converting AsciiDoc to pdf-files
After the installation of the gems you are ready to convert your AsciiDoc files to pdf-format.
asciidoctor-pdf example.adoc3.4. Using the development version of Asciidoctor to create pdf-files
If you want to use the latest development version of asciidoctor to create your pdf-files you have to clone the asciidoctor-pdf repository from GitHub.
git clone git@github.com:asciidoctor/asciidoctor-pdf.gitTo get the application ready you first need to install the dependencies. You might have to install the bundler gem first.
cd asciidoctor-pdf
bundle install
Now you can start using the latest version to convert your AsciiDoc.
./bin/asciidoctor-pdf /path/to/your/file.adoc
# or via bundler
bundle execute asciidoctor-pdf /path/to/your/file.adoc
3.5. Using Asciidoctor in a Gradle build file
3.5.1. Using AsciidoctorJ in a Gradle build
The easiest way to use Asciidoctor in a Gradle build is through the Asciidoctor Gradle Plugin. It is based on AsciidoctorJ, which functions as a Java wrapper for Asciidoctor.
The following example build.gradle will convert your source files to html5.
plugins {
    id 'org.asciidoctor.convert' version '1.5.3'
}

apply plugin: 'java'
apply plugin: 'org.asciidoctor.convert'

asciidoctorj {
    version = '1.5.4'
}

asciidoctor {
    attributes \
        'build-gradle': file('build.gradle'),
        // point this to the folder that holds your AsciiDoc
        'sourcedir': project.sourceSets.main.java.srcDirs[0],
        'endpoint-url': 'http://example.org',
        'source-highlighter': 'coderay',
        'imagesdir': 'images',
        'toc': 'left',
        'icons': 'font',
        'setanchors': '',
        'idprefix': '',
        'idseparator': '-',
        'docinfo1': ''
}
You start the conversion by invoking the asciidoctor task.
gradle asciidoctor3.5.2. Using the Asciidoctor-Pdf gem in a Gradle build
You can use the latest Ruby version of Asciidoctor extensions directly in your Gradle build. The following example shows how to use the asciidoctor-pdf gem.
plugins {
    id 'org.asciidoctor.convert' version '1.5.3'
    id 'com.github.jruby-gradle.base' version '1.3.3'
}

apply plugin: 'org.asciidoctor.convert'

dependencies {
    gems 'rubygems:asciidoctor-pdf:1.5.0.alpha.13'
}

asciidoctorj {
    version = '1.5.4.1'
}

asciidoctor {
    // jrubyPrepare downloads and installs Ruby Gem dependencies
    dependsOn jrubyPrepare
    // include the 'asciidoctor-pdf' Ruby module
    requires = ['asciidoctor-pdf']
    // let the Asciidoctor Plug-in search for Gems in jrubyPrepares output directory
    gemPath = jrubyPrepare.outputDir
    // convert to pdf
    backends 'pdf'
}
You start the conversion by invoking the asciidoctor task.
gradle asciidoctor3.5.3. Using the development version of Asciidoctor-Pdf in a Gradle build file
To use the development version of Asciidoctor-Pdf in a Gradle build file you first need to build the gem.
git clone git@github.com:asciidoctor/asciidoctor-pdf.git
cd asciidoctor-pdf
bundle
bundle exec rake build
You can then find the .gem file under /pkg.
Copy it into your Gradle project under the folder development-gems.
We are going to use the JRuby and Asciidoctor Gradle plugin, so we need to declare them.
plugins {
  id 'org.asciidoctor.convert' version '1.5.3'
  id 'com.github.jruby-gradle.base' version '1.3.3'
}

apply plugin: 'org.asciidoctor.convert'
To use a local gem from Gradle, all dependencies of that gem have to be specified manually.
You can find the dependencies in asciidoctor-pdf.gemspec
Gem::Specification.new do |s|
  # ...
  s.add_runtime_dependency 'prawn', '>= 1.3.0', '< 3.0.0'
  s.add_runtime_dependency 'prawn-table', '0.2.2'
  s.add_runtime_dependency 'prawn-templates', '0.0.3'
  s.add_runtime_dependency 'prawn-svg', '>= 0.21.0', '< 0.26.0'
  s.add_runtime_dependency 'prawn-icon', '1.3.0'
  s.add_runtime_dependency 'safe_yaml', '~> 1.0.4'
  s.add_runtime_dependency 'thread_safe', '~> 0.3.5'
  s.add_runtime_dependency 'treetop', '1.5.3'
end
You can then add them to your build.gradle.
dependencies {
  gems 'rubygems:prawn:2.1.0'
  gems 'rubygems:prawn-table:0.2.2'
  gems 'rubygems:prawn-templates:0.0.3'
  gems 'rubygems:prawn-svg:0.25.2'
  gems 'rubygems:prawn-icon:1.3.0'
  gems 'rubygems:safe_yaml:1.0.4'
  gems 'rubygems:thread_safe:0.3.5'
  gems 'rubygems:treetop:1.5.3'
}
You need to override the jrubyPrepare task to use all of the declared dependencies plus the local gem.
import com.github.jrubygradle.JRubyPrepare
task customJRubyPrepare(type: JRubyPrepare) {
  dependencies project.configurations.gems
  dependencies file('development-gems/asciidoctor-pdf-1.5.0.alpha.14.dev.gem')
  outputDir buildDir
}
Finally you have to make sure that the asciidoctor task depends on customJRubyPrepare and requires asciidoctor-pdf.
asciidoctor {
    dependsOn customJRubyPrepare
    requires ['asciidoctor-pdf']
    gemPath customJRubyPrepare.outputDir
    backends 'pdf'
}
Trigger the asciidoctor task to convert your AsciiDoc.
gradle asciidoctor4. Admonition paragraphs and blocks for warnings, notes and tips
4.1. Admonition paragraphs
An admonition paragraph draws the reader’s attention to certain information. It can be defined by a predefined label at the beginning of the paragraph or as a block.
Here are the other built-in admonition types:

NOTE: Some additional info...

TIP: Pro tip...

IMPORTANT: Don't forget...

WARNING: Watch out for...

CAUTION: Ensure that...
The result looks like the following:
Here are the other built-in admonition types:
| Some additional info.. |
| Pro tip… |
| Don’t forget… |
| Watch out for… |
| Ensure that… |
4.2. Admonition blocks
You can also use admonition blocks.
[TIP]
====
Think of c1..c2 as _all commits as of c1 (not including c1) until commit
c2._
====
The output looks like the following.
|
Think of c1..c2 as all commits as of c1 (not including c1) until commit c2. |
Similar to a tip, you can add a warning.
[WARNING]
====
This is a warning
====
The output looks like the following.
|
This is a warning |
The following styles are supported:
-
NOTE
-
TIP
-
IMPORTANT
-
CAUTION
-
WARNING
You can also add header to these admonitions.
.My header for the note
[NOTE]
====
Blabla
====
This looks like the following:
|
My header for the note
Blabla |
4.3. Block quotes
[quote, Ben Parker, Spiderman Movie]
____
With great power comes great responsibility.
____
will look like this:
With great power comes great responsibility.
Spiderman Movie
5. Define a collapsible block
You can also define collapsible blocks which the user can interactively open in the HTML output.
.Name of the menu
[%collapsible]
====
This is the content.
====
This looks like the following.
Name of the menu
This is the content.
6. Using the Eclipse IDE as Asciidoc editor
Currently the best Asciidoc editor plug-in for the Eclipse IDE is provided by https://github.com/de-jcup/eclipse-asciidoctor-editor.
You can install it via its Marketplace entry: https://marketplace.eclipse.org/content/asciidoctor-editor or via its p2 update site https://de-jcup.github.io/update-site-eclipse-asciidoctor-editor/update-site/
It provides an editor and a preview tab for Asciidoc.
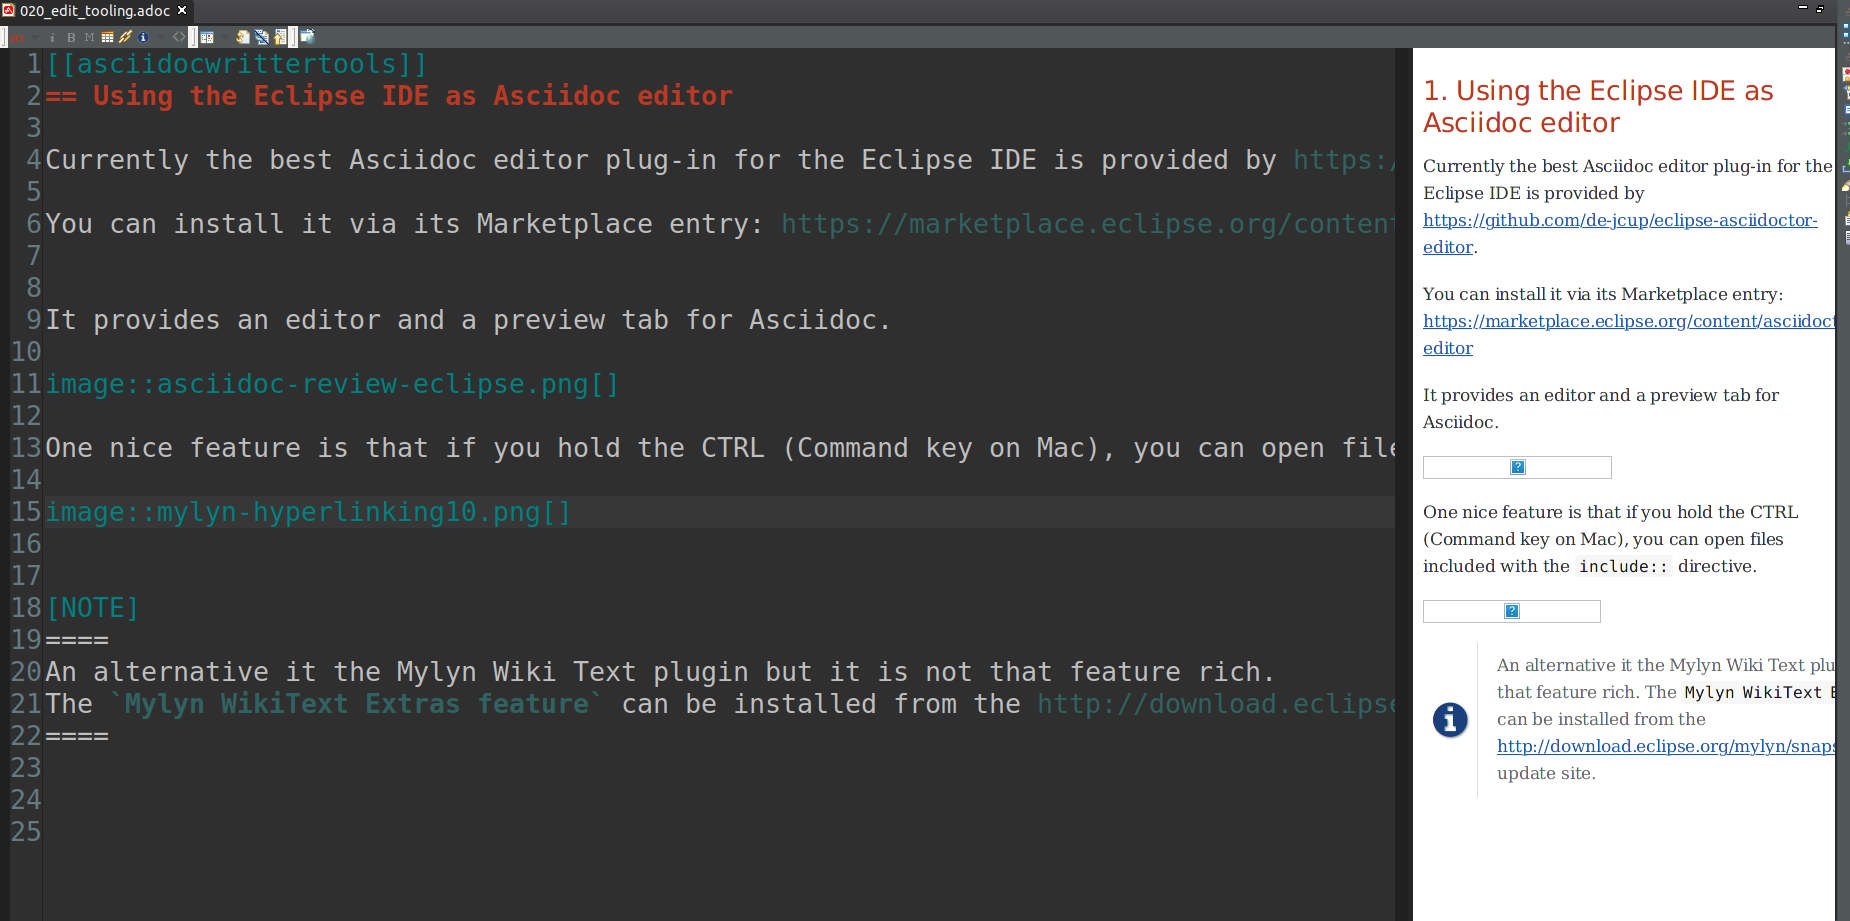
One nice feature is that if you hold the Ctrl (Command key on Mac), you can open files included with the include:: directive.

7. Settings for the PDF output
7.1. Title page
The title page of a pdf document can include the following attributes:
-
Title
-
Subtitle
-
Author
-
Revision
This attributes can be styled in the file basic-theme.yml in the folder themes.
7.2. Links
To see the links in the generated output use the following attribute in the header of you document.
:show-link-uri:| Before release alpha.13 you have to use the :showlinks: attribute instead. |
Also you can configure the label for a chapter via the chapter-label attribute, e.g., if you do not want any label you can use:
:!chapter-signifier:Unfortunately, Asciidoctor does not add a page break before a part if you use "book" as output.
See https://github.com/asciidoctor/asciidoctor-pdf/issues/329.
As workaround you have to put manual line breaks into it with <<<.
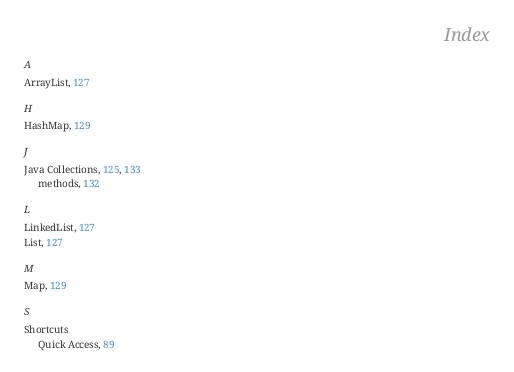
7.3. Index
You can add an index to your pdf output by defining it as follows:
[index]
= Index
This will list all the defined indexes. The output will look like this:
7.5. Styling the PDF output
To style the PDF output use the file basic-theme.yml in the folder themes. In this file you can style the title page, the headings (h1, h2, h3, etc), the images and many more objects.
For example, to style the heading do the following entry in the basic-theme.yml file:
heading:
  font_style: bold
  h1:
    font_color: 999999
    font_style: italic
    align: right
A useful feature is to set a default width for images in the pdf output. To achieve this do the following entry:
image:
  width: 60%
To see all possible styling settings visit the Asciidoc theming guide.
7.6. Publishing Mode
To use some publishing attributes you must set the media attribute in the header of your AsciiDoc document as follows:
:media: prepressThis attribute will trigger the following settings:
-
Double-sided (mirror) page margins
-
Automatic facing pages
7.6.1. Double-sided (mirror) page margins
The double-sided page margins will have the following impact: the page margins for the recto (right-hand, odd-numbered) and verso (left-hand, even-numbered) pages will be replaced by the side page margins with the values of the page_margin_inner and page_margin_outer keys.
You can define the page_margin_inner and page_margin_outer in the theme. This will look as follows:
page:
  margin: [0.5in, 0.67in, 0.67in, 0.67in]
  margin_inner: 0.75in
  margin_outer: 0.59in
These settings will trigger the following change to the output:
recto page margin
[0.5in, 0.59in, 0.67in, 0.75in]

verso page margin
[0.5in, 0.75in, 0.67in, 0.59in]
7.6.2. Automatic facing pages
Regarding to the automatic facing pages, a blank page will be inserted, if necessary, to ensure the following pages are right-hand-facing pages:
-
Title page
-
Table of contents
-
First page of body content
-
Parts and chapters
It’s possible to disable the automatic facing feature for a given part or chapter. This can be done by adding the nonfacing option [%nonfacing] to the section node. When the nonfacing option is present, the part or chapter title will be placed on the following page.
[%nonfacing]
= Chapter Title

Chapter content
8. Influencing the HTML output
8.1. Turn section titles into links
Use the sectlinks attribute to turn titles into links.
Use the sectanchors attribute to add anchor before the section title, by default § is used.
8.2. Using custom templates to alter the html output
The default styling of the asciidoctor tooling is good for most cases. But some cases require the use of custom templates to modify the output for the use case.
This requires to specify the option template_dir in the config file.
For gradle:
options template_dirs : [new File('<template_folder>').absolutePath]For Asciidoctor CLI tooling use the -T parameter:
$ asciidoctor <target_file> -T '<template_folder>'
Templates can be written in haml or slim. You can find example templates written by the asciidoctor project at https://github.com/asciidoctor/asciidoctor-backends.
8.2.1. Exercise: Writing an asciidoctor template with an additional gem dependency using asciidoctor-gradle-plugin
In this exercise we are going to write an asciidoctor template that overwrites the html output for block images.
We are going to add the Ruby gem fastimage as a dependency and use it add width and height to the <img> tag output.
We will use asciidoctor through the asciidoctor-gradle-plugin.
A complete example project with the code shown here can be found at https://github.com/vogellacompany/codeexamples-asciidoctor/tree/main/template-with-external-gem.
Our project will look like this:
Project
├── img
│   └── annie-spratt-xUKHtTN2NcU-unsplash.jpg
├── template
│   ├── block_image.html.slim
│   └── helpers.rb
├── build.gradle
└── doc.adoc
plugins {
    id 'org.asciidoctor.jvm.convert' version '3.3.2'
    id 'org.asciidoctor.jvm.gems' version '3.3.2'
}

apply plugin: 'org.asciidoctor.jvm.convert'
apply plugin: 'org.asciidoctor.jvm.gems'

repositories {
    ruby.gems() (1)
    mavenCentral()
}

dependencies {
    asciidoctorGems 'rubygems:fastimage:2.2.4' (2)
}

asciidoctor {
    dependsOn asciidoctorGemsPrepare (3)
    sourceDir projectDir
    sources {
        include 'doc.adoc'
    }
    resources {
        from(sourceDir) { include 'img/**' } (4)
    }

    asciidoctorj {
        requires 'fastimage' (5)
        options template_dirs: [ "${projectDir}/template" ] (6)
    }
}| 1 | Adds the ruby gems repository so we can require ruby dependencies |
| 2 | asciidoctorGems adds gems to AsciidoctorJ conversions |
| 3 | Requires the asciidoctorGemsPrepare to run, which fetches and installs our gem dependency |
| 4 | Makes sure our images get copied to the build output |
| 5 | Requires the fastimage gem for all asciidoctorj conversions globally |
| 6 | Specifies where to find the template code we want asciidoctorj to use |
Copy the code found at github.com/asciidoctor/asciidoctor-backends to the template/helpers.rb file.
This is the template to put into template/block_image.html.slim:
= block_with_title({class: 'imageblock', style: (style_value text_align: (attr :align), float: (attr :float))}, :bottom)
  .content
    - fi_width, fi_height = FastImage.size("#{attr(:imagesdir)}/#{attr(:target)}")
    - if (attr :link)
      a.image href=(attr :link)
        img src=image_uri(attr :target) alt=(attr :alt) width=(attr(:width) || fi_width) height=(attr(:height) || fi_height)
    - else
      img src=image_uri(attr :target) alt=(attr :alt) width=(attr(:width) || fi_width) height=(attr(:height) || fi_height)
Our doc.adoc looks like this:
== Example doc
:imagesdir: ./img

image::annie-spratt-xUKHtTN2NcU-unsplash.jpg[]
You can copy this image to the /img directory:

The image originally comes from https://unsplash.com/photos/xUKHtTN2NcU/.
Now run asciidoctorj through gradle:
gradle clean asciidoctor
The generated output html (build/docs/asciidoc/doc.html) should contain an <img> tag with width and height added:
<div class="imageblock">
    <div class="content"><img src="./img/annie-spratt-xUKHtTN2NcU-unsplash.jpg" alt="annie spratt xUKHtTN2NcU unsplash" width="640" height="853">
    </div>
</div>
8.3. Include content in the header of our HTML or Docbook output
You can add content to the header of the HTML output. See https://asciidoctor.org/docs/user-manual/#docinfo-file for details.
9. Asciidoc resources
9.1. vogella Java example code
If you need more assistance we offer Online Training and Onsite training as well as consulting