This tutorial describes how to work with the Room framework to manage SQLite database in Android applications.
It also describes the direct usage of the SQLite database in Android applications. It demonstrates how to use existing ContentProvider and how to define new ones. In addition, the usage of the loader framework is described.
1. SQLite and Android
SQLite is an open-source database. SQLite supports standard relational database features like SQL syntax, transactions and prepared statements. The database requires limited memory at runtime (approx. 250 KByte).
SQLite supports the following data types:
-
TEXT(similar to String in Java) -
INTEGER(similar to long in Java) -
REAL(similar to double in Java). All other types must be converted into one of these fields before getting saved in the database. SQLite itself does not validate if the types written to the columns are of the defined type. This means you can write an integer into a string column and bvice versa.
Access to an SQLite database involves accessing the file system. This can be slow. Therefore it is recommended to perform database operations asynchronously.
More information about SQLite can be found on the SQLite website: https://www.sqlite.org.
2. Using Room as SQL object mapping library
Room is an annotation processing based SQL object mapping library provided by Google. Room is designed to abstract away the underlying database tables and queries. Therefore it provides an easy way to create and use Sqlite database. It is based on best-practices for persisting data in databases. For example, Room does, by default, not allow database access in the main thread.
Room has 3 major components:
-
Database: define an abstract database class that provides one or more data access objects (dao).
-
Dao: interface that defines how to get or change the values in db.
-
Entity: represents a value object in the db.
For every table in your database you define a Java class, annotated with @Entity.
The primary key must be annotated with @PrimaryKey.
For each Java annotated with @Entity, you define an interface for the database access object (DAO) annotated with @Dao.
In this interface you define methods annotated with:
-
@Query
-
@Insert
-
@Delete
@Query are asynchronous, while @Insert and @Delete are synchronous.
The generator creates readable error messages, if the database statements is erroneous.
To connect your data to your UI, you can use LiveData.
LiveData is an observable data holder.
It notifies observers when data changes so that the user interface can be updated.
You can also define Type Converters to define how custom types can be converted into types known by the database.
@Ignore can be used to ignore certain fields.
Room does not support object references between entities, to avoid potential performances issues. Even though you cannot use direct relationships, it is possible to define foreign key constraints between entities.
3. Exercise using Room
This exercise demonstrates the usage of root to persist data. It also demonstrates the usage of foreign constraints to model relationships.
3.1. Create project
Create a project called com.vogella.android.persistence with the same top-level package name. Use the Empty Activity template.
Ensure google() is available in the main build.gradle file.
allprojects {
    repositories {
        jcenter()
        google()
    }
}
Add the following dependencies to your app/build.gradle file.
    def lifecycle_version = "1.1.1"
    implementation "android.arch.lifecycle:extensions:$lifecycle_version"
    implementation "android.arch.persistence.room:runtime:$lifecycle_version"
    annotationProcessor "android.arch.lifecycle:compiler:$lifecycle_version"
    annotationProcessor "android.arch.persistence.room:compiler:$lifecycle_version"
}
3.2. Create database classes and use them
Create the data objects.
package com.vogella.android.persistence;

import android.arch.persistence.room.Entity;
import android.arch.persistence.room.PrimaryKey;

/**
 * Created by vogella on 06.09.17.
 */
@Entity
public class User {

    @PrimaryKey
    public final int id;
    public String name;
    public int level;
    public long skillPoints;


    public User(int id, String name, long skillPoints) {
        this.id = id;
        this.name = name;
        this.skillPoints  = skillPoints;
        this.level = 0;
    }

}
package com.vogella.android.persistence;
import android.arch.persistence.room.Entity;
import android.arch.persistence.room.ForeignKey;
import android.arch.persistence.room.Index;
import android.arch.persistence.room.PrimaryKey;
@Entity(tableName = "trophy",
foreignKeys = {
@ForeignKey(
entity = User.class,
parentColumns = "id",
childColumns = "userId",
onDelete = ForeignKey.CASCADE
)},
indices = { @Index(value = "id")}
)
public class Trophy {
@PrimaryKey(autoGenerate = true)
long id;
public long userId;
String description;
public Trophy(long userId, String description) {
this.userId = userId;
this.description = description;
}
}Create the following DAO object.
package com.vogella.android.persistence;

import android.arch.persistence.room.Dao;
import android.arch.persistence.room.Insert;
import android.arch.persistence.room.OnConflictStrategy;
import android.arch.persistence.room.Query;
import android.arch.persistence.room.Update;

import java.util.List;


@Dao
public interface UserDao {

    @Insert(onConflict = OnConflictStrategy.REPLACE)
    void addUser(User user);

    @Query("select * from user")
    public List<User> getAllUser();

    @Query("select * from user where id = :userId")
    public List<User> getUser(long userId);

    @Update(onConflict = OnConflictStrategy.REPLACE)
    void updateUser(User user);

    @Query("delete from user")
    void removeAllUsers();
}
package com.vogella.android.persistence;
import android.arch.persistence.room.Dao;
import android.arch.persistence.room.Insert;
import android.arch.persistence.room.OnConflictStrategy;
import android.arch.persistence.room.Query;
import android.arch.persistence.room.Update;
import java.util.List;
@Dao
public interface TrophyDao {
@Insert(onConflict = OnConflictStrategy.REPLACE)
void addTrophy(Trophy trophy);
@Query("SELECT * FROM trophy WHERE userId=:userId")
List<Trophy> findTrophiesForUser(int userId);
@Update(onConflict = OnConflictStrategy.REPLACE)
void updateTrophy(Trophy trophy);
@Query("delete from trophy where id = :id")
void delete(long id);
}Create the AppDatabase class.
package com.vogella.android.persistence;


import android.content.Context;

import android.arch.persistence.room.Database;
import android.arch.persistence.room.Room;
import android.arch.persistence.room.RoomDatabase;

@Database(entities = {User.class,  Trophy.class
}, version = 16, exportSchema = false)
public abstract class AppDatabase extends RoomDatabase {

    private static AppDatabase INSTANCE;

    public abstract UserDao userDao();
    public abstract TrophyDao trophyDao();

    public static AppDatabase getDatabase(Context context) {
        if (INSTANCE == null) {
            INSTANCE =
                    Room.databaseBuilder(context, AppDatabase.class, "userdatabase")
//Room.inMemoryDatabaseBuilder(context.getApplicationContext(), AppDatabase.class)
                            // To simplify the exercise, allow queries on the main thread.
                            // Don't do this on a real app!
                            .allowMainThreadQueries()
                            // recreate the database if necessary
                            .fallbackToDestructiveMigration()
                            .build();
        }
        return INSTANCE;
    }

    public static void destroyInstance() {
        INSTANCE = null;
    }
}
Adjust your main activity to use the database.
package com.vogella.android.persistence;

import android.app.Activity;
import android.os.Bundle;
import android.view.View;
import android.widget.TextView;
import android.widget.Toast;

import java.util.List;

public class MainActivity extends Activity {

    private User user;
    private AppDatabase database;

    @Override
    protected void onCreate(Bundle savedInstanceState) {
        super.onCreate(savedInstanceState);
        setContentView(R.layout.activity_main);
        database = AppDatabase.getDatabase(getApplicationContext());

        // cleanup for testing some initial data
        database.userDao().removeAllUsers();
        // add some data
        List<User> users = database.userDao().getAllUser();
        if (users.size()==0) {
            database.userDao().addUser(new User(1, "Test 1", 1));
            user = database.userDao().getAllUser().get(0);
            Toast.makeText(this, String.valueOf(user.id), Toast.LENGTH_SHORT).show();
            Trophy trophy = new Trophy(user.id, "Learned to use 3");
            database.trophyDao().addTrophy(trophy);
            database.userDao().addUser(new User(2, "Test 2", 2));
            database.userDao().addUser(new User(3, "Test 3", 3));
        }

        updateFirstUserData();

    }


    private void updateFirstUserData() {
        List<User> user = database.userDao().getAllUser();
        List<Trophy> trophiesForUser = database.trophyDao().findTrophiesForUser(user.get(0).id);
        TextView textView = findViewById(R.id.result);
        Toast.makeText(this, trophiesForUser.toString(), Toast.LENGTH_SHORT).show();
        if (user.size()>0){
            textView.setText(user.get(0).name + " Skill points " + user.get(0).skillPoints + " Trophys " + trophiesForUser.size() );
        }
    }

    public void onClick(View view){
        if (view.getId()==R.id.addtrophybutton) {
            // TODO add trophy
            // TODO call updatefirstUserData
            Toast.makeText(this,String.valueOf(user.id), Toast.LENGTH_SHORT).show();
            Trophy trophy = new Trophy(user.id, "More stuff");
            database.trophyDao().addTrophy(trophy);
        }
        if (view.getId()==R.id.increaseskills ){
            user.skillPoints++;
            database.userDao().updateUser(user);
            // TODO to skillpoints

        }
        // TODO call updatefirstUserData
        updateFirstUserData();

    }
    @Override
    protected void onDestroy() {
        AppDatabase.destroyInstance();
        super.onDestroy();
    }
}
3.3. Optional: Add another table to your application
Each user can have Problems.
A problem can have a description and an number.
Change your code so that you can also persists a number of problems for a user.
4. Working directly with SQLite
|
While it is possible to work directly with SQLite, using Using Room as SQL object mapping library should be preferred. The usage of Room largely simplifies the handling of databases. Using the database APIs as described in this section, provides several challenges:
|
The android.database package contains all necessary classes for working with databases.
The android.database.sqlite package contains the SQLite specific classes.
To create and upgrade a database in your Android application you subclass the SQLiteOpenHelper class.
An SQLiteDatabase object is the Java representation of the database.
In the constructor of your subclass, you specify the name and the version of your database in the SQLiteOpenHelper.super() call.
In your SQLiteOpenHelper subclass class you need to override the following methods:
-
onCreate()- is called by the framework, if the database is accessed but not yet created. -
onUpgrade()- called, if the database version is increased in your application code. This method allows you to update an existing database schema or to drop the existing database and recreate it via theonCreate()method.
The SQLiteOpenHelper class provides the getReadableDatabase() and getWriteableDatabase() methods.
They allow read or write access to the SQLiteDatabase database.
The database tables should use the identifier _id for the primary key of the table.
Several Android functions rely on this standard.
SQLiteDatabase is the base class for working with a SQLite database.
It provides the insert(), update() and delete() methods to open, query, update and close the database.== Performance
Changes in SQLite are ACID (atomic, consistent, isolated, durable). This means that every update, insert and delete operation is ACID. Unfortunately, this requires some overhead in the database processing therefore you should wrap updates in the SQLite database in an transaction and commit this transaction after several operations. This can significantly improve performance.
The following code demonstrates this performance optimization.
db.beginTransaction();
try {
   for (int i= 0; i< values.lenght; i++){
       // TODO prepare ContentValues object values
       db.insert(your_table, null, values);
       // In case you do larger updates
       yieldIfContededSafely()
     }
     db.setTransactionSuccessful();
    } finally {
      db.endTransaction();
}
For larger data updates you should use the
yieldIfContededSafely()
method.
SQLite locks the database during an transaction.
With this call, Android checks if someone else queries the data and if finish
automatically the transaction and opens a new one. This way the other
process can access the data in between.
It also provides the execSQL() method that allows to execute SQL statements.
The object ContentValues allows defining key-value pairs for inserts and updates.
The key represents the table column identifier and the value represents the content for the table record in this column.
Queries can be created via the rawQuery() and query() methods.
rawQuery() directly accepts an SQL select statement as input.
query() provides a structured interface for specifying
the SQL query.
SQLiteQueryBuilder is a convenience class that helps to build SQL queries.
The following listings demonstrate the usage of the different calls.
Cursor cursor = getReadableDatabase().
    rawQuery("select * from todo where _id = ?", new String[] { id });
return database.query(DATABASE_TABLE,
new String[] { KEY_ROWID, KEY_CATEGORY, KEY_SUMMARY, KEY_DESCRIPTION },
null, null, null, null, null);The method query() has the following parameters.
| Parameter | Comment |
|---|---|
String dbName |
The table name to compile the query against. |
String[] columnNames |
A list of which table columns to return. Passing "null" will return all columns. |
String whereClause |
Where-clause, i.e. filter for the selection of data, null will select all data. |
String[] selectionArgs |
You may include ?s in the "whereClause"". These placeholders will get replaced by the values from the selectionArgs array. |
String[] groupBy |
A filter declaring how to group rows, null will cause the rows to not be grouped. |
String[] having |
Filter for the groups, null means no filter. |
String[] orderBy |
Table columns which will be used to order the data, null means no ordering. |
If a condition is not required you can pass null, e.g., for the group by clause.
The "whereClause" is specified without the word "where", for example a "where" statement might look like: "_id=19 and summary=?".
If you specify placeholder values in the where clause via ?, you pass them as the selectionArgs parameter to the query.
A query returns a Cursor object.
A Cursor represents the result of a query and basically points to one row of the query result.
This way Android can buffer the query results efficiently; as it does not have to load all data into memory.
To get the number of elements of the resulting query use the getCount() method.
To move between individual data rows, you can use the moveToFirst() and moveToNext() methods.
The isAfterLast() method determines if the end of the query result has been reached.
Cursor provides typed get*() methods, e.g., getLong(columnIndex), getString(columnIndex) to access the column data of the current cursor.
Cursor also provides the getColumnIndexOrThrow(String) method that allows to get the column index for a column name of the table.
A Cursor needs to be closed with the close() method call.
4.1. Performance
You should wrap updates in the SQLite database in an transaction and commit this transaction after several operations. This can significantly improve performance.
The following code demonstrates this performance optimization.
db.beginTransaction();
try {
   for (int i= 0; i< values.lenght; i++){
       // TODO prepare ContentValues object values
       db.insert(your_table, null, values);
       // In case you do larger updates
       yieldIfContededSafely()
     }
     db.setTransactionSuccessful();
    } finally {
      db.endTransaction();
}
For larger data updates you should use the yieldIfContededSafely() method.
SQLite locks the database during an transaction.
With this call, Android checks if someone else queries the data and if finish automatically the transaction and opens a new one.
This way the other process can access the data in between.
5. Content provider and sharing data
5.1. What is a content provider?
Content provider can provide data to other applications or components.
A provider must be declared in the manifest file for the application.
Via the android:exported=false|true flag you can define if the provide is available for other applications or not.
Consumers access the data provided via URI’s.
Any URI which starts with content:// points to a resources that can be accessed via a provider.
A URI for a resource may allow to perform the basic CRUD operations (Create, Read, Update, Delete) on the resource via the content provider.
A provider allows applications to access data. The data can be stored in an SQlite database, on the file system, in flat files or on a remote server.
The base URI to access a content provider is defined via the combination of the content:// schema and the name space of the provider.
This name space is defined in the manifest file via the android:authorities attribute of the receiver registration.
For example: content://test/
The base URI represents a collection of resources.
If the base URI is combined with an instance identifier, e,g., content://test/2, it represents a single instance.
It is a good practice to provide public constants for the URIs to document them to other developers.
5.2. Custom content provider
To create your custom content provider you have to define a class that extends android.content.ContentProvider.
You must declare this class as content provider in the Android manifest file.
The corresponding entry must specify the android:authorities attribute that allows identifying the content provider.
This authority is the basis for the URI to access data and must be unique.
<provider
       android:authorities="de.vogella.android.todos.contentprovider"
       android:name=".contentprovider.MyTodoContentProvider" >
</provider>
If a content provider does support methods its good practice to throw an UnsupportedOperationException().
A content provider can be accessed from several programs at the same time. Therefore, you must implement its methods thread-safe.
6. Inspecting the database
SQlite stores the whole database in a file on the Android device. On an emulator or a rooted devices you can access this file. You can pull the database on your computer to investigate the content via your favorite SQlite desktop client.
For this use the following command to connect to the device.
# root the device
adb root

# pull the `userdatabase.db` database from the app with
#
adb pull /data/data/com.vogella.android.persistence/databases/userdatabase.db
# Enter .dump to see all the tables

[TIP]
====
Open source projects like https://github.com/infinum/android_dbinspector allow you to view the data directly on the device.
====|
The |
The most important commands for the sqlite command line access are:
| Command | Description |
|---|---|
.help |
List all commands and options. |
.exit |
Exit the sqlite3 command. |
.schema |
Show the CREATE statements which were used to create the tables of the current database. |
You find the complete documentation of SQlite at https://www.sqlite.org/sqlite.html.
7. Tutorial: Using SQLite
7.1. Introduction to the project
The following exercise demonstrates how to work with an SQLite database directly. It uses a data access object (DAO) to manage the data.
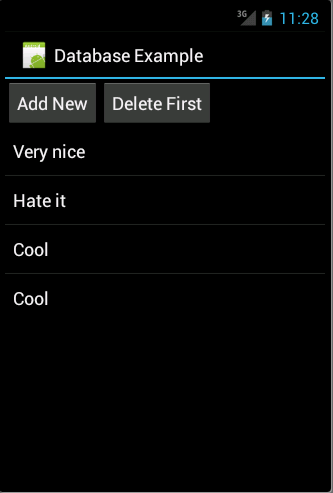
The resulting application will look like the following.
7.2. Create Project
Create the new Android project with the name de.vogella.android.sqlite.first and an activity called TestDatabaseActivity.
7.3. Database and Data Model
Create the following MySQLiteHelper class.
package de.vogella.android.sqlite.first;

import android.content.Context;
import android.database.sqlite.SQLiteDatabase;
import android.database.sqlite.SQLiteOpenHelper;
import android.util.Log;

public class MySQLiteHelper extends SQLiteOpenHelper {

    public static final String TABLE_COMMENTS = "comments";
    public static final String COLUMN_ID = "_id";
    public static final String COLUMN_COMMENT = "comment";

    private static final String DATABASE_NAME = "commments.db";
    private static final int DATABASE_VERSION = 1;

    // Database creation sql statement
    private static final String DATABASE_CREATE = "create table "
            + TABLE_COMMENTS + "( " + COLUMN_ID
            + " integer primary key autoincrement, " + COLUMN_COMMENT
            + " text not null);";

    public MySQLiteHelper(Context context) {
        super(context, DATABASE_NAME, null, DATABASE_VERSION);
    }

    @Override
    public void onCreate(SQLiteDatabase database) {
        database.execSQL(DATABASE_CREATE);
    }

    @Override
    public void onUpgrade(SQLiteDatabase db, int oldVersion, int newVersion) {
        Log.w(MySQLiteHelper.class.getName(),
                "Upgrading database from version " + oldVersion + " to "
                        + newVersion + ", which will destroy all old data");
        db.execSQL("DROP TABLE IF EXISTS " + TABLE_COMMENTS);
        onCreate(db);
    }

}
Create the Comment class.
package de.vogella.android.sqlite.first;

public class Comment {
    private long id;
    private String comment;

    public long getId() {
        return id;
    }

    public void setId(long id) {
        this.id = id;
    }

    public String getComment() {
        return comment;
    }

    public void setComment(String comment) {
        this.comment = comment;
    }

    // Will be used by the ArrayAdapter in the ListView
    @Override
    public String toString() {
        return comment;
    }
}
Create the CommentsDataSource class.
package de.vogella.android.sqlite.first;

import java.util.ArrayList;
import java.util.List;

import android.content.ContentValues;
import android.content.Context;
import android.database.Cursor;
import android.database.SQLException;
import android.database.sqlite.SQLiteDatabase;

public class CommentsDataSource {

    // Database fields
    private SQLiteDatabase database;
    private MySQLiteHelper dbHelper;
    private String[] allColumns = { MySQLiteHelper.COLUMN_ID,
            MySQLiteHelper.COLUMN_COMMENT };

    public CommentsDataSource(Context context) {
        dbHelper = new MySQLiteHelper(context);
    }

    public void open() throws SQLException {
        database = dbHelper.getWritableDatabase();
    }

    public void close() {
        dbHelper.close();
    }

    public Comment createComment(String comment) {
        ContentValues values = new ContentValues();
        values.put(MySQLiteHelper.COLUMN_COMMENT, comment);
        long insertId = database.insert(MySQLiteHelper.TABLE_COMMENTS, null,
                values);
        Cursor cursor = database.query(MySQLiteHelper.TABLE_COMMENTS,
                allColumns, MySQLiteHelper.COLUMN_ID + " = " + insertId, null,
                null, null, null);
        cursor.moveToFirst();
        Comment newComment = cursorToComment(cursor);
        cursor.close();
        return newComment;
    }

    public void deleteComment(Comment comment) {
        long id = comment.getId();
        System.out.println("Comment deleted with id: " + id);
        database.delete(MySQLiteHelper.TABLE_COMMENTS, MySQLiteHelper.COLUMN_ID
                + " = " + id, null);
    }

    public List<Comment> getAllComments() {
        List<Comment> comments = new ArrayList<Comment>();

        Cursor cursor = database.query(MySQLiteHelper.TABLE_COMMENTS,
                allColumns, null, null, null, null, null);

        cursor.moveToFirst();
        while (!cursor.isAfterLast()) {
            Comment comment = cursorToComment(cursor);
            comments.add(comment);
            cursor.moveToNext();
        }
        // make sure to close the cursor
        cursor.close();
        return comments;
    }

    private Comment cursorToComment(Cursor cursor) {
        Comment comment = new Comment();
        comment.setId(cursor.getLong(0));
        comment.setComment(cursor.getString(1));
        return comment;
    }
}
7.4. User Interface
Change your activity_main.xml layout file to the following.
<?xml version="1.0" encoding="utf-8"?>
<LinearLayout xmlns:android="http://schemas.android.com/apk/res/android"
    android:layout_width="match_parent"
    android:layout_height="match_parent"
    android:orientation="vertical" >

    <LinearLayout
        android:id="@+id/group"
        android:layout_width="wrap_content"
        android:layout_height="wrap_content" >

        <Button
            android:id="@+id/add"
            android:layout_width="wrap_content"
            android:layout_height="wrap_content"
            android:text="Add New"
            android:onClick="onClick"/>

        <Button
            android:id="@+id/delete"
            android:layout_width="wrap_content"
            android:layout_height="wrap_content"
            android:text="Delete First"
            android:onClick="onClick"/>

    </LinearLayout>

    <ListView
        android:id="@android:id/list"
        android:layout_width="match_parent"
        android:layout_height="wrap_content"
     />

</LinearLayout>
Change your TestDatabaseActivity class.
package de.vogella.android.sqlite.first;

import java.util.List;
import java.util.Random;

import android.app.ListActivity;
import android.os.Bundle;
import android.view.View;
import android.widget.ArrayAdapter;

public class TestDatabaseActivity extends ListActivity {
    private CommentsDataSource datasource;

    @Override
    public void onCreate(Bundle savedInstanceState) {
        super.onCreate(savedInstanceState);
        setContentView(R.layout.main);

        datasource = new CommentsDataSource(this);
        datasource.open();

        List<Comment> values = datasource.getAllComments();

        // use the SimpleCursorAdapter to show the
        // elements in a ListView
        ArrayAdapter<Comment> adapter = new ArrayAdapter<Comment>(this,
                android.R.layout.simple_list_item_1, values);
        setListAdapter(adapter);
    }

    // Will be called via the onClick attribute
    // of the buttons in main.xml
    public void onClick(View view) {
        @SuppressWarnings("unchecked")
        ArrayAdapter<Comment> adapter = (ArrayAdapter<Comment>) getListAdapter();
        Comment comment = null;
        switch (view.getId()) {
        case R.id.add:
            String[] comments = new String[] { "Cool", "Very nice", "Hate it" };
            int nextInt = new Random().nextInt(3);
            // save the new comment to the database
            comment = datasource.createComment(comments[nextInt]);
            adapter.add(comment);
            break;
        case R.id.delete:
            if (getListAdapter().getCount() > 0) {
                comment = (Comment) getListAdapter().getItem(0);
                datasource.deleteComment(comment);
                adapter.remove(comment);
            }
            break;
        }
        adapter.notifyDataSetChanged();
    }

    @Override
    protected void onResume() {
        datasource.open();
        super.onResume();
    }

    @Override
    protected void onPause() {
        datasource.close();
        super.onPause();
    }

}
7.5. Running the apps
Install your application and use the Add and Delete button. Restart your application to validate that the data is still there.
8. Tutorial: Using ContentProvider
8.1. Overview
The following example access an ContentProvider from the People application.
8.2. Create contacts on your emulator
For this example, we need a few maintained contacts.
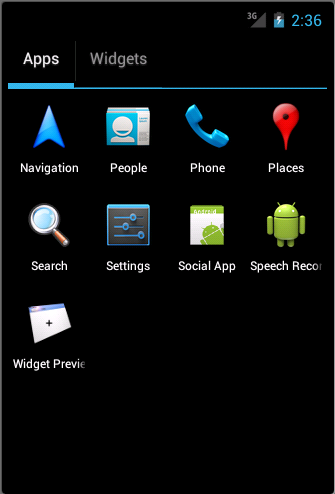
Select the home menu and then the People entry to create contacts.
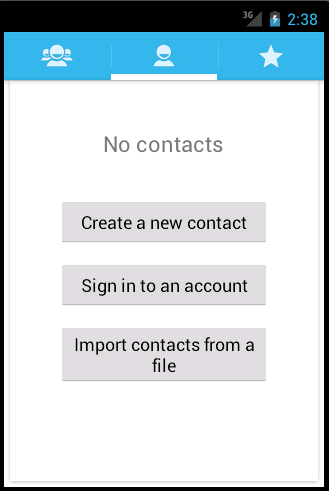
The app will ask you if you want to login. Either login or select "Not now". Press ""Create a new contact". You can create local contacts.
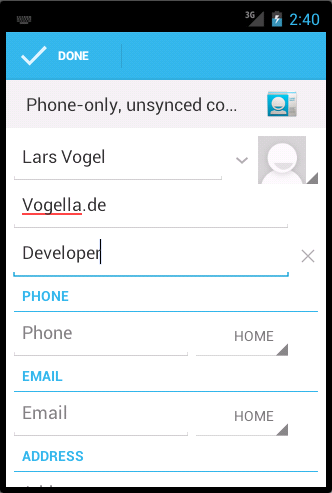
Finish adding your first contact. Afterwards, the app allows you to add more contacts via the + button. As a result you should have a few new contacts in your application.
8.3. Using the Contact Content Provider
Create a new Android project called de.vogella.android.contentprovider with the activity called ContactsActivity.
Change the corresponding
layout file in the
<filename class="directory">res/layout_
folder.
Rename
the ID of the existing
TextView
to
contactview. Delete the default text.
The resulting layout file should look like the following.
<?xml version="1.0" encoding="utf-8"?>
<LinearLayout xmlns:android="http://schemas.android.com/apk/res/android"
    android:layout_width="match_parent"
    android:layout_height="match_parent"
    android:orientation="vertical" >

    <TextView
        android:id="@+id/contactview"
        android:layout_width="match_parent"
        android:layout_height="match_parent" />

</LinearLayout>
Access to the contact
ContentProvider
requires a certain
permission,
as not all applications should have
access to the contact
information.
Open the
AndroidManifest.xml
file,
and select the Permissions tab.
On that
tab click the
Add button,
and select the
Uses Permission.
From the drop-down list select
the
android.permission.READ_CONTACTS
entry.
Change the coding of the activity.
package de.vogella.android.contentprovider;

import android.app.Activity;
import android.database.Cursor;
import android.net.Uri;
import android.os.Bundle;
import android.provider.ContactsContract;
import android.widget.TextView;

public class ContactsActivity extends Activity {
    /** Called when the activity is first created. */
    @Override
    public void onCreate(Bundle savedInstanceState) {
        super.onCreate(savedInstanceState);
        setContentView(R.layout.activity_contacts);
        TextView contactView = (TextView) findViewById(R.id.contactview);

        Cursor cursor = getContacts();

        while (cursor.moveToNext()) {

            String displayName = cursor.getString(cursor
                    .getColumnIndex(ContactsContract.Data.DISPLAY_NAME));
            contactView.append("Name: ");
            contactView.append(displayName);
            contactView.append("\n");
        }
    }

    private Cursor getContacts() {
        // Run query
        Uri uri = ContactsContract.Contacts.CONTENT_URI;
        String[] projection = new String[] { ContactsContract.Contacts._ID,
                ContactsContract.Contacts.DISPLAY_NAME };
        String selection = ContactsContract.Contacts.IN_VISIBLE_GROUP + " = '"
                + ("1") + "'";
        String[] selectionArgs = null;
        String sortOrder = ContactsContract.Contacts.DISPLAY_NAME
                + " COLLATE LOCALIZED ASC";


        return managedQuery(uri, projection, selection, selectionArgs,
                sortOrder);
    }

}
If you run this application the data is read from the
ContentProvider
of the People application
and displayed in a
TextView. Typically you would display such data in a
ListView.
9. Tutorial: SQLite, custom ContentProvider and Loader
9.1. Overview
The following demo is also available in the Android Market.
If you have a barcode scanner installed on your Android phone,
you can
scan the following QR Code to go to the example app in the
Android
market. Please note that the app looks and behaves differently
due to
the different Android versions, e.g., you have an
OptionMenu
instead of the
ActionBar
and the theme is different.

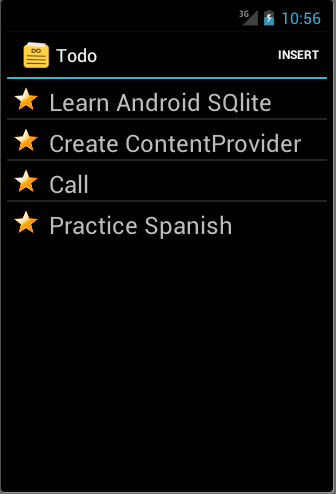
We will create a "To-do" application that allows the user to enter tasks for himself. These items are stored in the SQLite database and accessed via a content provider.
The application consists out of two activities, one for seeing a list of all todo items and one for creating and changing a specific todo item.
To asynchronously load and manage the Cursor the main activity uses a Loader.
The resulting application looks similar to the following.
9.2. Project
Create the project
de.vogella.android.todos
with the
activity
called
TodosOverviewActivity. Create another
activity
called
TodoDetailActivity.
9.3. Database classes
Create the
package
de.vogella.android.todos.database.
This package
will store
the
classes for the database
handling.
As said earlier I consider having one separate class per table as best practice. Even though we have only one table in this example we will follow this practice. This way we are prepared in case our database schema grows.
Create the following class. This class also contains constants for the table name and the columns.
package de.vogella.android.todos.database;

import android.database.sqlite.SQLiteDatabase;
import android.util.Log;

public class TodoTable {

    // Database table
    public static final String TABLE_TODO = "todo";
    public static final String COLUMN_ID = "_id";
    public static final String COLUMN_CATEGORY = "category";
    public static final String COLUMN_SUMMARY = "summary";
    public static final String COLUMN_DESCRIPTION = "description";

    // Database creation SQL statement
    private static final String DATABASE_CREATE = "create table "
            + TABLE_TODO
            + "("
            + COLUMN_ID + " integer primary key autoincrement, "
            + COLUMN_CATEGORY + " text not null, "
            + COLUMN_SUMMARY + " text not null,"
            + COLUMN_DESCRIPTION
            + " text not null"
            + ");";

    public static void onCreate(SQLiteDatabase database) {
        database.execSQL(DATABASE_CREATE);
    }

    public static void onUpgrade(SQLiteDatabase database, int oldVersion,
            int newVersion) {
        Log.w(TodoTable.class.getName(), "Upgrading database from version "
                + oldVersion + " to " + newVersion
                + ", which will destroy all old data");
        database.execSQL("DROP TABLE IF EXISTS " + TABLE_TODO);
        onCreate(database);
    }
}
Create the following
TodoDatabaseHelper
class. This class extends
SQLiteOpenHelper
and calls the static methods of the
TodoTable
helper class.
package de.vogella.android.todos.database;

import android.content.Context;
import android.database.sqlite.SQLiteDatabase;
import android.database.sqlite.SQLiteOpenHelper;

public class TodoDatabaseHelper extends SQLiteOpenHelper {

    private static final String DATABASE_NAME = "todotable.db";
    private static final int DATABASE_VERSION = 1;

    public TodoDatabaseHelper(Context context) {
        super(context, DATABASE_NAME, null, DATABASE_VERSION);
    }

    // Method is called during creation of the database
    @Override
    public void onCreate(SQLiteDatabase database) {
        TodoTable.onCreate(database);
    }

    // Method is called during an upgrade of the database,
    // e.g., if you increase the database version
    @Override
    public void onUpgrade(SQLiteDatabase database, int oldVersion,
            int newVersion) {
        TodoTable.onUpgrade(database, oldVersion, newVersion);
    }
}
We will use a
ContentProvider
for accessing the database; we will not write a data access object
(DAO) as we did in the previous SQlite example.
9.4. Create ContentProvider
Create the package
de.vogella.android.todos.contentprovider.
Create the following
MyTodoContentProvider
class which extends
ContentProvider.
package de.vogella.android.todos.contentprovider;

import java.util.Arrays;
import java.util.HashSet;

import android.content.ContentProvider;
import android.content.ContentResolver;
import android.content.ContentValues;
import android.content.UriMatcher;
import android.database.Cursor;
import android.database.sqlite.SQLiteDatabase;
import android.database.sqlite.SQLiteQueryBuilder;
import android.net.Uri;
import android.text.TextUtils;
import de.vogella.android.todos.database.TodoDatabaseHelper;
import de.vogella.android.todos.database.TodoTable;

public class MyTodoContentProvider extends ContentProvider {

    // database
    private TodoDatabaseHelper database;

    // used for the UriMacher
    private static final int TODOS = 10;
    private static final int TODO_ID = 20;

    private static final String AUTHORITY = "de.vogella.android.todos.contentprovider";

    private static final String BASE_PATH = "todos";
    public static final Uri CONTENT_URI = Uri.parse("content://" + AUTHORITY
            + "/" + BASE_PATH);

    public static final String CONTENT_TYPE = ContentResolver.CURSOR_DIR_BASE_TYPE
            + "/todos";
    public static final String CONTENT_ITEM_TYPE = ContentResolver.CURSOR_ITEM_BASE_TYPE
            + "/todo";

    private static final UriMatcher sURIMatcher = new UriMatcher(
            UriMatcher.NO_MATCH);
    static {
        sURIMatcher.addURI(AUTHORITY, BASE_PATH, TODOS);
        sURIMatcher.addURI(AUTHORITY, BASE_PATH + "/#", TODO_ID);
    }

    @Override
    public boolean onCreate() {
        database = new TodoDatabaseHelper(getContext());
        return false;
    }

    @Override
    public Cursor query(Uri uri, String[] projection, String selection,
            String[] selectionArgs, String sortOrder) {

        // Uisng SQLiteQueryBuilder instead of query() method
        SQLiteQueryBuilder queryBuilder = new SQLiteQueryBuilder();

        // check if the caller has requested a column which does not exists
        checkColumns(projection);

        // Set the table
        queryBuilder.setTables(TodoTable.TABLE_TODO);

        int uriType = sURIMatcher.match(uri);
        switch (uriType) {
        case TODOS:
            break;
        case TODO_ID:
            // adding the ID to the original query
            queryBuilder.appendWhere(TodoTable.COLUMN_ID + "="
                    + uri.getLastPathSegment());
            break;
        default:
            throw new IllegalArgumentException("Unknown URI: " + uri);
        }

        SQLiteDatabase db = database.getWritableDatabase();
        Cursor cursor = queryBuilder.query(db, projection, selection,
                selectionArgs, null, null, sortOrder);
        // make sure that potential listeners are getting notified
        cursor.setNotificationUri(getContext().getContentResolver(), uri);

        return cursor;
    }

    @Override
    public String getType(Uri uri) {
        return null;
    }

    @Override
    public Uri insert(Uri uri, ContentValues values) {
        int uriType = sURIMatcher.match(uri);
        SQLiteDatabase sqlDB = database.getWritableDatabase();
        long id = 0;
        switch (uriType) {
        case TODOS:
            id = sqlDB.insert(TodoTable.TABLE_TODO, null, values);
            break;
        default:
            throw new IllegalArgumentException("Unknown URI: " + uri);
        }
        getContext().getContentResolver().notifyChange(uri, null);
        return Uri.parse(BASE_PATH + "/" + id);
    }

    @Override
    public int delete(Uri uri, String selection, String[] selectionArgs) {
        int uriType = sURIMatcher.match(uri);
        SQLiteDatabase sqlDB = database.getWritableDatabase();
        int rowsDeleted = 0;
        switch (uriType) {
        case TODOS:
            rowsDeleted = sqlDB.delete(TodoTable.TABLE_TODO, selection,
                    selectionArgs);
            break;
        case TODO_ID:
            String id = uri.getLastPathSegment();
            if (TextUtils.isEmpty(selection)) {
                rowsDeleted = sqlDB.delete(
                        TodoTable.TABLE_TODO,
                        TodoTable.COLUMN_ID + "=" + id,
                        null);
            } else {
                rowsDeleted = sqlDB.delete(
                        TodoTable.TABLE_TODO,
                        TodoTable.COLUMN_ID + "=" + id
                        + " and " + selection,
                        selectionArgs);
            }
            break;
        default:
            throw new IllegalArgumentException("Unknown URI: " + uri);
        }
        getContext().getContentResolver().notifyChange(uri, null);
        return rowsDeleted;
    }

    @Override
    public int update(Uri uri, ContentValues values, String selection,
            String[] selectionArgs) {

        int uriType = sURIMatcher.match(uri);
        SQLiteDatabase sqlDB = database.getWritableDatabase();
        int rowsUpdated = 0;
        switch (uriType) {
        case TODOS:
            rowsUpdated = sqlDB.update(TodoTable.TABLE_TODO,
                    values,
                    selection,
                    selectionArgs);
            break;
        case TODO_ID:
            String id = uri.getLastPathSegment();
            if (TextUtils.isEmpty(selection)) {
                rowsUpdated = sqlDB.update(TodoTable.TABLE_TODO,
                        values,
                        TodoTable.COLUMN_ID + "=" + id,
                        null);
            } else {
                rowsUpdated = sqlDB.update(TodoTable.TABLE_TODO,
                        values,
                        TodoTable.COLUMN_ID + "=" + id
                        + " and "
                        + selection,
                        selectionArgs);
            }
            break;
        default:
            throw new IllegalArgumentException("Unknown URI: " + uri);
        }
        getContext().getContentResolver().notifyChange(uri, null);
        return rowsUpdated;
    }

    private void checkColumns(String[] projection) {
        String[] available = { TodoTable.COLUMN_CATEGORY,
                TodoTable.COLUMN_SUMMARY, TodoTable.COLUMN_DESCRIPTION,
                TodoTable.COLUMN_ID };
        if (projection != null) {
            HashSet<String> requestedColumns = new HashSet<String>(
                    Arrays.asList(projection));
            HashSet<String> availableColumns = new HashSet<String>(
                    Arrays.asList(available));
            // check if all columns which are requested are available
            if (!availableColumns.containsAll(requestedColumns)) {
                throw new IllegalArgumentException(
                        "Unknown columns in projection");
            }
        }
    }

}
MyTodoContentProvider
implements
update(),
insert(),
delete()
and
query()
methods. These methods map more or less directly to the
SQLiteDatabase
interface.
It also has the
checkColumns()
method to validate that a query only requests valid columns.
Register your
ContentProvider
in your
AndroidManifest.xml file.
<application
    <!-- Place the following after the Activity
         Definition
    -->
  <provider
      android:name=".contentprovider.MyTodoContentProvider"
      android:authorities="de.vogella.android.todos.contentprovider" >
   </provider>
</application>
9.5. Resources
Our application requires several resources.
First define a menu
listmenu.xml
`
in the folder
`res/menu
. If you use the Android resource wizard to create the "listmenu.xml"
file, the folder will be created
for you; if you create the file
manually you also need to create the
folder manually.
This XML file will be used to define the option menu in our
application. The
android:showAsAction="always"
attribute will ensure that this menu entry is displayed in the
ActionBar
of our application.
<?xml version="1.0" encoding="utf-8"?>
<menu xmlns:android="http://schemas.android.com/apk/res/android" >

    <item
        android:id="@+id/insert"
        android:showAsAction="always"
        android:title="Insert">
    </item>

</menu>
The user will be able to select the priority for the todo items. For
the priorities we create a string array. Create the
following file
priority.xml
in the
res/values
folder
.
<?xml version="1.0" encoding="utf-8"?>
<resources>

    <string-array name="priorities">
        <item>Urgent</item>
        <item>Reminder</item>
    </string-array>

</resources>
Define also additional strings for the
application.
Edit
strings.xml
under
res/values.
<?xml version="1.0" encoding="utf-8"?>
<resources>
    <string name="hello">Hello World, Todo!</string>
    <string name="app_name">Todo</string>
    <string name="no_todos">Currently there are no Todo items maintained</string>
    <string name="menu_insert">Add Item</string>
    <string name="menu_delete">Delete Todo</string>
    <string name="todo_summary">Summary</string>
    <string name="todo_description">Delete Todo</string>
    <string name="todo_edit_summary">Summary</string>
    <string name="todo_edit_description">Description</string>
    <string name="todo_edit_confirm">Confirm</string>
</resources>
9.6. Layouts
We will define three layouts. One will be used for the display of a row in the list, the other ones will be used by our activities.
The row layout refers to an icon called reminder.
Paste an icon of
type "png" called
"reminder.png"
into your
res/drawable
folders (
drawable-hdpi,
drawable-mdpi,
drawable-ldpi
)
If you do not have an icon available you can copy the icon created by the Android wizard (ic_launcher.png in the res/drawable* folders) or rename the reference in the layout file. Please note that the Android Developer Tools sometimes change the name of this generated icon, so your file might not be called "ic_launcher.png".
Alternatively, you could remove the icon definition from the "todo_row.xml" layout definition file which you will create in the next step.
Create the "todo_row.xml" layout file in the folder <filename class="directory">res/layout_.
<?xml version="1.0" encoding="utf-8"?>
<LinearLayout xmlns:android="http://schemas.android.com/apk/res/android"
    android:layout_width="match_parent"
    android:layout_height="wrap_content" >

    <ImageView
        android:id="@+id/icon"
        android:layout_width="30dp"
        android:layout_height="24dp"
        android:layout_marginLeft="4dp"
        android:layout_marginRight="8dp"
        android:layout_marginTop="8dp"
        android:src="@drawable/reminder" >
    </ImageView>

    <TextView
        android:id="@+id/label"
        android:layout_width="match_parent"
        android:layout_height="wrap_content"
        android:layout_marginTop="6dp"
        android:lines="1"
        android:text="@+id/TextView01"
        android:textSize="24dp"
        >
    </TextView>

</LinearLayout>
Create the
todo_list.xml
layout file. This layout
defines how
the list looks like.
<?xml version="1.0" encoding="utf-8"?>
<LinearLayout xmlns:android="http://schemas.android.com/apk/res/android"
    android:layout_width="match_parent"
    android:layout_height="match_parent"
    android:orientation="vertical" >

    <ListView
        android:id="@android:id/list"
        android:layout_width="match_parent"
        android:layout_height="wrap_content" >
    </ListView>

    <TextView
        android:id="@android:id/empty"
        android:layout_width="wrap_content"
        android:layout_height="wrap_content"
        android:text="@string/no_todos" />

</LinearLayout>
Create the
todo_edit.xml
layout file. This layout will be used
to display and edit an
individual
todo item
in the
TodoDetailActivity
activity.
<?xml version="1.0" encoding="utf-8"?>
<LinearLayout xmlns:android="http://schemas.android.com/apk/res/android"
    android:layout_width="match_parent"
    android:layout_height="match_parent"
    android:orientation="vertical" >

    <Spinner
        android:id="@+id/category"
        android:layout_width="wrap_content"
        android:layout_height="wrap_content"
        android:entries="@array/priorities" >
    </Spinner>

    <LinearLayout
        android:id="@+id/LinearLayout01"
        android:layout_width="match_parent"
        android:layout_height="wrap_content" >

        <EditText
            android:id="@+id/todo_edit_summary"
            android:layout_width="wrap_content"
            android:layout_height="wrap_content"
            android:layout_weight="1"
            android:hint="@string/todo_edit_summary"
            android:imeOptions="actionNext" >
        </EditText>
    </LinearLayout>

    <EditText
        android:id="@+id/todo_edit_description"
        android:layout_width="match_parent"
        android:layout_height="match_parent"
        android:layout_weight="1"
        android:gravity="top"
        android:hint="@string/todo_edit_description"
        android:imeOptions="actionNext" >
    </EditText>

    <Button
        android:id="@+id/todo_edit_button"
        android:layout_width="wrap_content"
        android:layout_height="wrap_content"
        android:text="@string/todo_edit_confirm" >
    </Button>

</LinearLayout>
9.7. Activities
Change the coding of your activities to the following.
First
TodosOverviewActivity.java.
package de.vogella.android.todos;

import android.app.ListActivity;
import android.app.LoaderManager;
import android.content.CursorLoader;
import android.content.Intent;
import android.content.Loader;
import android.database.Cursor;
import android.net.Uri;
import android.os.Bundle;
import android.view.ContextMenu;
import android.view.ContextMenu.ContextMenuInfo;
import android.view.Menu;
import android.view.MenuInflater;
import android.view.MenuItem;
import android.view.View;
import android.widget.AdapterView.AdapterContextMenuInfo;
import android.widget.ListView;
import android.widget.SimpleCursorAdapter;
import de.vogella.android.todos.contentprovider.MyTodoContentProvider;
import de.vogella.android.todos.database.TodoTable;

/*
 * TodosOverviewActivity displays the existing todo items
 * in a list
 *
 * You can create new ones via the ActionBar entry "Insert"
 * You can delete existing ones via a long press on the item
 */

public class TodosOverviewActivity extends ListActivity implements
        LoaderManager.LoaderCallbacks<Cursor> {
    private static final int ACTIVITY_CREATE = 0;
    private static final int ACTIVITY_EDIT = 1;
    private static final int DELETE_ID = Menu.FIRST + 1;
    // private Cursor cursor;
    private SimpleCursorAdapter adapter;

    /** Called when the activity is first created. */
    @Override
    public void onCreate(Bundle savedInstanceState) {
        super.onCreate(savedInstanceState);
        setContentView(R.layout.todo_list);
        this.getListView().setDividerHeight(2);
        fillData();
        registerForContextMenu(getListView());
    }

    // create the menu based on the XML defintion
    @Override
    public boolean onCreateOptionsMenu(Menu menu) {
        MenuInflater inflater = getMenuInflater();
        inflater.inflate(R.menu.listmenu, menu);
        return true;
    }

    // Reaction to the menu selection
    @Override
    public boolean onOptionsItemSelected(MenuItem item) {
        switch (item.getItemId()) {
        case R.id.insert:
            createTodo();
            return true;
        }
        return super.onOptionsItemSelected(item);
    }

    @Override
    public boolean onContextItemSelected(MenuItem item) {
        switch (item.getItemId()) {
        case DELETE_ID:
            AdapterContextMenuInfo info = (AdapterContextMenuInfo) item
                    .getMenuInfo();
            Uri uri = Uri.parse(MyTodoContentProvider.CONTENT_URI + "/"
                    + info.id);
            getContentResolver().delete(uri, null, null);
            fillData();
            return true;
        }
        return super.onContextItemSelected(item);
    }

    private void createTodo() {
        Intent i = new Intent(this, TodoDetailActivity.class);
        startActivity(i);
    }

    // Opens the second activity if an entry is clicked
    @Override
    protected void onListItemClick(ListView l, View v, int position, long id) {
        super.onListItemClick(l, v, position, id);
        Intent i = new Intent(this, TodoDetailActivity.class);
        Uri todoUri = Uri.parse(MyTodoContentProvider.CONTENT_URI + "/" + id);
        i.putExtra(MyTodoContentProvider.CONTENT_ITEM_TYPE, todoUri);

        startActivity(i);
    }


    private void fillData() {

        // Fields from the database (projection)
        // Must include the _id column for the adapter to work
        String[] from = new String[] { TodoTable.COLUMN_SUMMARY };
        // Fields on the UI to which we map
        int[] to = new int[] { R.id.label };

        getLoaderManager().initLoader(0, null, this);
        adapter = new SimpleCursorAdapter(this, R.layout.todo_row, null, from,
                to, 0);

        setListAdapter(adapter);
    }

    @Override
    public void onCreateContextMenu(ContextMenu menu, View v,
            ContextMenuInfo menuInfo) {
        super.onCreateContextMenu(menu, v, menuInfo);
        menu.add(0, DELETE_ID, 0, R.string.menu_delete);
    }

    // creates a new loader after the initLoader () call
    @Override
    public Loader<Cursor> onCreateLoader(int id, Bundle args) {
        String[] projection = { TodoTable.COLUMN_ID, TodoTable.COLUMN_SUMMARY };
        CursorLoader cursorLoader = new CursorLoader(this,
                MyTodoContentProvider.CONTENT_URI, projection, null, null, null);
        return cursorLoader;
    }

    @Override
    public void onLoadFinished(Loader<Cursor> loader, Cursor data) {
        adapter.swapCursor(data);
    }

    @Override
    public void onLoaderReset(Loader<Cursor> loader) {
        // data is not available anymore, delete reference
        adapter.swapCursor(null);
    }

}
And TodoDetailActivity.java
package de.vogella.android.todos;

import android.app.Activity;
import android.content.ContentValues;
import android.database.Cursor;
import android.net.Uri;
import android.os.Bundle;
import android.text.TextUtils;
import android.view.View;
import android.widget.Button;
import android.widget.EditText;
import android.widget.Spinner;
import android.widget.Toast;
import de.vogella.android.todos.contentprovider.MyTodoContentProvider;
import de.vogella.android.todos.database.TodoTable;

/*
 * TodoDetailActivity allows to enter a new todo item
 * or to change an existing
 */
public class TodoDetailActivity extends Activity {
    private Spinner mCategory;
    private EditText mTitleText;
    private EditText mBodyText;

    private Uri todoUri;

    @Override
    protected void onCreate(Bundle bundle) {
        super.onCreate(bundle);
        setContentView(R.layout.todo_edit);

        mCategory = (Spinner) findViewById(R.id.category);
        mTitleText = (EditText) findViewById(R.id.todo_edit_summary);
        mBodyText = (EditText) findViewById(R.id.todo_edit_description);
        Button confirmButton = (Button) findViewById(R.id.todo_edit_button);

        Bundle extras = getIntent().getExtras();

        // check from the saved Instance
        todoUri = (bundle == null) ? null : (Uri) bundle
                .getParcelable(MyTodoContentProvider.CONTENT_ITEM_TYPE);

        // Or passed from the other activity
        if (extras != null) {
            todoUri = extras
                    .getParcelable(MyTodoContentProvider.CONTENT_ITEM_TYPE);

            fillData(todoUri);
        }

        confirmButton.setOnClickListener(new View.OnClickListener() {
            public void onClick(View view) {
                if (TextUtils.isEmpty(mTitleText.getText().toString())) {
                    makeToast();
                } else {
                    setResult(RESULT_OK);
                    finish();
                }
            }

        });
    }

    private void fillData(Uri uri) {
        String[] projection = { TodoTable.COLUMN_SUMMARY,
                TodoTable.COLUMN_DESCRIPTION, TodoTable.COLUMN_CATEGORY };
        Cursor cursor = getContentResolver().query(uri, projection, null, null,
                null);
        if (cursor != null) {
            cursor.moveToFirst();
            String category = cursor.getString(cursor
                    .getColumnIndexOrThrow(TodoTable.COLUMN_CATEGORY));

            for (int i = 0; i < mCategory.getCount(); i++) {

                String s = (String) mCategory.getItemAtPosition(i);
                if (s.equalsIgnoreCase(category)) {
                    mCategory.setSelection(i);
                }
            }

            mTitleText.setText(cursor.getString(cursor
                    .getColumnIndexOrThrow(TodoTable.COLUMN_SUMMARY)));
            mBodyText.setText(cursor.getString(cursor
                    .getColumnIndexOrThrow(TodoTable.COLUMN_DESCRIPTION)));

            // always close the cursor
            cursor.close();
        }
    }

    protected void onSaveInstanceState(Bundle outState) {
        super.onSaveInstanceState(outState);
        saveState();
        outState.putParcelable(MyTodoContentProvider.CONTENT_ITEM_TYPE, todoUri);
    }

    @Override
    protected void onPause() {
        super.onPause();
        saveState();
    }

    private void saveState() {
        String category = (String) mCategory.getSelectedItem();
        String summary = mTitleText.getText().toString();
        String description = mBodyText.getText().toString();

        // only save if either summary or description
        // is available

        if (description.length() == 0 && summary.length() == 0) {
            return;
        }

        ContentValues values = new ContentValues();
        values.put(TodoTable.COLUMN_CATEGORY, category);
        values.put(TodoTable.COLUMN_SUMMARY, summary);
        values.put(TodoTable.COLUMN_DESCRIPTION, description);

        if (todoUri == null) {
            // New todo
            todoUri = getContentResolver().insert(
                    MyTodoContentProvider.CONTENT_URI, values);
        } else {
            // Update todo
            getContentResolver().update(todoUri, values, null, null);
        }
    }

    private void makeToast() {
        Toast.makeText(TodoDetailActivity.this, "Please maintain a summary",
                Toast.LENGTH_LONG).show();
    }
}
The resulting
AndroidManifest.xml
looks like the following.
<?xml version="1.0" encoding="utf-8"?>
<manifest xmlns:android="http://schemas.android.com/apk/res/android"
    package="de.vogella.android.todos"
    android:versionCode="1"
    android:versionName="1.0" >

    <uses-sdk android:minSdkVersion="15" />

    <application
        android:icon="@drawable/icon"
        android:label="@string/app_name" >
        <activity
            android:name=".TodosOverviewActivity"
            android:label="@string/app_name" >
            <intent-filter>
                <action android:name="android.intent.action.MAIN" />

                <category android:name="android.intent.category.LAUNCHER" />
            </intent-filter>
        </activity>
        <activity
            android:name=".TodoDetailActivity"
            android:windowSoftInputMode="stateVisible|adjustResize" >
        </activity>

        <provider
            android:name=".contentprovider.MyTodoContentProvider"
            android:authorities="de.vogella.android.todos.contentprovider" >
        </provider>
    </application>

</manifest>
9.8. Start your application
Start your application. You should be able to enter a new todo item via the "Insert" button in the ActionBar.
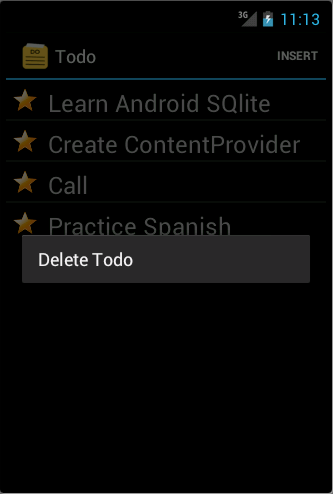
An existing todo item can be deleted on the list via a long press.
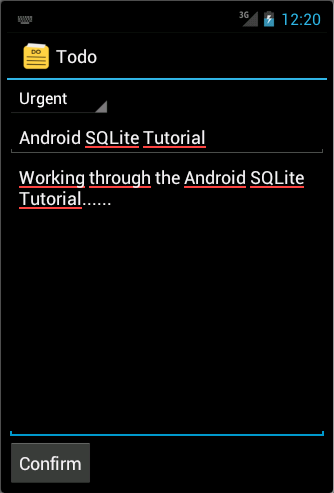
To change an existing todo item, touch the corresponding row. This starts the second activity.
10. Android SQLite resources
10.1. vogella Java example code
If you need more assistance we offer Online Training and Onsite training as well as consulting