Using the Notification Manager in Android. This article describes how to use the Notification Manager in Android. It is based on Android Studio and Android 5.0.
1. Notification Manager
1.1. Notification Manager
Android allows to put notification into the titlebar of your application. The user can expand the notification bar and by selecting the notification the user can trigger another activity.
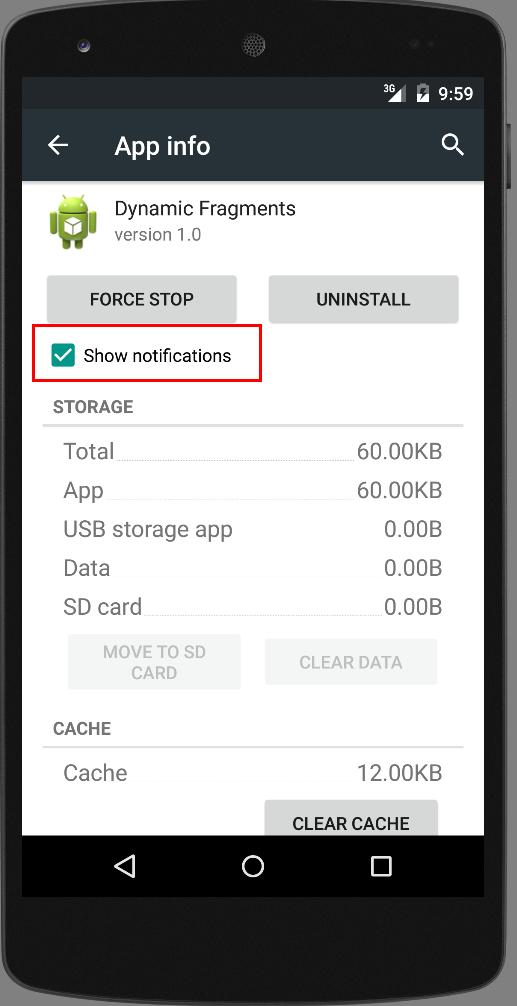
Because notifications can be annoying, the user can disable
notifications for each application. This can be done via the Settings
application of the Android
device. Select
Apps
in the Settings, select the app you are interested in
and unset the
Show notifications
checkbox to prevent the app to show notifications.
1.2. Setting up Notifications
Notifications in Android are represented by the
Notification
class.
To create notifications you use the
NotificationManager
class that can be received from the
Context, e.g., an
activity
or a
service,
via the
getSystemService()
method.
NotificationManager notificationManager = (NotificationManager)
    getSystemService(NOTIFICATION_SERVICE);
The
Notification.Builder
provides an builder interface to create an
Notification
object. You use a
PendingIntent
to specify the action which should be performed once the user select
the notification.
The
Notification.Builder
allows you to add up to three buttons with definable actions to the
notification.
// prepare intent which is triggered if the
// notification is selected

Intent intent = new Intent(this, NotificationReceiver.class);
// use System.currentTimeMillis() to have a unique ID for the pending intent
PendingIntent pIntent = PendingIntent.getActivity(this, (int) System.currentTimeMillis(), intent, 0);

// build notification
// the addAction re-use the same intent to keep the example short
Notification n  = new Notification.Builder(this)
                .setContentTitle("New mail from " + "test@gmail.com")
                .setContentText("Subject")
                .setSmallIcon(R.drawable.icon)
                .setContentIntent(pIntent)
                .setAutoCancel(true)
                .addAction(R.drawable.icon, "Call", pIntent)
                .addAction(R.drawable.icon, "More", pIntent)
                .addAction(R.drawable.icon, "And more", pIntent).build();


NotificationManager notificationManager =
    (NotificationManager) getSystemService(NOTIFICATION_SERVICE);

notificationManager.notify(0, n);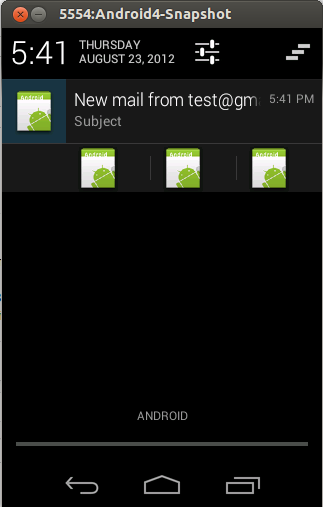
Android 4.1 supports expandable notifications. In addition to
normal
notification view it is possible to define a big view
which gets
shown
when notification is expanded. There are three
styles to be used
with
the big view: big picture style, big text
style, Inbox style. The
following code demonstrates the usage of the
BigTextStyle()
that allows to use up to 256
dp.
String longText = "...";

Notification noti = new Notification.Builder(this).
.....
.setStyle(new Notification.BigTextStyle().bigText(longText))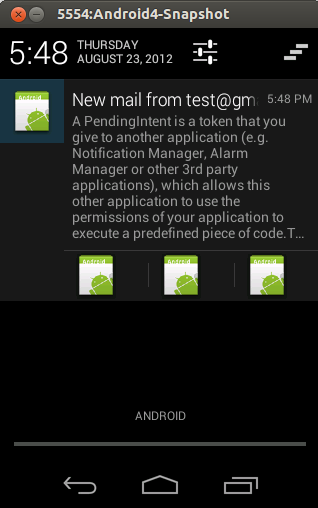
1.3. Canceling Notifications
The user can dismiss all notification or if you set your notification to auto-cancel it is also removed once the user selects it.
You can also call the
cancel()
for a specific notification ID on the
NotificationManager. The
cancelAll()
method call removes all
of the notifications you
previously issued.
2. Example: NotificationManager
Create a new project called
de.vogella.android.notificationmanager
with the
activity
class called
CreateNotificationActivity. This
activity
should use the
main.xml
layout file.
<?xml version="1.0" encoding="utf-8"?>
<LinearLayout xmlns:android="http://schemas.android.com/apk/res/android"
    android:layout_width="match_parent"
    android:layout_height="match_parent"
    android:orientation="vertical" >

    <Button
        android:id="@+id/button1"
        android:layout_width="match_parent"
        android:layout_height="match_parent"
        android:onClick="createNotification"
        android:text="Create Notification" >
    </Button>

</LinearLayout>
Create the following result.xml layout file.
<?xml version="1.0" encoding="utf-8"?>
<LinearLayout xmlns:android="http://schemas.android.com/apk/res/android"
    android:layout_width="match_parent"
    android:layout_height="match_parent" >

    <TextView
        android:id="@+id/textView1"
        android:layout_width="wrap_content"
        android:layout_height="wrap_content"
        android:text="This is the result activity opened from the notification" >
    </TextView>

</LinearLayout>
Create a new activity called NotificationReceiverActivity with the following coding. Don’t forget to register the activity in the AndroidManfest.mf.
package de.vogella.android.notificationmanager;

import android.app.Activity;
import android.os.Bundle;

public class NotificationReceiverActivity extends Activity {
    @Override
    protected void onCreate(Bundle savedInstanceState) {
        super.onCreate(savedInstanceState);
        setContentView(R.layout.result);
    }
}
Change the
CreateNotificationActivity
class to the following coding.
package de.vogella.android.notificationmanager;

import android.app.Activity;
import android.app.Notification;
import android.app.NotificationManager;
import android.app.PendingIntent;
import android.content.Intent;
import android.os.Bundle;
import android.view.View;

public class CreateNotificationActivity extends Activity {
    @Override
    public void onCreate(Bundle savedInstanceState) {
        super.onCreate(savedInstanceState);
        setContentView(R.layout.main);
    }

    public void createNotification(View view) {
        // Prepare intent which is triggered if the
        // notification is selected
        Intent intent = new Intent(this, NotificationReceiverActivity.class);
        PendingIntent pIntent = PendingIntent.getActivity(this, (int) System.currentTimeMillis(), intent, 0);

        // Build notification
        // Actions are just fake
        Notification noti = new Notification.Builder(this)
                .setContentTitle("New mail from " + "test@gmail.com")
                .setContentText("Subject").setSmallIcon(R.drawable.icon)
                .setContentIntent(pIntent)
                .addAction(R.drawable.icon, "Call", pIntent)
                .addAction(R.drawable.icon, "More", pIntent)
                .addAction(R.drawable.icon, "And more", pIntent).build();
        NotificationManager notificationManager = (NotificationManager) getSystemService(NOTIFICATION_SERVICE);
        // hide the notification after its selected
        noti.flags |= Notification.FLAG_AUTO_CANCEL;

        notificationManager.notify(0, noti);

    }
}
Run your application and press the button. A new notification is created. If you select it your second activity will be displayed.
3. Links and literature
3.2. vogella Java example code
If you need more assistance we offer Online Training and Onsite training as well as consulting